Starter Code
- The starter code is well-commented, so looking at the actual code is the best way to learn how it works!
- The starter code has a lot, but it is by no means perfect. AniGraph is still new and evolving, and we can make improvements and clarifications in response to your feedback. In particular, if one group asks for some added functionality, and we implement it to help them out, our rule is that we push that functionality to the repo for other groups to use as well. This is a good reason to make sure you can easily pull updates to the repo!
Some of the default models have changed since last year, so the gifs you see below may have different 3D models in them, but the example functionality should be the same.
Running the Code
Start by forking the code from the course repo. Running the code should work as it did with assignments a0-c1;
First install the code
yarn install
Then you can run it with
yarn start
As before, I strongly recommend using the debugger in Webstorm, as I find it tremendously useful to step through code and examine local variables directly in the IDE (though I know many of you prefer VS code, and we aren't going to force you on this).
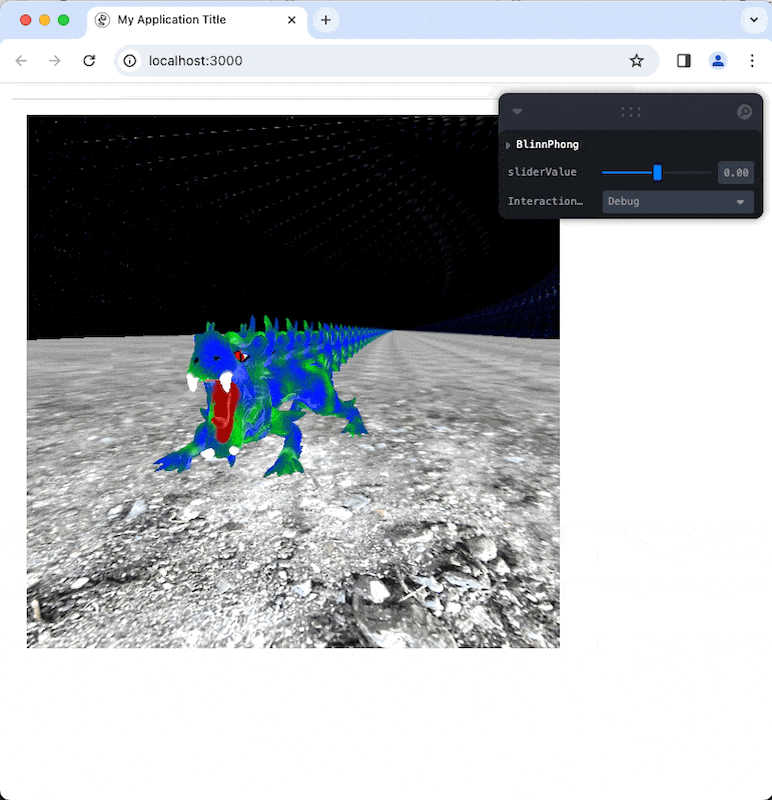
Main Scene
When you run the code, you should see a scene that looks roughly like this:
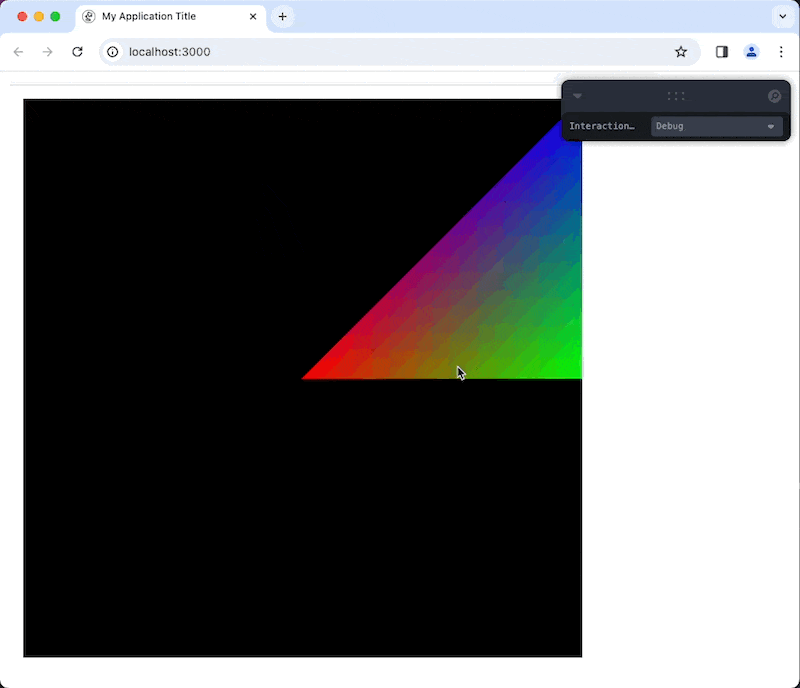
The scene being shown here is defined by MainSceneModel and MainSceneController
The main scene is pretty empty right now. It loads one node of a custom skeleton class you can use as a starting point for your own customizations. It also includes the debug interaction mode, which has orbit mouse controls and camera movements with the wasd keyboard keys. The debug interaction mode is attached by default to make debugging easier for you when you are just getting started and haven't written your own interaction mode. You can always switch back to debug mode using the dropdown menu in the control panel.
The Main Scene is mostly empty, as it is intended to be a good starting point for doing your own thing.
Example Scenes
To try out different example scenes in the starter code, you can comment and uncomment the appropriate lines in MainApp.tsx
import AppClasses from "./FinalProject/Main/"
// import AppClasses from "./FinalProject/ExampleApps/Example0"
// import AppClasses from "./FinalProject/ExampleApps/Example1"
// import AppClasses from "./FinalProject/ExampleApps/Example2"
// import AppClasses from "./FinalProject/ExampleApps/Example3"
// import AppClasses from "./FinalProject/ExampleApps/ShaderDemo"
Example 0:

Example Nodes
Let's take a look at what's in the Example0 scene. Below is a labeled frame that also lists a function or class name associated with each part of the scene:
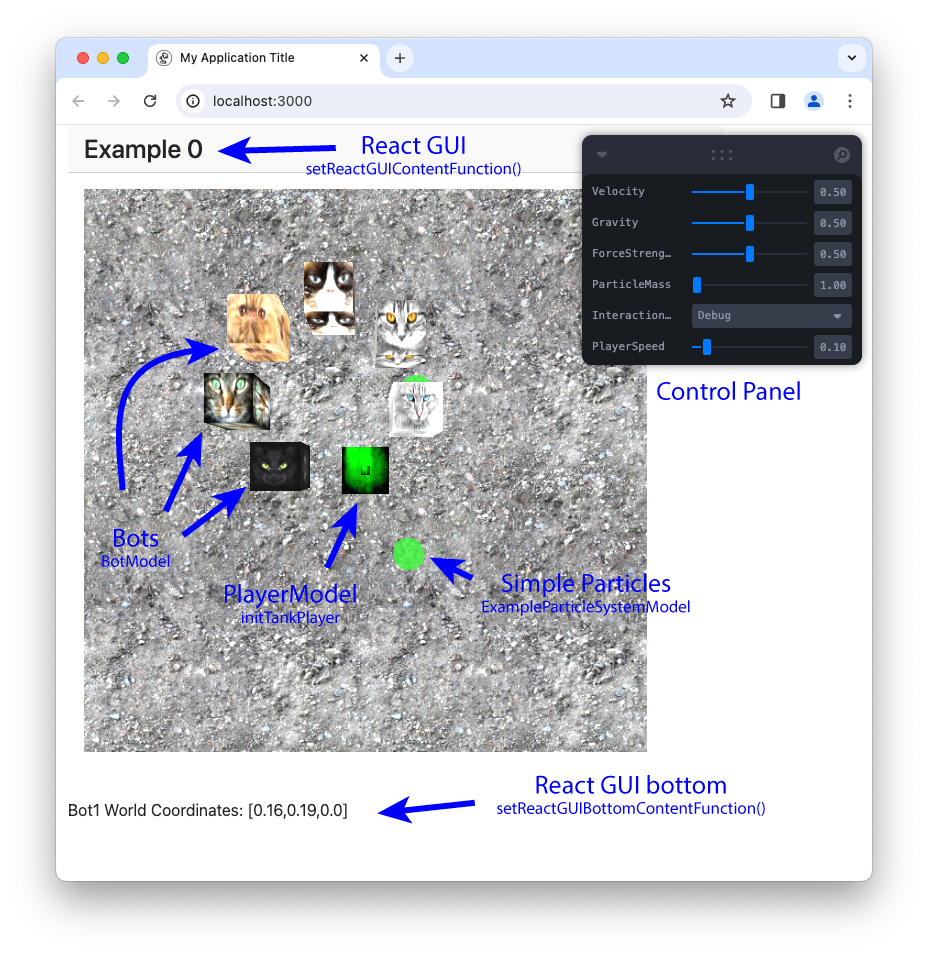
The scene has a player node, a simple (non-instanced) particle system node, and a handful of bot nodes. In the starter code, the bots are arranged in a hierarchy in the scene graph for demonstration.
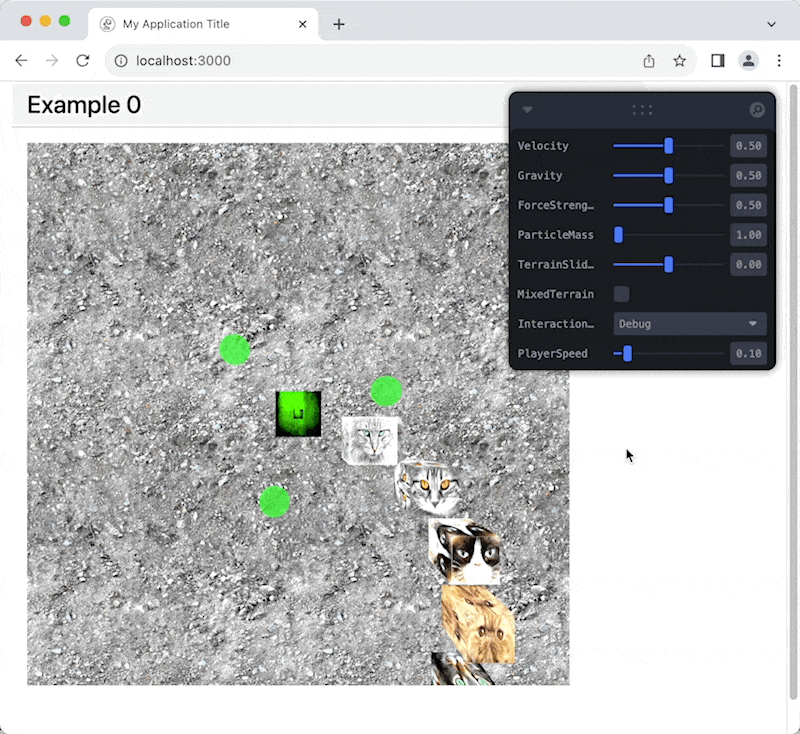
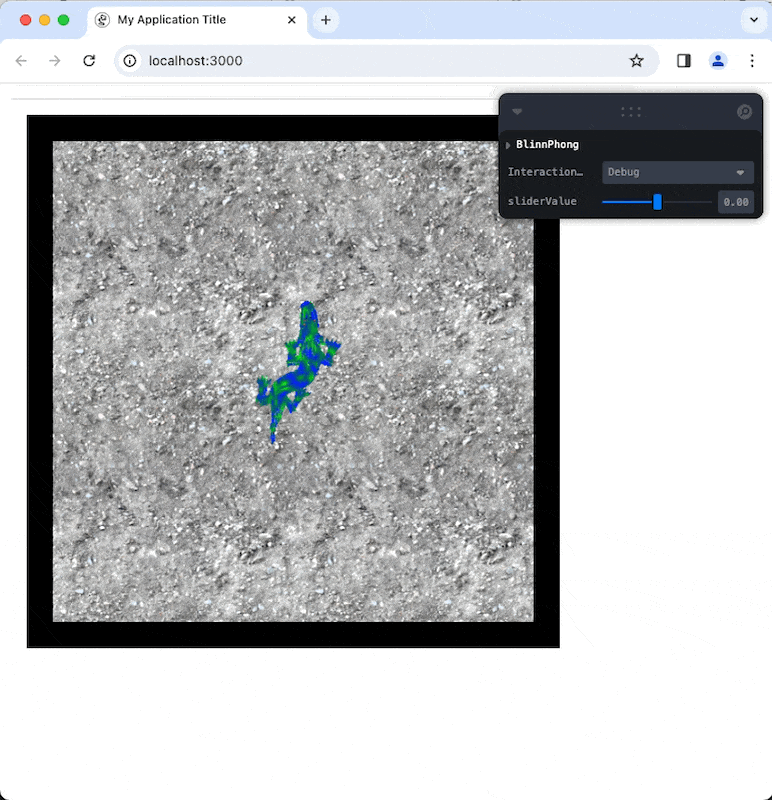
Terrain
In the control panel of Example 0 you will find a "MixedTerrain" checkbox. If you click it, the terrain will be rendered with two textures, and you can use the "TerrainSlider" slider to control where it switches from one to the other. This is to demonstrate how to interact with the terrain shader and use multiple textures.
Rendering a Cursor and Adding Objects on Click
Example 1:

Example 1 is similar to example 0, but includes:
- Loading a different type of model (the cat) and a corresponding texture atlas.
- How to set different values in the terrain map. The example just adds a bit of random noise.
- Starting code for implementing an efficient billboard particle system.
Example 2:
Example 2 shows how to set up more advanced multipass rendering methods. It's a good starting point for implementing things like reflective surfaces.
Example 3:
Example 3 provides a starter example for how to implement post-processing effects, which you can think of as image warps and other operations that you can do to the entire image in a shader.
Shader Demo:
The shader demo I showed in class. Press L on the keyboard to add new point light sources. You can edit the shade programs in the demoshader shader directory.
Shader Demo (unabridged)
I also added the ShaderDemoUnabridged Scene to the starter code example scenes. This scene is the same as the shader demo, but it unrolls most of the code for creating shader materials into one file so you can see all the steps you would use in a very general/flexible setting.