Multi-Pass Reflections
-"just the same... only things go the other way"
Let's take a look at the code for Example 2, which is a good starting point if you want to render reflections using multi-pass rendering.
The basic idea
The most common approach to rendering reflections with rasterization-based graphics is to use a multi-pass technique. The basic idea is to render the scene in two "passes".:
- In the first pass, you render the reflected scene from a virtual camera that approximately samples the reflected rays (where to put this camera depends on the location of the current camera and the surface that is reflecting), but rather than writing the output pixels to the screen, you write them to a separate pixel buffer in memory.
- In the second pass, you render the scene (to the screen) from the current perspective of the camera. But this time you use the output of your first pass as a texture to color the reflective surface in your scene.
In the diagram below, our strategy works by first rendering the scene from the mirror camera's perspective, then using the rendered image to texture our mirror during a second pass, where we render the scene from our camera's perspective (the blue one on the left). If we compare what a reflected ray from the second pass would look like to a transmitted ray from the first pass, we can see why this technique works.
There is a way to do this without rendering to texture, which uses something called a stencil buffer. The idea of a stencil buffer is that you render to only some of the pixels on the screen at a time. This only works if you are rendering a planar mirrored surface, but it could be a bit quicker than rendering to texture. You'd have to work out how to use stencil buffers with ThreeJS on your own, though.

The Example2 Scene
The best starting point for implementing reflections is probably the Example 2 Scene in the starter code. This scene already implements two rendering passes in the scene controller, with each rendering pass preceded by a function that you can customize in the scene model. The result of the first pass is used as a texture in the second pass.
Example 2 also shows how to use a different camera for each of the passes. Here is code from the Example2SceneController:
/****************** First Pass *******************/
/**
 * Tell the model to prep for our first pass,
 */
this.model.prepForFirstPass(currentTextureBuffer);

/**
 * Set the render target to our texture target and clear it
 */
this.setCurrentRenderTarget(currentDestinationBuffer);
context.renderer.clear();

/**
 * Render the scene to texture from our model's virtualScreenCamera perspective
 */
context.renderer.render(this.getThreeJSScene(), this.getThreeJSCamera(this.model.virtualScreenCamera))


/****************** Second Pass *******************/
/**
 * Setting the render target to null will make the screen our render target again
 */
this.setCurrentRenderTarget(null);

/**
 * Prep for our second pass and then render it
 */
this.model.prepForSecondPass(currentDestinationBuffer);
context.renderer.clear();
context.renderer.render(this.getThreeJSScene(), this.getThreeJSCamera());
The example also shows how to change the transform and projection matrix of our second virtual screen camera. There is a toggle button in the control panel that will make the virtual screen camera move side to side, and another that causes the vertex shader to interpolate eye coordinates across triangles (check out the mirror shader starter). Here's what it looks like:
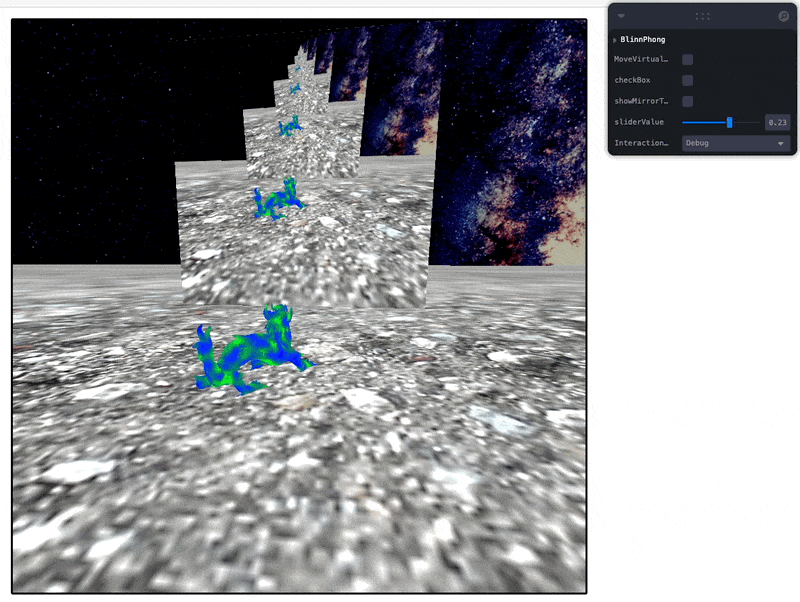
Also note that this starter example makes the virtual screen camera a child of the main scene camera. You can alternatively make it a direct child of world coordinates---it's up to you. The relevant code can be found in the the initCamera() method of Example2SceneController:
/**
 * We will create a virtual camera to render our virtual screen's viewpoint from
 * @type {ACameraModel}
 */
this.virtualScreenCamera = new ACameraModel(ACamera.CopyOf(this.camera));
// this.addChild(this.virtualScreenCamera); // use this to make it a child of world coordinates
this.cameraModel.addChild(this.virtualScreenCamera); // use this to make it a child of the main camera
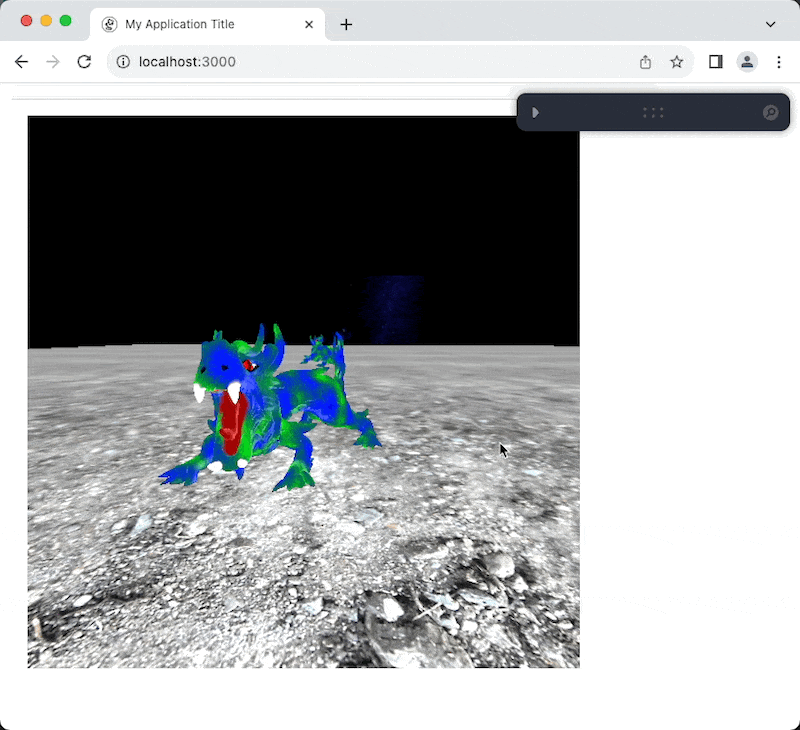
Example of basic mirror working:
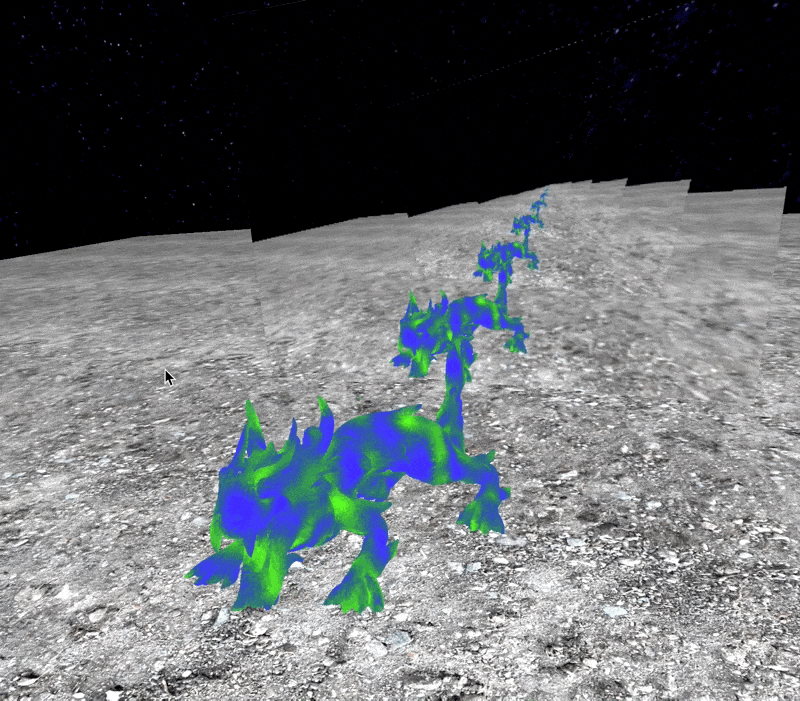
Though, I still prefer this example......