Introduction to LibGDX
This week’s lab is an introduction to LibGDX. You will learn how to use LibGDX inside of IntelliJ. You will start off with a sample project called ShipDemo that provides a two-player (hot seat) game. You will modify this ShipDemo sample in various ways to see a few of the things you can do with LibGDX.

This lab is not due during this lab period, but it is to your advantage to work through (and/or learn) as much as you can now, while assistance is immediately available. If you run into problems finishing the lab project later, please feel free to contact a staff member for help (preferably a programming TA).
Table of Contents
Useful References
One of the things that you will learn right away is that there is a lot of instruction missing from this lab. Indeed, a large part of this lab is learning where to look for the information that you need. Of course the TAs can help you. But in addition to the TAs, you will find it very helpful to make use of the wealth of LibGDX material online. The following should be enough for you to complete this lab.
The LibGDX API
This reference is the equivalent of the Java API for LibGDX It details all of the LibGDX classes with their methods.
LibGDX Project Structure
We have created a web page that describes how an IntelliJ LibGDX project fits together. For the most part you can ignore this – the project is already created for you. But you will need this reference if you have to troubleshoot your project.
LibGDX.info
This is a brand new tutorial series developed in the past year or so. It was created when LibGDX migrated to new management away from BadLogix. We have not reviewed these tutorials yet, so we cannot vouch for them. But they look snazzy.
Project Files
Download: ShipDemo.zip
While you can use any IDE that you want for this class, we will only support IntelliJ. While most of you have used Eclipse and not IntelliJ, you will find the IDE relatively easy to use. In particular, it is much easier to use LibGDX in IntelliJ than it is to use it in Eclipse. If you really want to use Eclipse, you will need to look at the Eclipse instructions on the LibGDX web site.
Loading the ShipDemo
Download the sample project, unzip it, and put the uncompressed folder where ever you want. It does not have to be in a special IntelliJ folder. Now start up IntelliJ. You should see a start-up screen like the one below.
Select Open. Navigate to the project folder that you want. However, do not stop
at the project folder. Instead, open up the file build.gradle. IntelliJ will
ask whether you wish to open this as a Project or a File. Choose Open as Project.
The first time you open up the project, IntelliJ will pause to initialize the Gradle system. You are ready to go once you get a pop-up identifying three modules: core, desktop, and gradle.
Running the ShipDemo
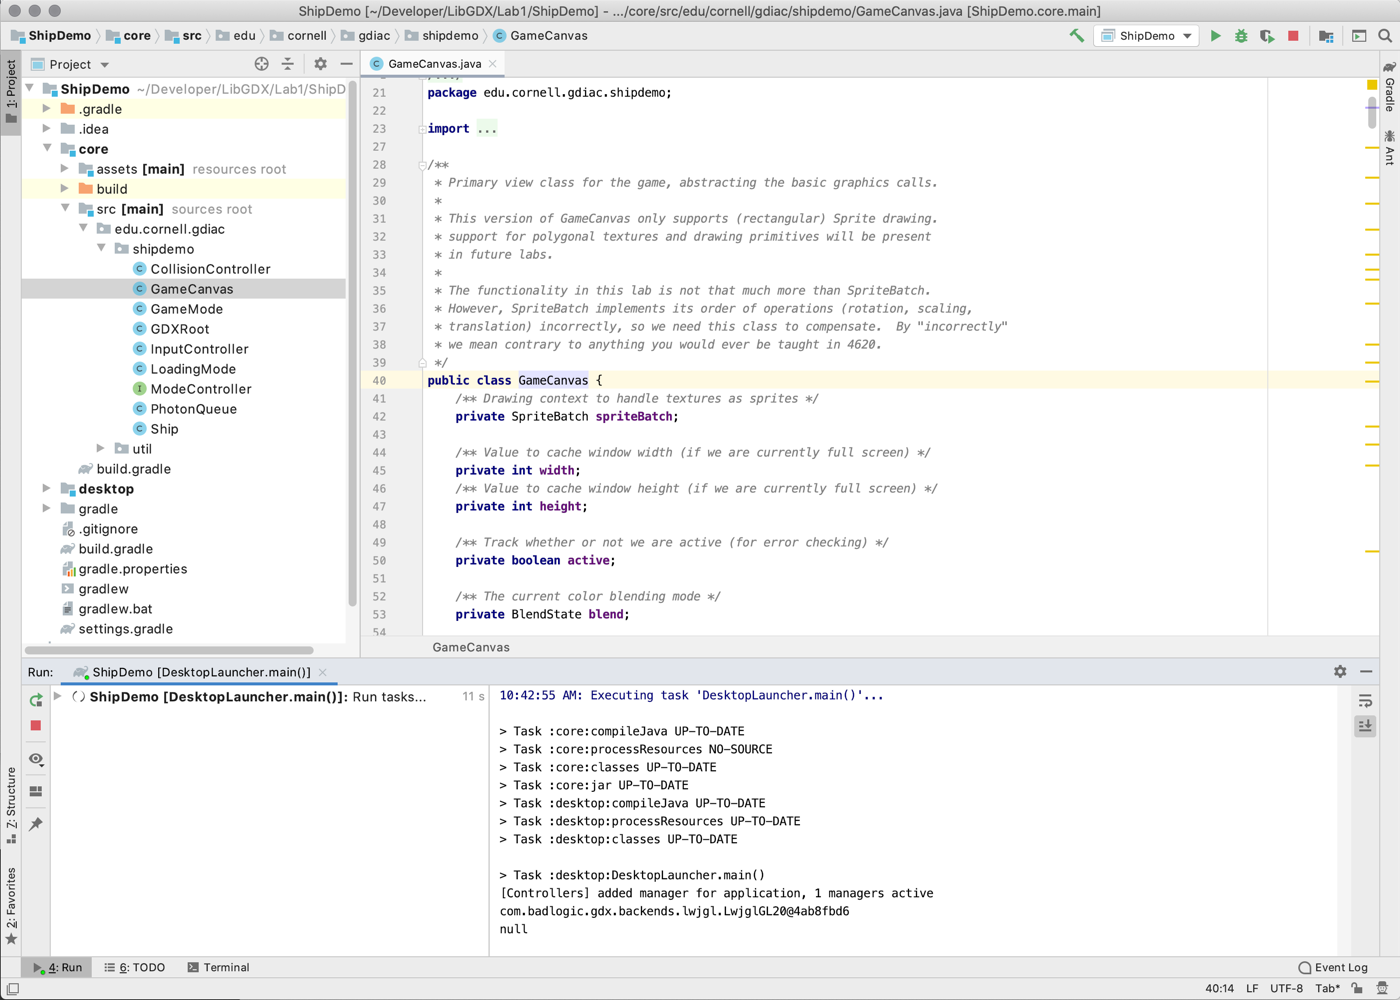
Once you have loaded the Gradle project, you will see two modules in the IDE: one called
core suffix and the other called desktop. The core module is
where almost all of your source code should go. Specifically, you should pay attention
to the package edu.cornell.gdiac.shipdemo.
However, you cannot run the core module. None of those classes have a
main method. Your main method must be targeted to a specific platform
(e.g. Android, iOS, or Desktop). As this project is designed for the desktop, this is
the purpose of the desktop module. Inside that project is one single class:
DesktopLauncher. This has your main method.
To run your LibGDX project, you need will need to create a launch configuration. See that drop-down menu to the left of the play button in the top right corner? Select it and choose Edit Configurations.
Choose the plus symbol in the top left corner to create a configuration. You will be given a list of configuration types. Choose Application. When you do this, you will see input fields like the ones shown below.
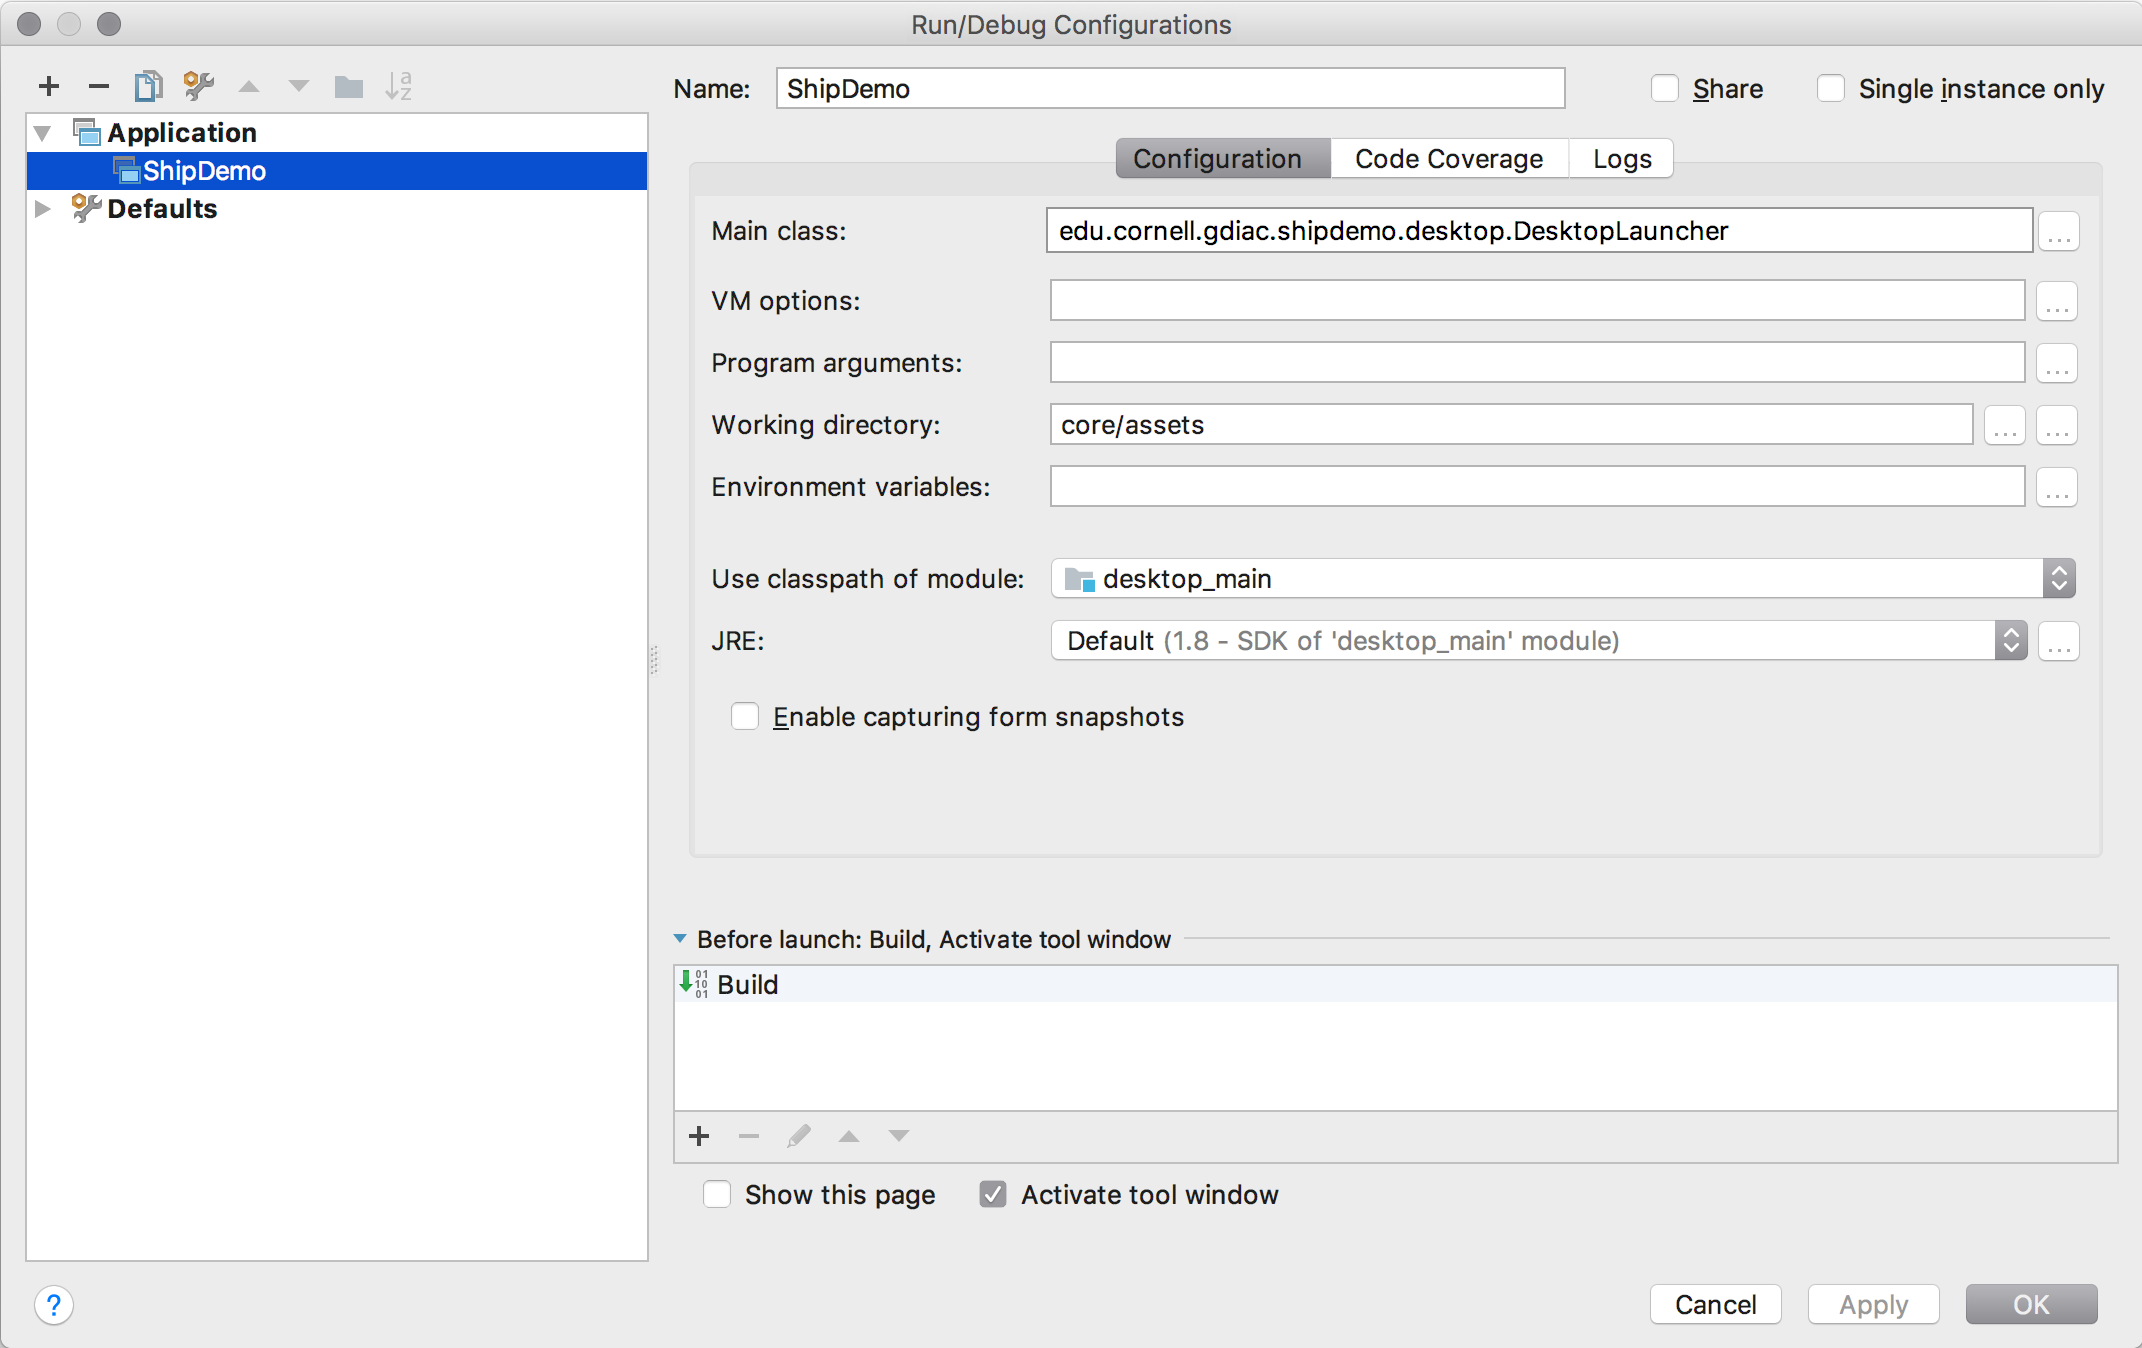
The very first thing you need to do is to select Use classpath of module. Everything
else will give you an error until you do this. Choose desktop_main. Now you can set
the main class to DesktopLauncher (use the full name, including the package). You also need
to set the Working directory. This is how IntelliJ finds your art assets. For all
LibGDX projects, the value is core/assets. Finally, give your configuration a name
when you are done. We usually pick the name of the project, as shown above.
Once the launch configuration is set, you can run the application by pressing the play button.
Project Structure
To help get familiarized with how to use LibGDX, you are going to make a series of modifications to ShipDemo. But before you do so, you should look through the code and see how it works. There are a lot of classes here (but nothing compared to what you will have by the end of the course). If you are lost, please talk to one of the programming TAs get you back on track.
The Root Classes
As you discovered when you ran the project, the class DesktopLauncher
is the root class. However, with one minor exception, you
should never need to modify this file. As far as LibGDX is concerned, the root class
is GDXRoot.
Th class GDXRoot is an implementation of ApplicationListener
It has callback functions for starting the game, running the animation loop, and shutting
the game down. However, it does not do the real work of running the game. It only
creates three classes, as shown in the dependency graph below.

An arrow from one class to another means that the first class makes a reference to the second class in its code. Throughout this lab you will note that there are no cycles in the dependency graph. That helps keep the code manageable (though this lab still has a lot of room for improvement).
The classes GameMode and LoadingMode are examples of game modes.
A mode is just any self-contained way of interacting with the game. A mode
can be a menu screen, an inventory screen, combat screen, or whatever. In this game
are two modes are the loading screen (LoadingMode) and the game
(GameMode).
Just as in any game, the loading screen makes sure that all assets are loading before
you can continue. There is some fairly sophisticated code in this class. You do
not need to worry about this class. We will come back to it later in the course.
You should only worry about GameMode. As far as you are concerned, this is the
true root class of this game.
The Game Mode
All of the other classes are associated with GameMode as their root class.
That is, only GameMode is responsible for instantiating the other classes
in the game, and not GDXRoot or DesktopLauncher. This code follows
a classic Model-View-Controller pattern. This is the primary architecture
pattern for this course. It is ideal for time-based applications that involve
animation or simulation.

The illustration above shows the dependency graph for the remaining classes in
package shipdemo. We summarize the important classes as follows:
GameMode
As far as this lab is concerned, it is the true root class. It initializes the game,
creating instances of all other classes. It also manages the game-loop via the
update and draw methods. If you add new objects to your game,
you will need to modify this class.
This class is a controller class.
InputController
This is a subcontroller for managing player input. It converts the input from low-level commands to something semantically meaningful (e.g. the game verbs). It also hides whether the player is using the keyboard or an X-Box controller.
This class is obviously a controller class.
CollisionController
This is a subcontroller for handling ship-to-ship and ship-to-wall collisions. Collisions
and physics should always be in a dedicate controller. A model class (like Ship)
should never manage its own collisions. We will see why later in the course.
This class is also obviously a controller class.
Ship
This class represents a ship. It stores the drawing texture (as a FilmStrip
object) for the ship as well as spatial information like position, velocity, and rotation.
It is a fairly lightweight model. Many of the methods that you would expect for a Ship
object to have are actually managed by the controllers. Again, we will see why we made
this decision later in the course.
This class is a model class.
PhotonQueue
This class is a queue that stores all the active photons. There is a limit to the number of photons that can be on the screen at a given time. If the queue is filled, the oldest photons are removed even if they have not reached their target. As all photons have the same drawing texture, this is managed by the photon queue and not the individual photons.
This class is a primitive example of a memory pool. You want to avoid any heap allocation while the game is running. If you need to add objects to the screen, it is best to preallocate them ahead of time like we do in this class, and then use them as necessary.
This class is a model class.
GameCanvas
This class handles all of the drawing for the game. Notice that is ignorant of all of the other classes; it only contains raw drawing code. The purpose of this class is to abstract the drawing code for the rest of the application so that it is not quite so low-level.
Most 2D drawing in LibGFDX is done with sprite batches. A sprite batch is a sequence of
images to draw (all gathered together as a single mesh, if you have had 4620). Every
sprite batch starts with a call to the methods begin and end. Our canvas is designed
the same way. The difference is that it is a little more user-friendly than the class
SpriteBatch for right now.
This class is a view class. We will see more sophisticated versions of this class in later labs.
Additional Packages
If you look at the package, you will notice a lot of extra packages, all of which contain
the prefix edu.cornell.gdiac. These are special classes we have added over the years
to fix “shortcomings” in LibGDX. We will talk about some of these much later in class.
For now, you can largely ignore these. There are only three additional classes that
are relevant to this lab.
edu.cornell.gdiac.backend.GDXAppSettings
Normally, the class DesktopLauncher would create an instead of an
LwjglApplication.
This class contains all of the specific code for running on a desktop (as opposed to
running on mobile or the web). We have replaced this with a class called GDXApp,
as we have added a lot of desktop-specific features (particularly with audio) beyond
what that class can offer.
You do not need to understand how GDXApp works. But you do need to understand how
to customize its settings. For example, GDXAppSettings is where you choose whether
to run fullscreen or in a window (and the size of that window). It is also where you
set the game framerate.
edu.cornell.gdiac.utils.Filmstrip
A filmstrip is a sequence of images arranged in a single file. They are read left-to-right, top-to-bottom. Each image is assigned a frame number, starting at 0. By changing the frame number, you can animate your image. Right now, it is used to bank the ship on a hard turn. But you will do more interesting animation later.
edu.cornell.gdiac.assets.AssetDirectory
This class is brand new for 2021. In the past, this lab would load all of its assets
(images and sounds) with hardcoded references. This is incredibly bad design, and it
made it difficult for students to adjust to the correct way later. An asset directory
is a much more modern approach that we use in the follow-up course CS 4152. The contents
of the package edu.cornell.gdiac.assets are all to support an asset directory, but
only the class AssetDirectory is relevant for this lab.
An asset directory consists of a json file that specifies all of the assets in the game,
together with their settings. For example, if you look at the file assets.json, you
will see that you can specify the magFilter or minFilter of an image (these are
OpenGL settings that control how smoothly the image resizes). Sounds do not have any
additional settings, so they are only specified by name. We will look at this
file structure in more detail later, but understand that if you want to add additional
images or sounds to your game, this is where you do it.
The class AssetDirectory is the class that you use to access these assets. It is
produces by the provided loading screen. To access an asset you use the method getEntry,
specifying the json key of the image and the LibGDX class corresponding to that asset.
So to load the image ship.png, you would write
Texture image = directory.getEntry("ship", Texture.class);
On the other hand, to access the laser sound effect, you would write
Sound image = directory.getEntry("laser", SoundBuffer.class);
The class SoundBuffer is a subclass of Sound
that includes a lot of extra features we have added. We will talk about that class
much later.
Troubleshooting
With the proliferation of Java versions, and major changes to the IntelliJ platform, we have discovered that some people have issues loading this project. To prevent conflicts, we have now stripped this project of any IntelliJ settings. That means you must edit the configurations before running the new project.
If you are still having problems, the best solution is to make a new project on your system, guaranteeing the project uses the correct settings for your computer. When you create the new project, you should type exactly what you see below (except Destintation, which can be anything you want).

Once you have done that, copy the directories core/assets, core/src and desktop/src
into your new project. Edit the configurations and run
the new project.
Lab Instructions
Once you have figured out how the classes fit together, it is time to start making changes to them. We recommend that you make the following changes in order.
1. Play with the FrameRate
While we said that you will almost never need to modify DesktopLauncher,
there is an important exception: modifying the application settings. As we said
above, we create an instance of GDXApp, initialize it with collection
of settings. Add the following assignment to this GDXAppSettings object:
config.foregroundFPS = 60;
When you do this, there should be no change to the program. Now change the
60.0 to different values such as 100.0, 30.0, 600.0, and 5.0. In the file
readme.txt which you will submit later, briefly describe what
happens (e.g. the effect these have on the gameplay and/or graphics). Leave the
value as 60.0 when you are done.
2. Modify the size of the game window
The size of the game window is also determined by the GDXAppSettings
properties. You can also change the size of the window while the game is running by
using the setSize() method in GameCanvas. However, we are going to
avoid doing this for now.
The default game window starts at 1280x720. Try several sizes, including 800x600,
400x300, 100x1000, and 2000x2000, to see what happens. For each size, try flying
the ship around and firing it a bit. In the file readme.txt, answer the
following questions:
- How do the ships and photons know where to bounce when you change the size?
- Does the game perform worse and/or look worse with some sizes than others?
- Is there a minimum or maximum screen size?
- Is there a “best” width to height ratio? If so, in what way is it best?
Leave the game window set to 1280x720 when done.
IMPORTANT: You are welcome to try full screen mode if you like. All you have to
do is set the field fullscreen in the config object in DesktopLauncher.
3. Change the ship sizes
Right now, the ships are the same size. We want you to make them two visibly different sizes. To do this, you will need to change two things: how the ships are drawn, and how they collide with one another.
The latter is actually the easiest part. Read through checkForCollision(Ship, Ship)
in CollisionControlller to see how collisions are detected. You should be able to
fix collisions by making a change to the getDiameter method *Ship*.
You should not need to update CollisionControlller.
As for drawing, the ships are drawn via the draw(GameCanvas) method in Ship.
This method in turn calls draw in GameCanvas twice; first to draw the shadow, and again
to draw the ship proper. Read the comments for the appropriate method draw to
understand how the method works. This is the method with 9 arguments whose first argument
is a TextureRegion (the parent class of FilmStrip). You will know you
found it because the comments say
THIS IS THE MASTER DRAW METHOD
Note the special method computeTransform which does all the work. It scales, rotates,
and places each image. To change the size of the ship, you change the scale (e.g. the
last two arguments of the draw method). Change the size of the ship by changing these
parameter to something other than DEFAULT_SCALE. Preferably the value should depend
on your new value of the diameter.
4. Implement wrap-around
Currently, when an object hits the edge of the playfield, it bounces off. If wrap-around is implemented, it should keep going and reappear on the other side. To make this work better you may want to modify the lifespan of shots, and you should implement a “max speed” for the ships; we recommend changing the “drag” to always affect them even when they are accelerating.
You should also be aware that there are “clipping” issues. You want a ship that is in the process of wrapping around to be drawn partially on one side, and partially on the other, which you can do by drawing the image twice (once on each side of the screen for each screen edge that it is near). Make sure you get the “corner cases” right, and make sure the ship’s shadow does not do anything noticeably weird or different in the transitions.
You should not write this code in the Ship class. The clipping code
belongs in the draw method for the GameCanvas. Clipping is a property of
the window and not the model, so the model should never concern itself with such
details. Furthermore, this allows photons to wrap as well. You should not need
to add a lot of code to do this. While there are a lot of draw methods
in GameCanvas, they all call the master draw method, so this
is the only one you need to modify (do not worry about drawOverlay).
Do not just copy-and-paste the drawing code a few times. Instead you should find a pattern and wrap it in a loop, or something like that. Make sure a ship that is not in the process of wrapping around the screen does not draw multiple times, however.
5. Play with the draw mode
If you look at GameMode, you will see that we switch to BlendState.Additive
when we draw the photons (and the target reticules). Look at this enumeration at the
end of the definition of GameCanvas. Try out the other values AlphaBlend
and Opaque. Now look at the file photon.png in the “assets”
folder. Based on what you see, make a conjecture about what each of these three modes
do with the graphics file. Write your conjecture in readme.txt> Pick the draw
mode you like best and use that one.
IMPORTANT: The game canvas (and sprite batches in general) is stateful. If you set a blend mode, that blend mode or color will still be set the next time you call draw. This is very confusing for students in this lab. If you change a value, always change it back when you are done.
6. Improve the photon appearance
Even with the change in the blending mode, the photons look pretty boring right now. We can make them more interesting by playing with the color tint. To understand tinting you have to learn a little bit about the Color class works. A color is three values: red, green, blue, and alpha. All these values are between 0 and 1. This means that when you multiply two colors together, you still get a valid color. And that is what tinting does; it multiplies every pixel in the image by the tint color.
This means that if you tint with red, all the white in your image becomes red. If you tint with white, the image is unaffected. If you tint with black, your image becomes completely black. And if you tint with clear (black, but with alpha value 0), your image disappears entirely.
With this in mind, you should also make the shots look better by doing at least one of the following:
- Modify the tinting of the photon so that it changes color continuously.
- Change the shots to fade out as they get older, instead of disappearing immediately .
- Draw each photon a 2nd time with a larger size (try 4x) and lower/faster-fading opacity to simulate glowing.
It is okay to make these drawing changes inside of the code for PhotonQueue. That is because these are properties of the photon and not the world geometry. Whatever changes you make must be visually noticeable. Having code that should work but does not or is too subtle to notice is not acceptable.
IMPORTANT: The game canvas (and sprite batches in general) is stateful. If you set a tint color, that tint color will still be set the next time you call draw. This is very confusing for students in this lab. If you change the color, always change it back to white when you are done.
7. Adjust the sound effects
Currently, every time a Photon is fired, the sound plays from start to finish.
Change the blue ship (but not the red ship) to stop playing its photon firing sound
and starting a new one each time a Photon is fired. To do this, read the documentation
for the methods play and stop in the
Sound
class.
8. Modify the background
The background in drawn at the very beginning of the draw method of
GameMode. Comment out the line of code that draws the background. Run
the game and describe what happens in the readme.txt file.
Once you have done that, uncomment the background drawing code to re-enable it.
Without changing the texture, change the appearance of the background to
something you think looks better or interesting. First, try tinting it a different
color. Next, change the scaling to get a feel for how that works. Finally, play
with the origin, scaling, screen position, and rotation; get the background to
continuously (and slowly!) rotate. Do this by continuously incrementing a value
in the draw method of GameMode and then scaling it.
A common problem you may encounter with the spinning background is that it spins jerkily or does not seem to spin continuously. If this happens, you probably forgot to cast to float or double before dividing (and so were unintentionally performing integer division). Be sure that the background both looks good and you never see a ‘corner’ of the image, but do not blow it up so much that it is blurry, either.
9. Implement a photon type
Change the red ship (but not the blue ship) to fire a different kind of photon.
Do this by giving the Photon inner class in PhotonQueue an
extra variable called “type”, and changing addPhoton to take
in and assign the photon type (you may need to modify firePhoton in
GameMode as well). The red ship should then be made to add photons
of a different “type” than the blue ship does.
Once this is done, change the draw method in PhotonQueue to
draw the photons of the blue ship’s type the same way as before, but to draw
the photons of the red ship’s type in a different way. To draw these new Photons,
do not use a different image. Instead, vary some of the parameters, such as the
tinting and scaling of the photons.
In addition to some of the ideas from exercise 6, you could also make some changes in the logic of the photons. For instance, the photons could move faster or slower, or even home in on the enemy ship. Get creative. Be sure that the Photons emitted from the red ship are clearly different from those emitted from the blue ship, and that you go through and test it to make sure everything looks good.
10. Implement collisions for shots
You should make a new method in CollisionController that checks for
ship-to-photon collisions. Upon detecting a collision, you should make each
connecting photon reflect at a reasonable angle upon colliding, and make it
knock back the ship it hit a little. You will probably find it easiest to copy
(or generalize) the ship-to-ship collision code, and treat photons as having
some arbitrary weight value that gives reasonable results.
You should also make sure that each ship is immune to its own photons. You might find exercise 9 useful for this part.
11. Add mouse support
Make changes to InputController to add mouse support. Moving the mouse
leftward should turn the ship counter-clockwise, moving the mouse right should
turn the ship clockwise, moving the mouse up should accelerate forward, and
moving the mouse down should accelerate backward. You should also add left-click
to fire photons. Do not remove the keyboard (or X-Box) input from that ship;
mouse and keyboard must both work for it.
Make sure the ship does not respond hypersensitively to mouse movement, but moving the mouse quickly should cause more of a reaction than moving it slowly. Also make sure that you can hold down the mouse button for rapid-fire as it was before. As much as possible, make the mouse control “feel natural” to use, which can be achieved with some tweaking (changes elsewhere to turning speed etc. may be necessary). See the Input and InputProcessor interfaces for information about getting mouse input with LibGDX.
12. Be creative
Finally, make one more change of your choice that you think we will find impressive,
and explain your reasoning in your readme.txt file.
Submission
Due: Mon, Feb 15 at 11:59 PM
This might seem like a lot of work, but hopefully you will find all of the tasks reasonably simple and straightforward. To turn in the lab, create a zip file containing the files:
GameMode.javaGameCanvas.javaCollisionController.javaInputController.javaPhotonQueue.javaShip.javareadme.txt- executable JAR of your solution
Even though you provided us with all of the source files, the last item is extremely important. It takes a lot of time for us to import your files and compile them. Therefore, we want something that we can run while looking at your source code. To make this JAR, read the intructions on the main LibGDX resources page.
The file readme.txt should answer questions and describe anything directly
asked in the above task. In addition it should describe (very briefly) how you
handled each task and where in the code it was handled.
Submit this zip file as lab1code.zip to CMS