Quickstart Guide
This page will help you get started with the Nexus. It has
been tested against version 20091211.
We will go
through the following items one by one:
System Requirements
Download
Build
Boot
Applications
Networking
TPM
Known Issues
Further Information
Throughout the text, commands are displayed as monospace
text in a colored box.
Regular code for the build system or Nexus user shell is encapsulated
in a gray box with solid border.
Commands for the Nexus kernel shell are encapsulated
in an orange box with dashed border.
System Requirements
Nexus is an operating system for 32-bit x86 processors. It
supports the following devices:
| Type |
Model |
Comment |
| Processor | Intel x86 | must have SSE1 support |
| TPM | Atmel | TPM 1.1 compatible chips |
| National Semiconductor | TPM 1.1 compatible chips |
| Networking | Intel Pro/1000 | |
| Broadcom NetXtreme, Netlink | Linux tg3 driver |
| 3Com 3c59x | |
| Video | VESA 1024x768@24bpp | Textmode is not supported |
| Audio | Intel i180 | |
| Input | PC Keyboard | |
| PS/2 Mouse | |
While the Nexus leverages the TPM, a TPM is not required.
Download
Download a Nexus live CD or fetch the sourcecode tree, both from
the download page.
If you download the live CD, skip the following build step.
Build
Prerequisites
Compilation must take place on a 32-bit x86 platform, because the linker
depends on the local libgcc. On a 64-bit machine, set up a 32-bit chroot.
On Debian and Ubuntu you can use debootstrap.
Nexus build depends on the following packages.
For all, the default versions in Ubuntu 9.04/9.10 are known to work.
- gnu make
- gcc
- binutils
- flex
- bison
- syslinux (only for GPXE)
- mkisofs (only for GPXE)
Commands
To build nexus from source, pull the latest version from our Git repository. The
build itself
is straightforward; details are in the README file in the top level directory of
the source tree. What follows is an abbreviated version of that document. At the top level
directory (which we will call $NXSRC), issue a make
make
The build process may stop before completing (at IPC.interface.h). If this
happens, run
make again.
make
You should now have built a nexus distribution as live CD along
with a set of applications and boot images. All generated
files are found under $NXSRC/build/boot.
Boot
Nexus can be booted in two ways: directly from the generated
nexus.iso image
(a
'live CD') or by booting over
the network. Nearly everyone will want to use the live CD. This
is also the image that we make available on our website. The network boot option
is useful for developers who frequently rebuild their kernel.
Booting on Raw Metal
Burn a bootable iso image to a disc
(both the
nexus.iso live CD and
nexus-gpxe.* network boot images
can be found in $NXSRC/build/boot/stage1) using your
favorite burn application or create a bootable USB stick from it using a tool
such as
unetbootin.
The live CD should boot into the shell.
Booting in a Virtual Machine
Nexus can also be run in a virtual machine. As of writing, the free
VMWare Player
version 2.5 is known to work, as is Workstation 6.5. Because of VESA video issues
version 3.0 does not currently work. A default VMWare configuration (.vmx)
file with the correct hardware settings can be found in the repository
and on the
download page. One nice
property of running the kernel in a VM is that you do not have to burn the live CD
to a physical image, as VMWare can emulate a disk directly from the .iso file.
Nexus has also been tested on Qemu. Start it using
qemu -kernel $NXSRC/build/boot/isoroot/vmnexuz
     -initrd $NXSRC/build/boot/isoroot/initrd.tar
     -m 512 -append "vga=792" /dev/null
The vmnexuz image pointed to is, by the way, the kernel in Linux bzImage format.
Like Linux, Nexus can also be debugged using gdb and qemu. This is explained in the
documentation in the source tree.
Booting over the Network
With network boot, you do not have to copy the nexus kernel onto the destination
machine. Instead, you
copy a small kernel capable only of fetching and starting another operating system
(in our case, Nexus). This is only useful if you (1) frequently update the
kernel and (2) boot on physical hardware. When developing with VMWare or Qemu, as said,
you can boot from the iso image.
We use GPXE
(formerly Etherboot) for network booting. The build process guesses the host to
contact during network boot from your hostname. See additional documentation in
$NXSRC/doc to learn how to override this default.
To use network boot, copy one of the network boot images in
$NXSRC/build/boot/stage1/ to the
destination host: usb to load from a USB stick, iso for a bootable
CD and bzImage to use a bootloader such as GRUB. The iso and bzImage have
been tested. The USB may or may not work depending on your hardware; alternatively,
use a tool such as unetbootin to create a bootable USB stick from the iso image.
Post-boot: Network Filesystem
The initial ramdisk (initrd) holds most Nexus applications, but leaves some
out to reduce filesize. As ramdisk, it cannot store changes across reboots.
Nexus does not have a native block device, but supports persistent storage with NFS.
Optionally, therefore, you can run an NFS server for Nexus.
If you build Nexus from source, all applications will end up in
$NXSRC/build/boot/bin. Point an NFS server there to make them available
at runtime.
Do not worry if this directory does not exist in the repository.
It will once the build successfully completes.
Applications
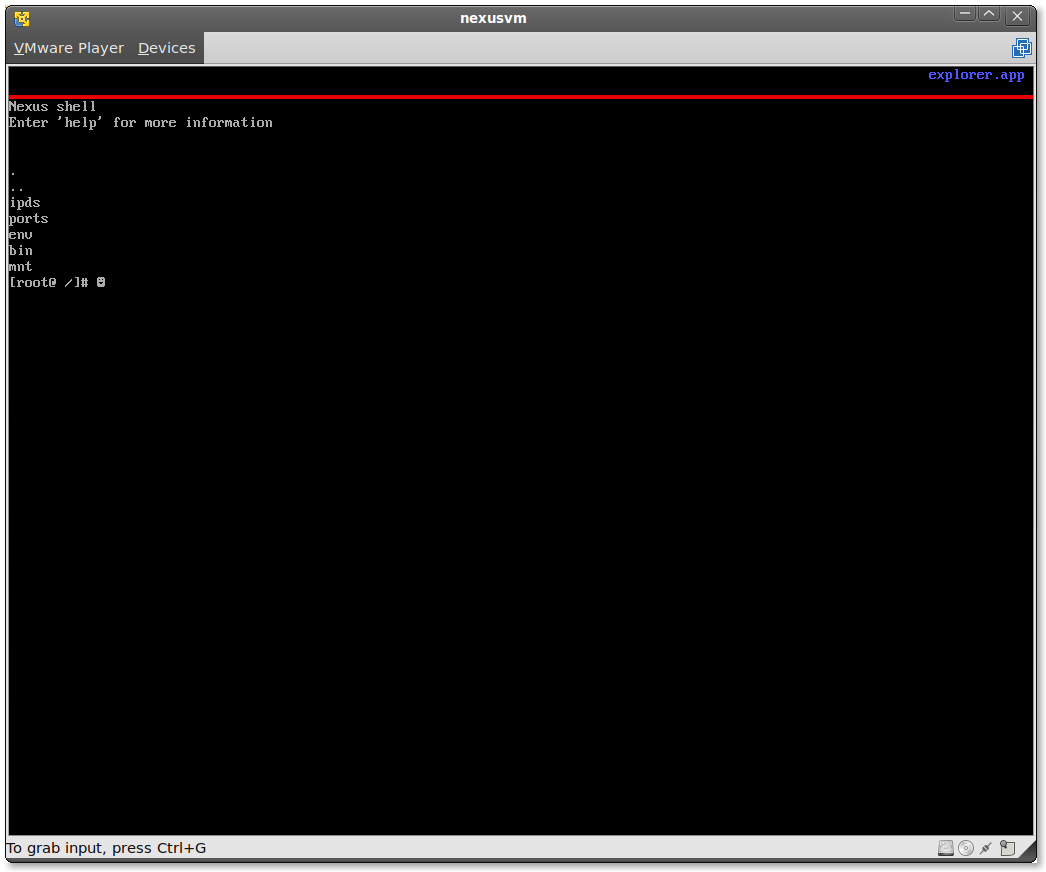
Nexus after booting into the shell
(click on the image for full size)
Once the system has booted, you will be greeted by the Nexus shell, as shown
on the right. In Nexus, each foreground process has its own full screen. Use
Alt-Tab to rotate through the active applications. Immediately after boot, this
should be the shell, the kernel shell and the e1000 userspace network driver
(regardless whether this device is present or not).
Shell
With the user shell you can browse the filesystem, which on boot consists of
a few procfs-like directories and a view of the initial ramdisk in
/bin.
ls bin
Start additional applications using the
exec command, for instance
exec bin/fs.test
Reruns the filesystem selftest. All selftests are run automatically on boot
in the background and should remain invisible (apart from an OK message)
unless they fail. These messages are displayed not in the user shell window,
but in the kernel shell.
The kernel shell gives direct access to OS kernel functions, which is useful
for debugging and during initial development. At the moment, most functionality
is accessible from userspace, but TPM configuration, for example, requires
the kernel shell. Query the kernel shell for system information, such as a list of
running processes
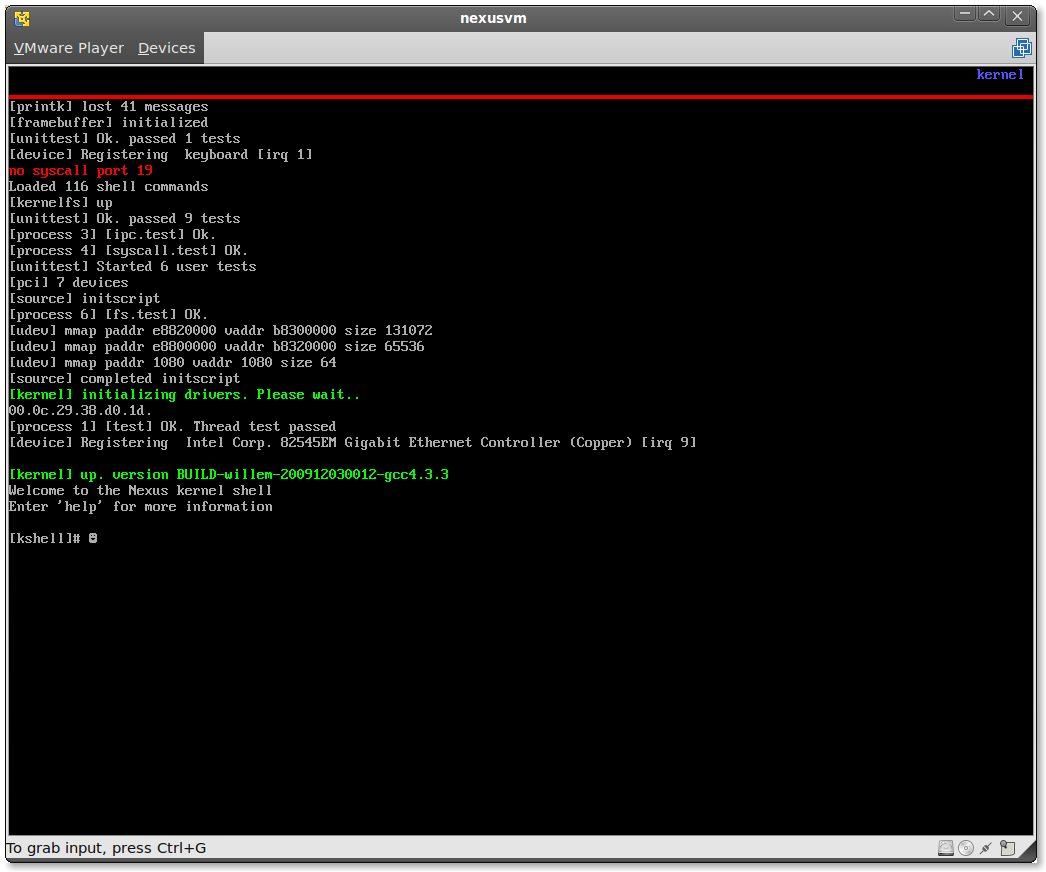
Nexus kernel shell
(click on the image for full size)
ps
or memory utilization
memutil
Other Applications
Aside from the shell, the initial ramdisk ships with a handful of
applications.
MPlayer
is started using
exec bin/mplayer bin/demo.mpg
In VMWare, the colors will be off, because the video is not downsampled to
the 16bit display.
Busybox, known as the `Swiss army knife
of embedded Linux', combines many common Unix tools in a single executable.
To see the list of tools compiled for Nexus, execute
exec bin/busybox
Not all tools have been tested, some may hit an unimplemented libc call,
in which case you will be notified and the process exits. These are known
correct, among others:
exec bin/busybox bzip2 bin/fs.test
exec bin/busybox cat bin/version
exec bin/busybox grep Dec bin/version
Networking
Network device drivers are started at system boot. Nexus comes with
three drivers: two in the kernel and one isolated userspace server. After
booting, this e1000 server can be seen.
For meaningful networking, acquire a dhcp license by running
exec bin/dhcp.app
Nexus comes with a few example network applications.
net_udp.app
and
lwip_chargen.app are low-level connectivity tests over UDP
and TCP. An in-memory webserver is started using
exec bin/lwip_httpd.app
An NFS client is started using
exec bin/nfs.app $IP:$PATH
where $IP is the IPv4 address of the NFS server and $PATH is the path of the exported
volume on that machine. Since NFS uses Unix UID/GID for access control, but Nexus does
not, you will need to give full read permissions for Nexus to be able to access your
resources. If successful, you will see the message "NFS up at ..." and the volume will
be mounted at /mnt.
For more information on the design of the network system and for tips
on how to setup optional TFTP, read the design documents under $NXSRC/doc in
the source tree.
TPM
Nexus can take ownership of the
trusted platform module (TPM),
run a low-level demo and use the
TPM for higher level virtualized trusted hardware. To load the tpm
driver, in the kernel shell issue
tpm
To take ownership, first ensure that your TPM has been cleared. This
procedure is device specific. Then, in the kernel shell, issue
vdir
This command sets up the Nexus virtual Data Integrity Registers. If
Nexus does not have ownership yet, this command will take ownership
using two randomly generated keys.
Test
To run a low level TPM demo, issue
tcpademo
Additional vDIR code is exercised by running
testvdir
Known Issues
The pertinent buglist can always be found in $NXSRC
in the files BUGS and TODO. For release 2009-12-03, the main issues are:
VMWare player 3 is not supported
Audio is not enabled
Mouse is not enabled
ELF files are occasionally corrupted at load.
If this occurs, simply try loading the executable again.
Further Reading and Contact
More detailed technical information, including design decisions and HOWTOs on
topics such as remote gdb, can be found in
$NXSRC/doc. The best
sources of information on purpose, design and performance of Nexus are our
talks and publications.
If you still have questions, have spotted errors on one of these pages, bugs in
the software or have other comments,
contact us directly. See
the contact page for the
relevant addresses.