AniGraph
AniGraph is a package that was written to facilitate cool cross-platform assignments for this class. It is in its infancy and thus still evolving, so feedback is welcome. Here we will provide an overview of functionality that may be particularly useful in C1.
AniGraph can be seen as a combination of model-view-controller (MVC) framework and scene graph. It makes use of react and threejs under the hood. Please do not share the AniGraph source as it is not yet public. We will show you how to build deployable versions of your submissions that you can post online, but do not post the AniGraph source.
Node Diggity, Node Doubt: Models & Views
The content of your scene will consist of data, which will be represented by models, and visualizations of that data, which will be represented by views.
Models will be organized in a hierarchical graph structure (scene graph!), with an ASceneModel sitting at the root.
A scene controller will listen to the scene model, create new views every time a new model is added to your scene graph, and organize these views
in a hierarchical manner that mirrors the structure of your model hieararchy. This means that you can write all of your application logic in model classes,
and define views that simply render the data of each corresponding model.
When we talk about defining a "custom node class" for our scene graph, that means pairing a custom node model class with some view class (which can optionally be customized as well).
The scene controller stores a dictionary that maps node model classes to corresponding node view classes. When a new node model is added to the scene graph, it creates a corresponding instance of the associated node view. The mapping itself if specified in the scene controller's initModelViewSpecs() function. We can see an example in the Example2SceneController class:
 /**
     * Specifies what view classes to use for different model class.
     */
    initModelViewSpecs() {
        this.addModelViewSpec(Polygon2DModel, Polygon2DView);
        this.addModelViewSpec(ExampleParticleSystemModel, ExampleParticleSystemView);
        this.addModelViewSpec(LabCatFloationgHeadModel, A2DMeshView);
    }
the addModelViewSpec(modelClass, viewClass) function tells the scene controller to create a viewClass object for every modelClass added to the scene graph.
If you create new custom node model classes, you will need to decorate their class declarations with @ASerializable:
@ASerializable("CustomPolygonModel")
export class CustomPolygonModel extends ANodeModel2D{
    ...
}
This may seem like extra work to you, but it actually automates a LOT more code under the hood that you would otherwise have to write... Ya welcome ;-)
Application Structure
Most of the links in the text below point to the corresponding files associated with the MainScene scene, which is basically an empty scene that you can use to implement your code. You can see example implementations in other Scenes/ subdirectories.
Below are the basic pieces of your AniGraph application. You won't necessarily need to implement all of them, but it's useful to have a picture of how everything fits together in your head.
- Scene Model: The data model representing an entire scene. You can also think of this as the root of your scene graph's data representation. It will usually be a subclass of ASceneModel. In general, other models will be added as children of the scene model, and the scene model is implicitly where world coordinates live.
- Scene Controller: The scene controller handles user input and connects models with views. To do this, it needs to know what view class to create for newly added instances of a particular model class. The Scene Controller also manages the graphics context that we render to. In theory, you could have multiple scene controllers for the same model, and each could be used to render different visualizations of the model to different windows. I would leave that sort of sorcery to a final project, though.
- Node Models: These represent the data in nodes of the scene graph. They all inherit from ANodeModel. Each has a `.transform` property representing the transformation associated with that node in the scene graph, and most have a `.verts` property representing its geometry. For most of the example code in the C1 helper repo, the transform property of each model will be either a Mat3 like it was in A2, or a NodeTransform2D, which stores position, rotation, scale, and anchor values (PRSA).
- Node Views: These are the views that create visuals based on the data stored in a corresponding node model. There is generally a 1-to-1 correspondence between node models and node views within a scene controller. Each node view `V` has a model `V.model` and a [threejs Group object](https://threejs.org/docs/index.html?q=group#api/en/objects/Group) `V.threejs`. Any graphics elements added to the view are added as children of `V.threejs`. If we add another node view `Vb` as a child of `V`, then `Vb.threejs` will be added as a child of `V.threejs`.
- Graphics Objects: A single view can have a bunch of different graphics elements. Each graphics element is basically some threejs mesh or other primitive that gets displayed on the screen.
- App Component: This is the react component that contains your app. Think of it as the web element (sub-window on the web page) that contains the app. You do not have to know react for this class, and you do not need to modify component code, but you are welcome to add React-based GUI elements in creative projects if you want.
Using Mat3 vs NodeTransform2D to represent transformations
In A1 and A2, you used 3x3 matrices (Mat3) to represent 2D geometric transformations. That functionality is still an option in C1, but we have also added a NodeTransform2D class to represent the PRSA standard discussed in lecture (refer to lecture slides if you need a refresher). `NodeTransform2D` can optionally be used as an alternative transformation type for node models. By default, the ANodeModel2D class that node model inherit from in C1 can use either type of transformation object for their `transform` property. This can make some tasks harder with typing, though, and may result in undefined behavior when casting from one transformation type to the other. If you want to avoid this, many of the example custom classes provided in the starter code are specialized to use just one of the transformation types. You can see example classes that specialize to use `Mat` or `NodeTransform2D` in the CustomPolygon2DModel.ts file.
"PRSA" is not a common term. If you google it, you will find essentially nothing about transformations or animation. In fact, I'm pretty sure I made up the term "PRSA" for this class... So how can it be a standard? To answer this, we need a bit more context. What does appear in plenty of APIs is "TRS", which stands for "translation, rotation, scale". Technically, any PRSA transform can be mapped to an equivalent TRS transform, so from an engineer's perspective, the P and A may seem redundant. But the advantage of PRSA is really for designing aniamtions, especially when using an interactive tool. So the PRSA standard really comes from creative tools for animation, where it is just referred to as four separate properties. To make matters worse, the name "anchor point" is not standardized; some software uses "origin", or "pivot point" instead. However, the corresponding order of matrix operations has become quite standard. I suspect this is at least partly due to the nice property that if you disallow anchor transformations (i.e., set A=identity), it reduces to the TRS standard.
Interactions
The simplest way to define keyboard and mouse interactions is to use sceneController.createNewInteractionMode(...) to define callbacks for keyboard and mouse events. We recommend looking at the definition of sceneController.initInteractions() in different example scenes (e.g., Example2SceneController.ts) to get a sense for how this works. The code is fairly well commented.
Callbacks
Callbacks are functions that sit around waiting for a particular event to happen. When it does, that's when they do their thing... which is whatever you tell them to do.
Let's consider what this looks like in context. Models, views, and controllers in AniGraph all support event signaling and subscriptions. Say we want to update a view object every time a particular event happens in its corresponding model. From the view class, we can define a callback that we want executed every time the event occurs, and register that callback with the model.
//  ...code inside of our view class:
/**
 * inside the callback we will no longer have access to the "this" variable, so we need to create a new variable
 * to refer to our view object.
  */
const self = this;
function myCallback(paraeter:number){
    self.updateWithParameter(parameter);
}

// Register with our model to execute `myCallback` every time the "SomeEventName" event is triggered by our model
let callbackSwitch = this.model.addEventListener("SomeEventName", myCallback);
Now our callback will be executed every time the view signals a SomeEventName event
// ...code inside of our model class
this.signalEvent("SomeEventName", parameterValue);
The object returned by addEventListener is a callback switch. You can optionally use it to activate or deactivate the callback.
After you first call addEventListener, the callback will be active.
When active, it will be called any time the correspond event is triggered. When deactivated, it will just kinda sit there contemplating its own meaning.
// ...inside of our view class
callbackSwitch.deactivate()
callbackSwitch.activate();
You will often see code in the example scenes that looks like this:
// ...elesewhere in the code, sometimes in a different file
export enum MyEventEnums{
    EventKey="SomeEventName",
    EventSubscriptionKey="SomeEventSubscriptionName",
    // ...
}


// ...from inside our view class
const self = this;
this.subscribe(this.model.addEventListener(MyEventEnums.EventKey,(parameter:number)=>{
    self.updateElements(parameter);
}), MyEventEnums.EventSubscriptionKey);
First you may notice the use of enums. This is just good programming practice. The idea is that if a string is going to be used to identify a specific event,
it's best to define that string as an object somewhere and always refer to that object. This way, you don't have to worry about, for example,
a small typo causing a callback to fail to register. It also means that if you want to change the string, you can do so in one place without worrying whether
you caught every instance of the key in your code.
The subscribe function is a convenient way to keep track of callback switches. It will automatically store the switch with the specified key (in this case, MyEventEnums.EventSubscriptionKey).
You can later activate, deactivate, or unsubscribe (which will deactivate and remove) using:
this.deactivateSubscription(MyEventEnums.EventSubscriptionKey); // deactivate
this.activateSubscription(MyEventEnums.EventSubscriptionKey); // reactivate
this.unsubscribe(MyEventEnums.EventSubscriptionKey); // unsubscribe
You will often see helper functions for subscribing to particular common events. A good example of this is the subscribeToAppState function,
which calls the appState.addStateValueListener helper function in its own implementation.
this.subscribeToAppState(MyAppStateKey, (v:number)=>{
    self.myAppStateChanged(v);
})
This brings us to the topic of AppState and the control panel...
AppState
AniGraph has a control panel feature where you can create global-ish variables that
you will be able to edit in a control panel that looks like this:

You can add state to the control panel using a global instance of some AAppState subclass.
To access the global app state, you can use GetAppState() from anywhere in your code:
import {GetAppState} from "../../anigraph";
let appState = GetAppState();
To add new app state, you can create, e.g., a slider or a color picker:
// For sliders, the arguments are a key string/name for the app state, then an initial value, then a min, a max, and a step size
appState.addSliderIfMissing("SliderValue", 7, 0, 10, 0.001);

// For color pickers, it's a key string/name for the app state then an initial value
appState.addColorControl("ColorValue", Color.FromString("#00abe0"));
To register a callback with one of these variables, you can use subscribeToAppState from any AObject (this includes models, controllers, views...). For example, in the constructor of CustomPolygonModel.ts:
we call:
const self = this;
this.subscribeToAppState("SliderValue", (v:number)=>{
    // set an attribute of this object to the value of the slider
    self.attribute = v;
})

this.subscribeToAppState("ColorValue", (color:Color)=>{
    self.colorAttribute = color;
})
Or you can do things a bit more manually, which is how the subscribeToAppState function works under the hood. For example, you will see in example code:
// Here we subscribe to the "PolygonScale" App state control that we created in `initAppState` above
this.subscribe(appState.addStateValueListener("PolygonScale", (newValue)=>{
    newPolygon.transform.scale = newValue;
}), "PolygonScaleSubscription")

// if we want to unsubscribe later we can use
this.unsubscribe("PolygonScaleSubscription")
At this point you may ask yourself "Geeze Abe, why do everything so indirectly? I mean, the control panel updates the app state which signals the an event that the model listens to so that the model can signal ANOTHER event, which the view listens to... Why???". Good question. The answer is that this indirection makes everything very modular, which ends up being really useful if you are writing a much bigger application. That's not really the goal of this assignment, though, so you are welcome to e.g., just listen to the app state directly in your view class if that makes more sense to you. The base and example AniGraph code will largely stick to best practices, though, so if you want to take shortcuts you may have to venture into less proven territory.
Drawing Geometry
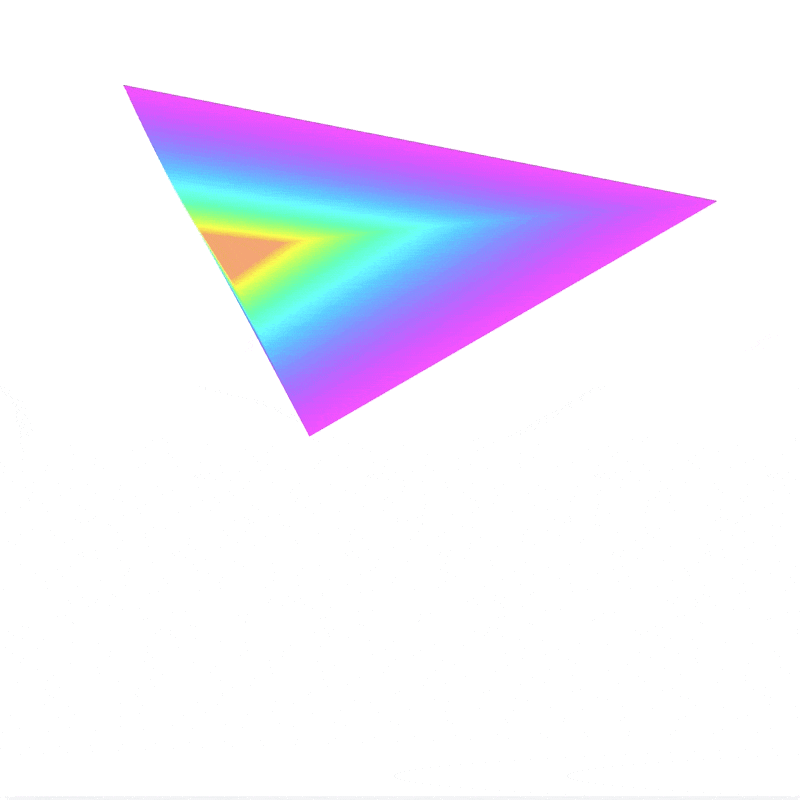
There are two use cases that help inform AniGraph's design. The first is one where objects of importance to the application logic may have a complex hierarchy of visuals associated with them. For example, a character in a video game may have some graphics associated with the character's body (e.g., a furry little Lab Cat), as well as various graphics supporting other effects associated with that character (e.g., particle flames of rage emanating from Lab Cat's eyes of fury... or something). In this case, the view object serves as a root for the graphics associated with our character, but those graphics may include a hierarchy of different elements, which we would be represented by different graphics elements.
The second use case is for procedural graphics. Node models contain geometry, which can be rendered directly in a view, or thought of as input to some procedure that the view uses to generate visuals. For example, in assignment 1 the spline model class stored a series of control points. The spline view class then created a new set of vertices that sampled a linear or cubic Bezier interpolation of those control points. In this case, we had one graphic element per view, but rooting a potential hierarchy of graphics elements at our view provides flexability to generate more complex procedural visuals.
Typical Use
You can create new models in the scene model's initScene function if you want to create them once at the beginning.
Or, you can create them in an interaction callback defined in the scene controller (e.g., onKeyDown) and add them to
the scene as the application is running. Remember that most of the default/basic model classes just store a vertex array.
Whether that array is interpreted as a curve, a polygon, control points, or something else is up to the view.
For example, the TriangleAtVerticesView example class draws a custom SmallTriangleGraphicElement graphic
element at each vertex of the model.
If we look at the CustomPolygonView class in the Example 3 code we can see how a view constructs geometry. Note that this example is a good starting point if you want to implement the pyramid-style procedural graphic. A good place to initialize graphics elements is in the `init` function. There, you can also register callbacks for updating the graphics. in CustomPolygonView.ts we have:
/**
 * Set up graphics and callbacks here.
 */
init(): void {

    // A helper function for creating our elements
    this.createElements();

    // We call our update function here to initialize everything according to current app state
    this.updateElements();

    // Views come with some callbacks registered by default. Any time an @AObjectState variable changes in our model
    // the view's `update` function will be called. In particular, this includes any change to the model's `transform` property.
    this.update();


    // We can register any non-standard callbacks here.
    // Below we register a callback for an event defined in our model class (see model class for more details).
    const self = this;
    /**
     * We are going to update elements every time pyramid props are updated
     */
    this.subscribe(this.model.addPyramidUpdateListener(
        ()=>{
            this.updateElements();
        }
    ))
}
Then the createElements function that creates our graphics:
createElements(){
    // We can clear any graphics that may have existed before. Not really necessary in this example, but a fine check to do.
    this.disposeGraphics();

    this.elements = [];
    for(let i=0;i<this.model.nElements;i++){

        // Create a polygon graphic for each element
        let newElement=new APolygon2DGraphic();

        // initialize it with the model geometry and a random color
        newElement.init(this.model.verts, Color.Random());

        // Set its transform
        newElement.setTransform(Mat3.Translation2D(i,1).times(this.model.transform.getMatrix()));

        // register the graphic with the view
        this.registerGraphic(newElement);

        // Add the graphic as a child of the view, or of another graphic
        this.add(newElement);
        // otherGraphic.add(newElement);

        // We will save the element in our elements array so we know to update it in updateElements
        this.elements.push(newElement);
    }
}
We can see examples of updating the parameters for graphics in updateElements:
/**
 * We will call this every time our pyramid parameters change. It will update our graphics elements based on the new
 * parameter values.
 */
updateElements(){
    for(let i=0;i<this.model.nElements;i++){
        this.elements[i].setTransform(Mat3.Translation2D(i,1).times(this.model.pyramidTransform.getMatrix()));
        this.elements[i].setMaterial(this.model.color.GetSpun(Math.PI*0.1*i));
    }
}
Note here that the Color class has a bunch of helpful color manipulation function. The GetSpun function
spins the hue of a color on the color wheel by some angle parameter (given in radians).