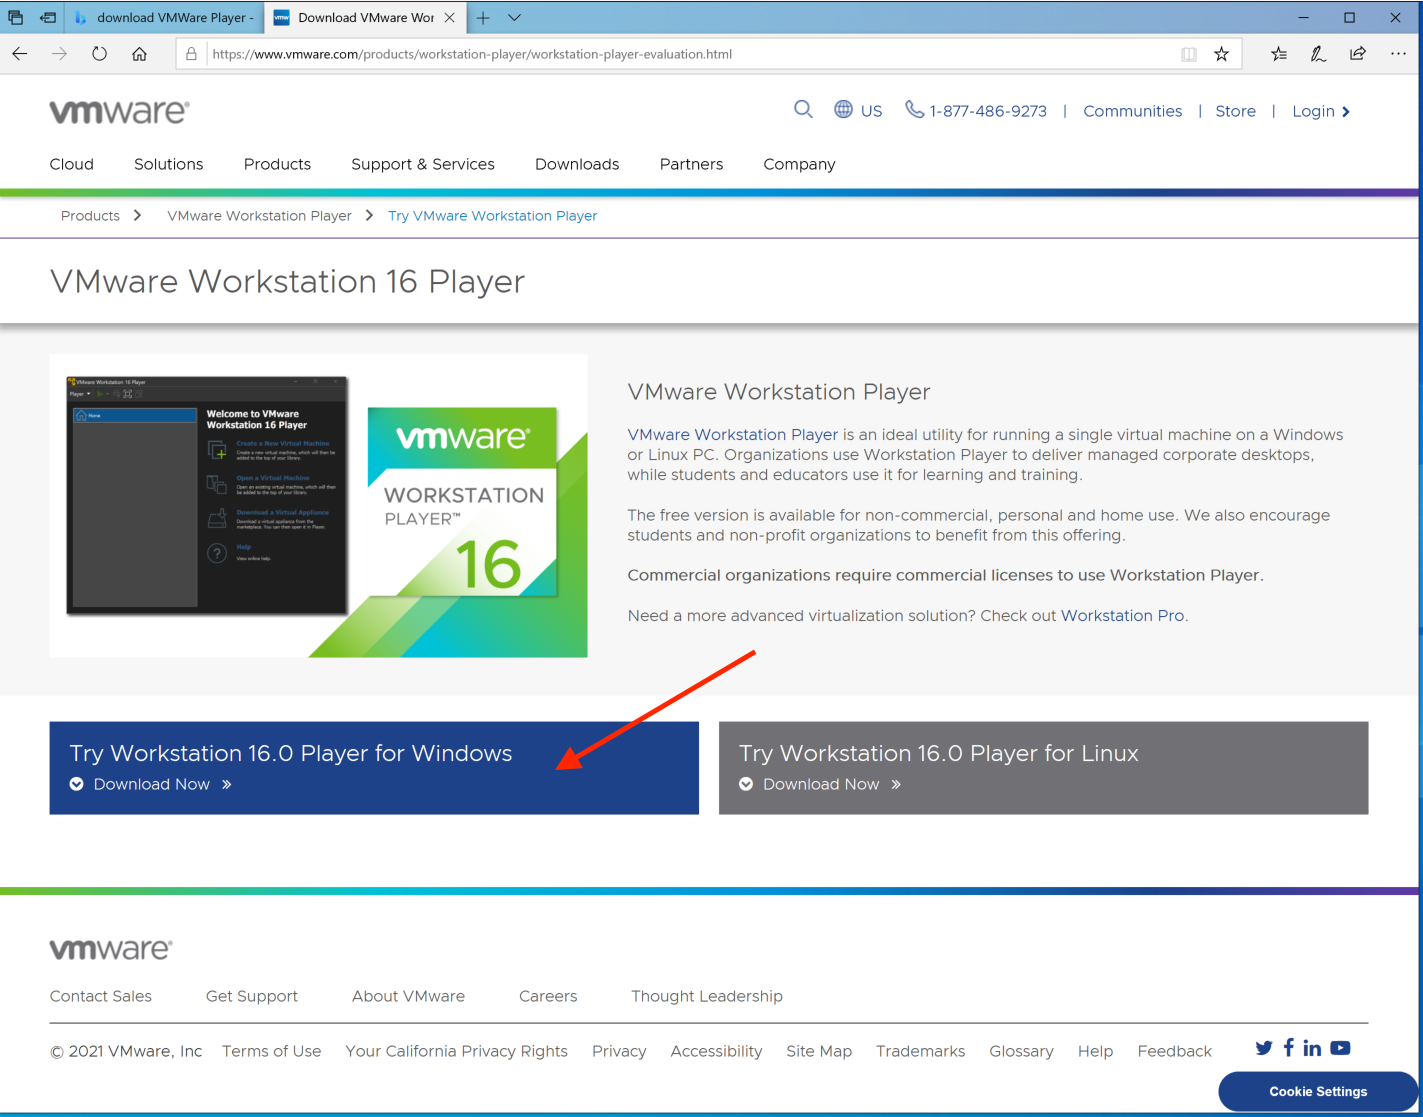
Next, click on the "Try Workstation 16.0 Player for Windows" button. Your download should begin.
When the download is complete, you should see a banner at the bottom of the Web Browser window that asks you if you'd like to run the downloaded .EXE file:

Click "Run"… before the installer runs, you will see the following:
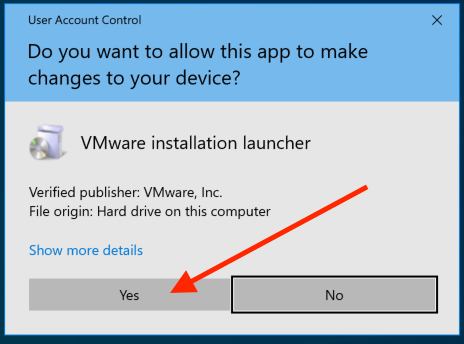
Click "Yes", and the installer will run.
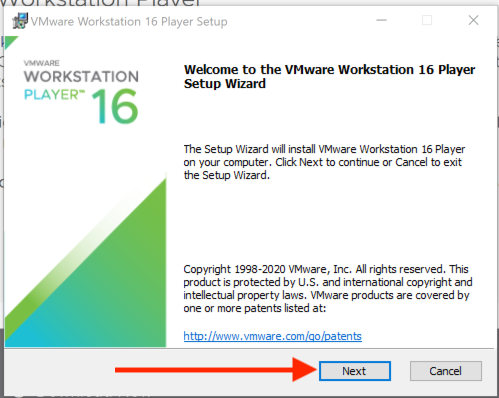
Click on "Next" to start the installation process. The next screen you will see will be the end user license agreement:
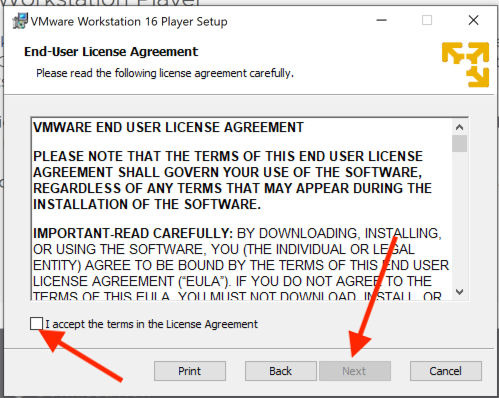
Assuming you wish to accept the agreement, click on the "I accept the terms in the License Agreement" checkbox and then click "Next". You will see the following:
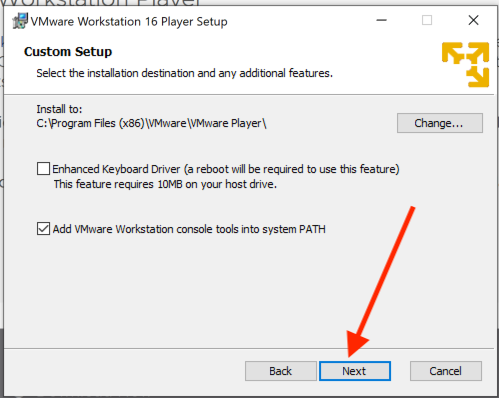
You shouldn't need to change anything in the dialog above, just click "Next" to install VMWare into the default location. You will then be presented with the following:
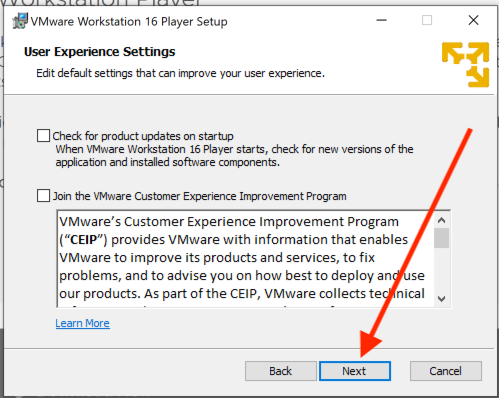
Feel free to check either of the checkboxes above if you'd like, but you don't need to. Then, click "Next" to continue.
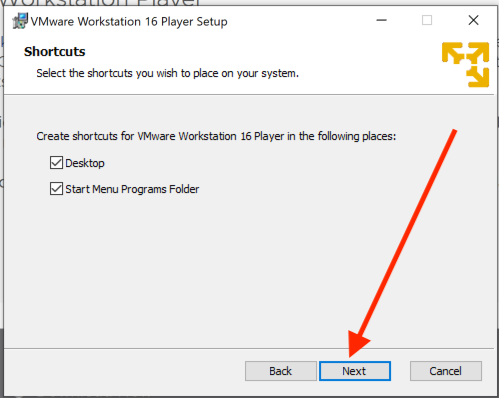
Leave the above checkboxes checked if you'd like a shortcut to VMWare Player to appear on your desktop and in your start menu. Feel free to uncheck either if you are comfortable doing so. Either way, once you've made your decision, click "Next":
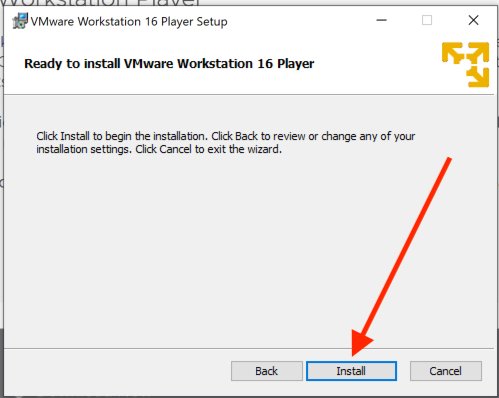
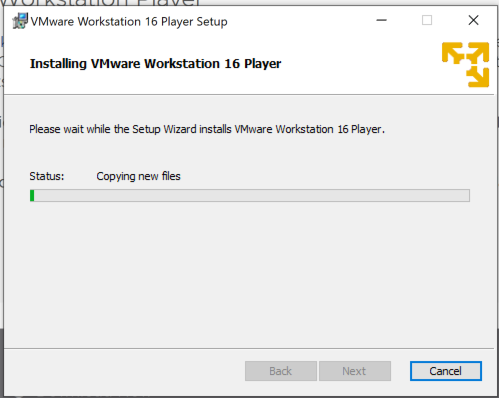
Finally, you can click "Install" to begin the installation. You'll see a progress dialog:
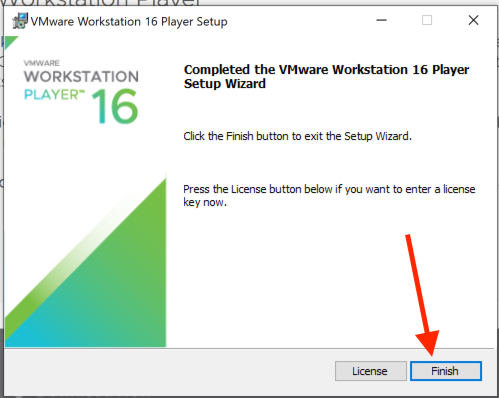
When the installer is done, you will see the following:
After clicking "Finish", you can go to your Start menu and you should see the VMWare Player available in your "Recently Added" section:
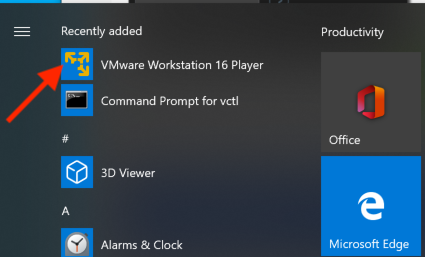
Congratulations! You've just installed VMWare Player!
Now, launch VMWare Player. You will see the following:
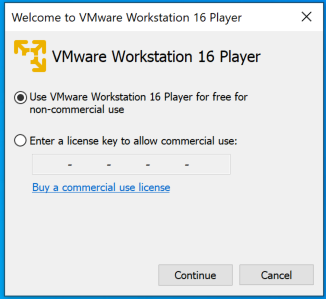
As a student using VMWare Player for a class, you may use it for free. Click "Continue".

Now, click "Finish", you'll be presented with the following:
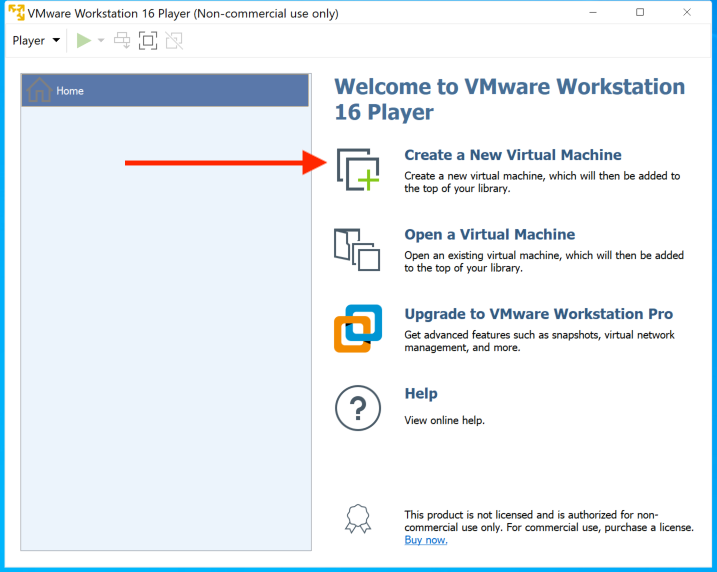
Here, click on "Create a New Virtual Machine". You will see the following:
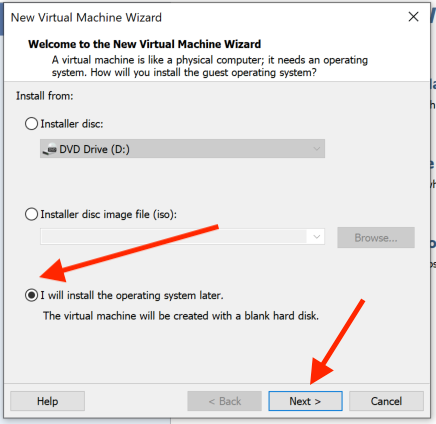
This will launch the "New Virtual Machine Wizard". Click on "I will install the operating system later", then click "Next":
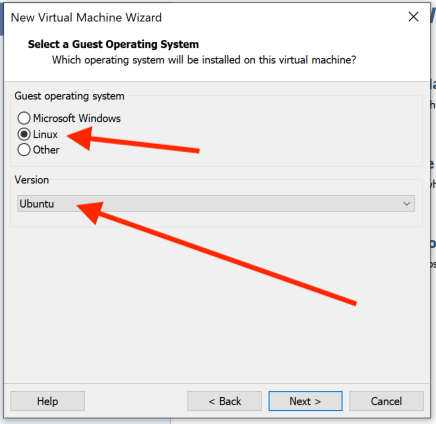
Change the "Guest Operating System" to "Linux", and make sure that "Ubuntu" is showing in the "Version" pop up. Then click "Next":
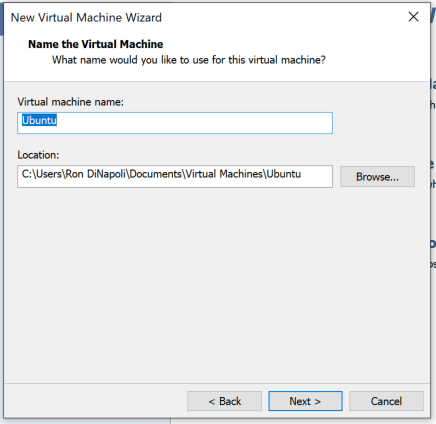
You'll be presented with a dialog allowing you to name the virtual machine and specify where it is stored. It should be ok to use the default values and click "Next":
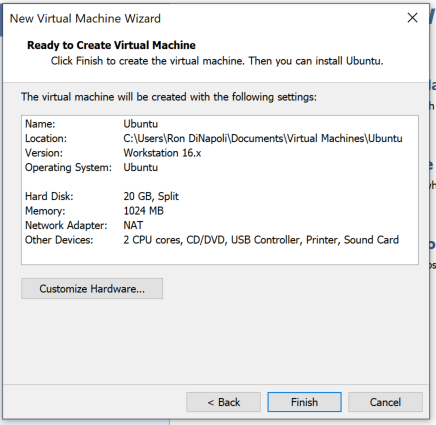
This dialog gives you the particulars about the VM you are about to create. It's fine to use these values and click "Finish":
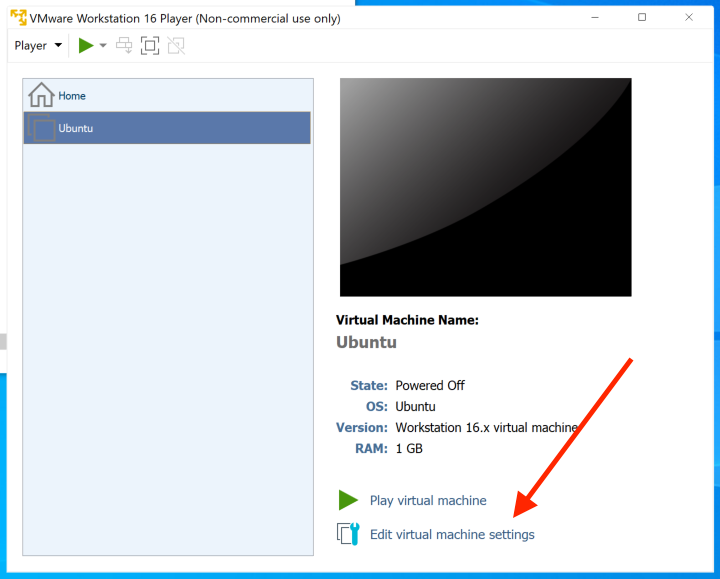
You'll be presented with the VM library screen again. The "Ubuntu" VM will be selected. However we need to change the hard drive from the default one it created to the one you downloaded from osboxes.com. So, click on "Edit virtual machine settings". You will see the following:
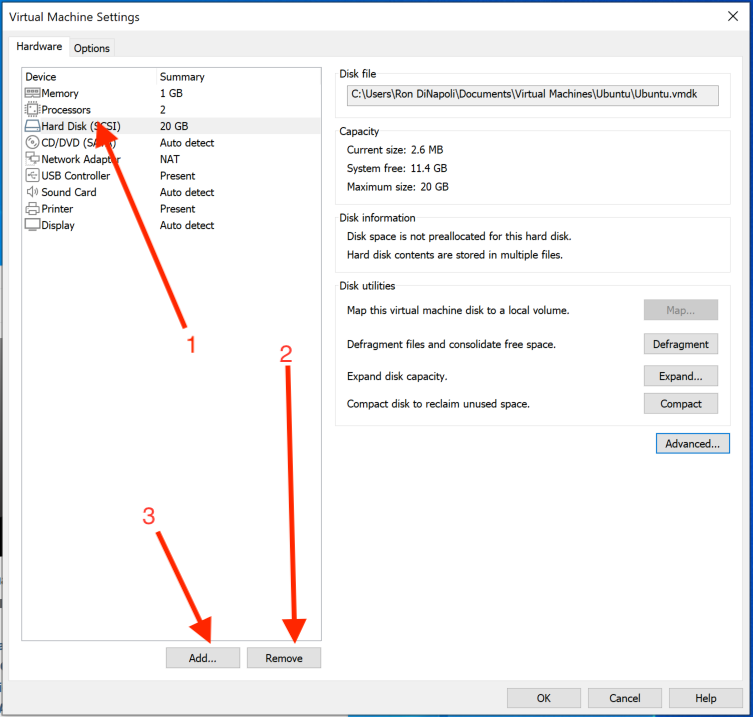
We first need to remove the existing virtual hard drive. Click on the "Hard Disk (SCSI)" entry and then click "Remove". After it is removed, click on the "Add" button.
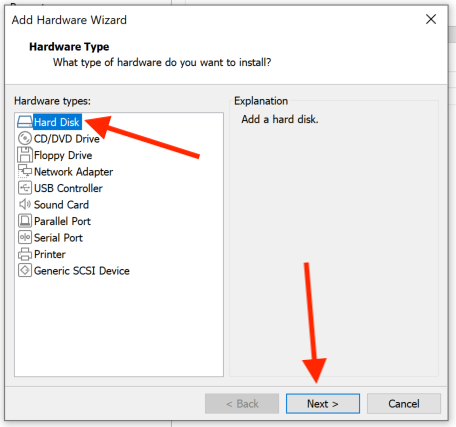
The "Add Hardware Wizard" appears. Click on "Hard Disk" and then click "Next".
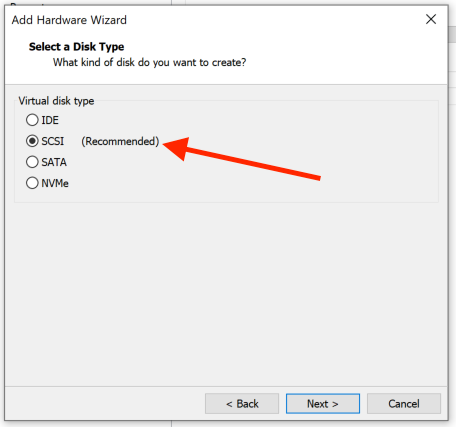
Make sure that SCSI is selected (it's the Recommended choice!) and then click "Next":
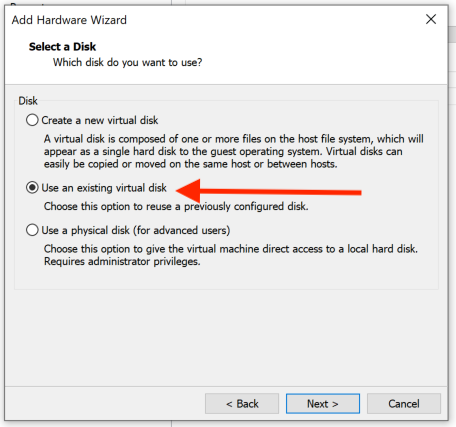
On the next screen, choose "Use an existing virtual disk" and click "Next":
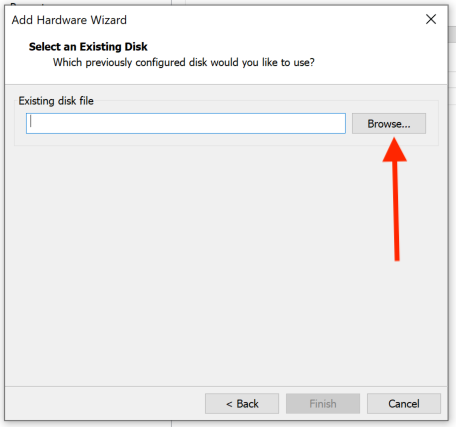
Now it's time to use the "Browse…" button to select the virtual disk that you unpacked from the osboxes.com download. It should be the file named "Ubuntu 20.10 (64bit).vmdk"
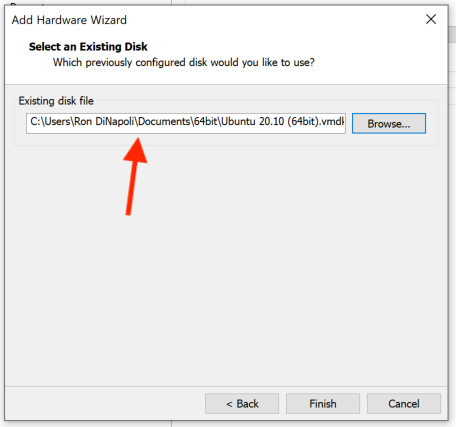
Once you've selected the proper .vmdk file, click on "Finish"
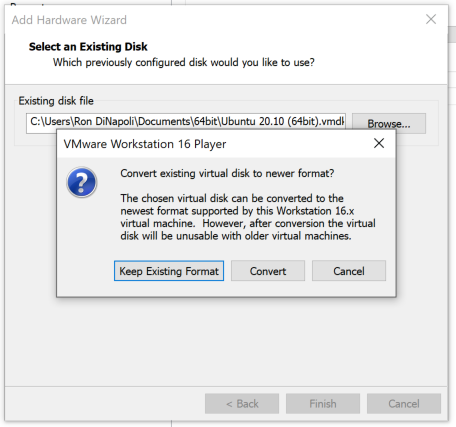
You will likely see this dialog. It's ok to either select "Keep Existing Format" or "Convert". If you are only going to use this VM for CS2043 this semester, just select "Keep Existing Format" as it will be faster :-).
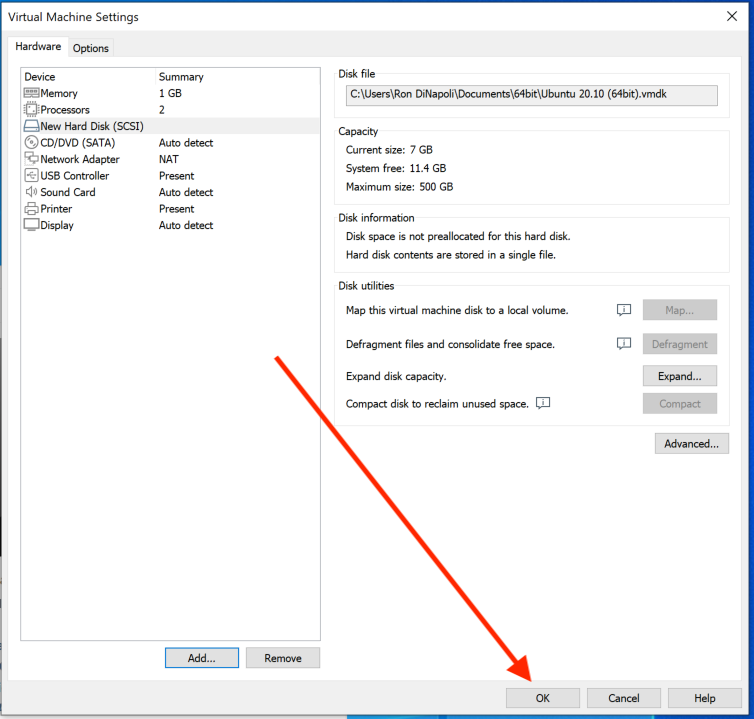
You will be returned to the "Virtual Machine Settings" page. You should see a new "hard disk" showing…. Go ahead and click "OK".
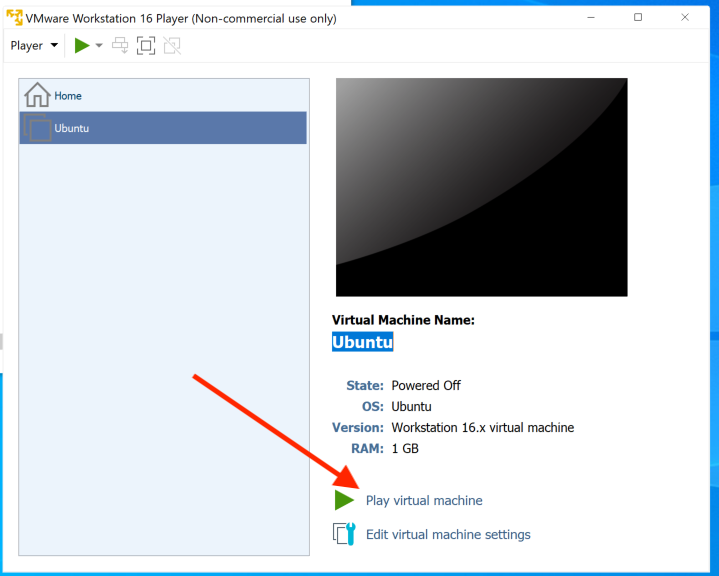
Finally, we're back in the virtual machine library screen. Go ahead and click on "Play virtual machine" to begin using Ubuntu!
Once it is running, proceed with instructions on how to complete your Ubuntu Setup.