Welcome to Angela's and Thorsten's
Greenhouse!
You are looking at a first-cut web site describing our adventure in
building a 21'x'24 greenhouse / conservatory in our back yard in Ithaca,
NY in our "free time" over the summer of 1997 (with the help of friends!).
Ithaca is in upstate NY in USDA Zone 5. Our greenhouse was designed and built from scratch
with pressure treated lumber and triple-glazed polycarbonate sheets. A third of the
greenhouse holds a pond for tropical water lilies. The remainder is for orchids and
bamboos. Ah, yes, there's also supposed to be a nice corner for us to enjoy the plants,
that warmth, and the humidity in winter.
The images below will give you an idea of what you can find on this
web site. All thumbnails can be clicked-on to get a larger JPEG image,
which is 756x504 for pictures taken before Jan '98 (I used a Kodak DCS-50) and 1280x1024
for pictures taken after that (with a Olympus D-600L, a camera I can highly recommend).
These larger images tend to use 90KBytes to 150KBytes, so you will need some patience if
you have a slow link. I will try to get intermediate images at some point...
To navigate, use the links below, or (if your browser supports frames)
use the links in the bar in the frame at the top of this window. Each time you'll get a
page with more text (well, eventually, i.e., when I get that written) and many more
images.
Disclaimer: neither of us knows anything about construction or
gardening. I'm a CS prof (see my home page
for what else I'm up to) and Angela does neither construction nor gardening
professionally.
All text and photos in this web are Copyrighted ©1996, 1997
& 1998 by Thorsten von Eicken and Angela
Moll.
If you would like to use any for non-profit use, please contact me. We're not out
for money, but will ask for an acknowledgment.
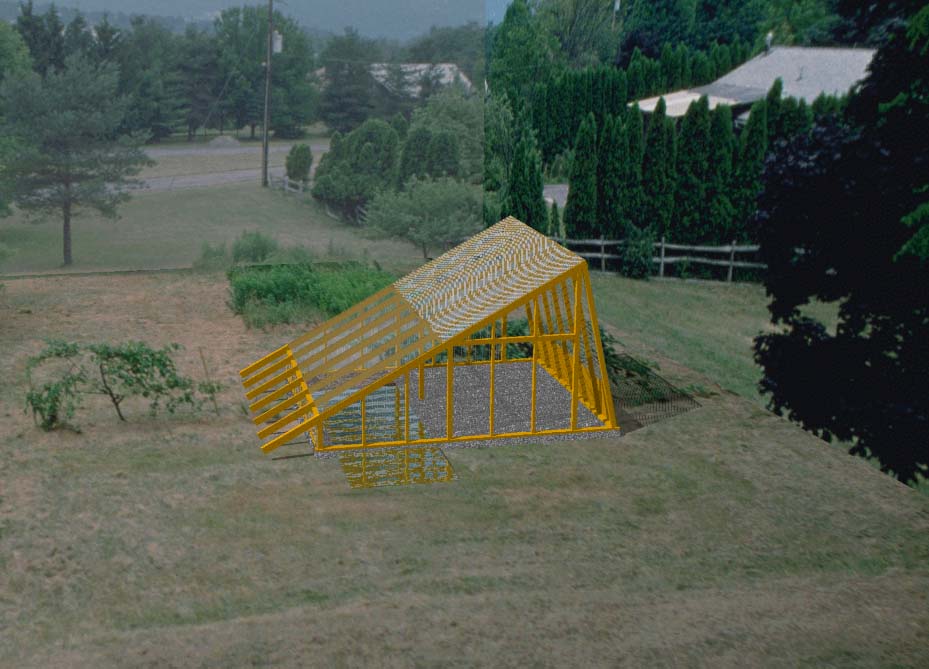
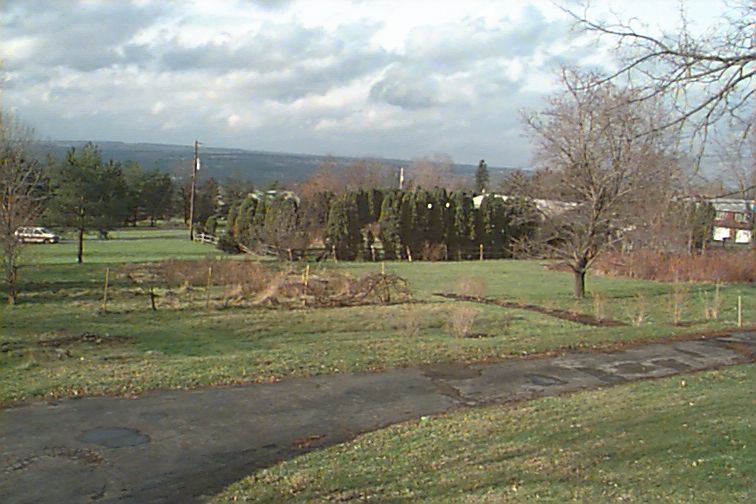
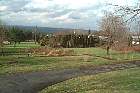 Before
it all began, late fall '96, the back yard was mostly a boring lawn.
Then we started dreaming of a greenhouse because watering all these orchids every morning
in the house was just too painful.We started with some sketches and I decided to try Corel
Dream 3D to build a 3D model of our plans.
Before
it all began, late fall '96, the back yard was mostly a boring lawn.
Then we started dreaming of a greenhouse because watering all these orchids every morning
in the house was just too painful.We started with some sketches and I decided to try Corel
Dream 3D to build a 3D model of our plans.
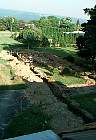
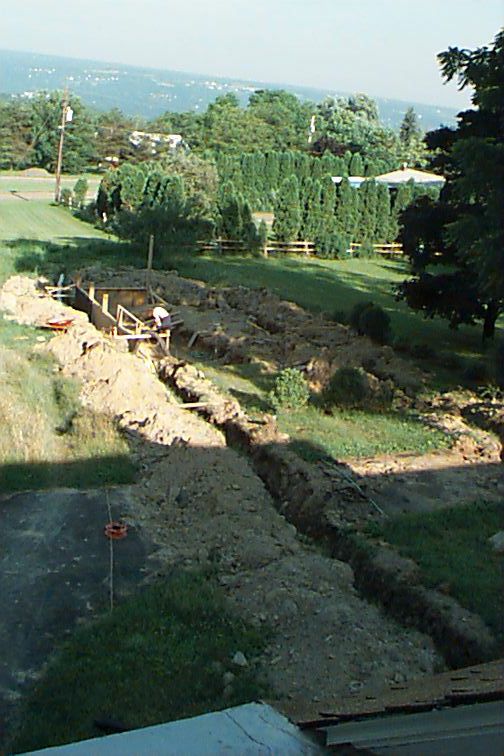
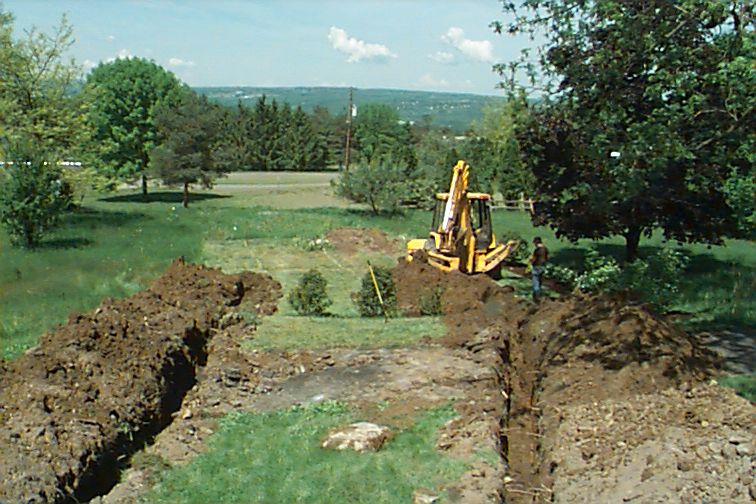
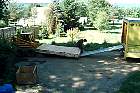
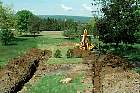 Excavating the foundation is the
one task for which we hired someone. Fenton's ( a local contractor) came June 6th '97 with
a backhoe and dug a 3' deep trench for the foundation perimeter (that deep for insulation
in the winter), a hole for inside and outside ponds, a 3' deep trench for gas and
electricity, and a 4-1/2' deep trench for water. The greenhouse is about 100' away from
our house, hence the need for the utility trenches. Yikes, this looks scary! Yesterday we
had a nice albeit boring yard, but now it's a total mess!
Excavating the foundation is the
one task for which we hired someone. Fenton's ( a local contractor) came June 6th '97 with
a backhoe and dug a 3' deep trench for the foundation perimeter (that deep for insulation
in the winter), a hole for inside and outside ponds, a 3' deep trench for gas and
electricity, and a 4-1/2' deep trench for water. The greenhouse is about 100' away from
our house, hence the need for the utility trenches. Yikes, this looks scary! Yesterday we
had a nice albeit boring yard, but now it's a total mess!
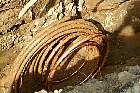
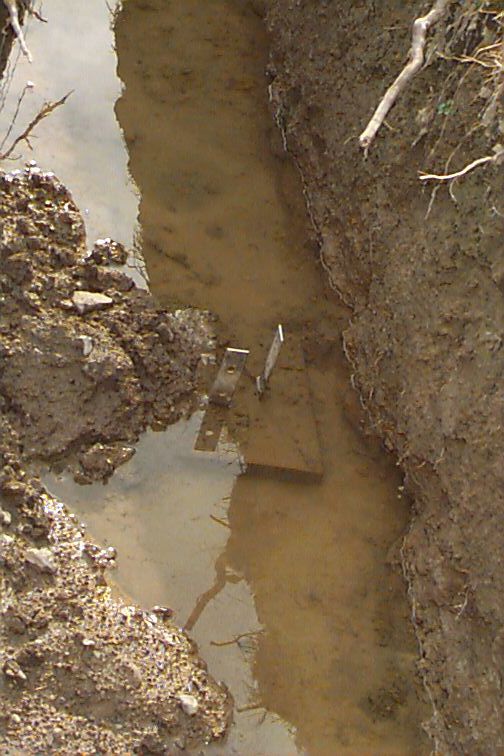
 Laying the utility lines into the
trenches was quite some "fun". Especially the water line goes at the bottom of a
4-1/2' deep trench, which is filled with clay (that's our soil here), and has a little
water stream running through it. I donned my rubber boots and struggled as much with the
100ft coil of 3/4" "soft" copper pipe as with the mud that threatened to
swallow my boots at every step! The gas and electric were a bit easier, but no piece of
cake either.
Laying the utility lines into the
trenches was quite some "fun". Especially the water line goes at the bottom of a
4-1/2' deep trench, which is filled with clay (that's our soil here), and has a little
water stream running through it. I donned my rubber boots and struggled as much with the
100ft coil of 3/4" "soft" copper pipe as with the mud that threatened to
swallow my boots at every step! The gas and electric were a bit easier, but no piece of
cake either.

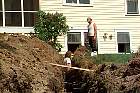
 Building the foundation ourselves
was the main mistake we made. It sounded simple: pour a concrete footing for posts at 6'
intervals, place a 6x6 post on top, nail plywood in between, glue foam insulation onto
that, and fill the trench with gravel for drainage. Ha! In all this we hadn't counted with
the clay soil and the water running through it which combined to make our lives miserable.
It took f-o-r-e-v-e-r to get anything done. And, on top of that, there are about as many
pieces of wood in the foundation as there are in the framing above ground! In retrospect,
we should have had 12" wide foundation trenches dug, thrown the foam boards in there,
filled up with concrete, and paid someone to do it. My guess is that it would have cost
$2K, which would have been very well spent!
Building the foundation ourselves
was the main mistake we made. It sounded simple: pour a concrete footing for posts at 6'
intervals, place a 6x6 post on top, nail plywood in between, glue foam insulation onto
that, and fill the trench with gravel for drainage. Ha! In all this we hadn't counted with
the clay soil and the water running through it which combined to make our lives miserable.
It took f-o-r-e-v-e-r to get anything done. And, on top of that, there are about as many
pieces of wood in the foundation as there are in the framing above ground! In retrospect,
we should have had 12" wide foundation trenches dug, thrown the foam boards in there,
filled up with concrete, and paid someone to do it. My guess is that it would have cost
$2K, which would have been very well spent!

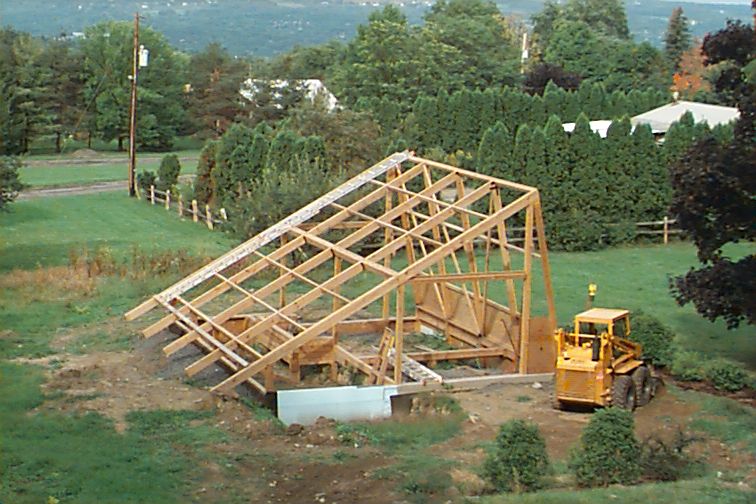
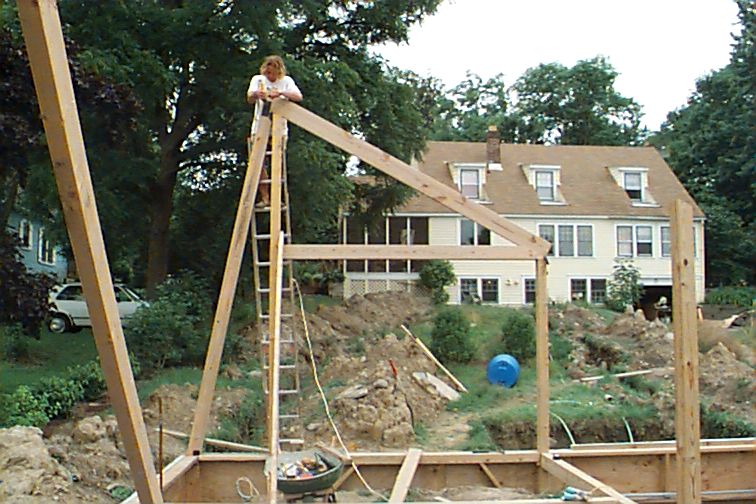
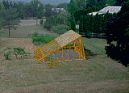
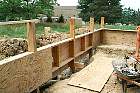
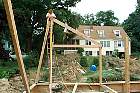 Framing was one of the most fun parts
and began sometime in July. Sort of like screwing big matchsticks together up on a ladder.
The trickiest part was getting the first ridge beam (14' above ground) in: we had put up
two rafters and the ridge beam all at the same time for anything to hold.
Framing was one of the most fun parts
and began sometime in July. Sort of like screwing big matchsticks together up on a ladder.
The trickiest part was getting the first ridge beam (14' above ground) in: we had put up
two rafters and the ridge beam all at the same time for anything to hold.
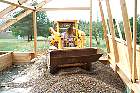
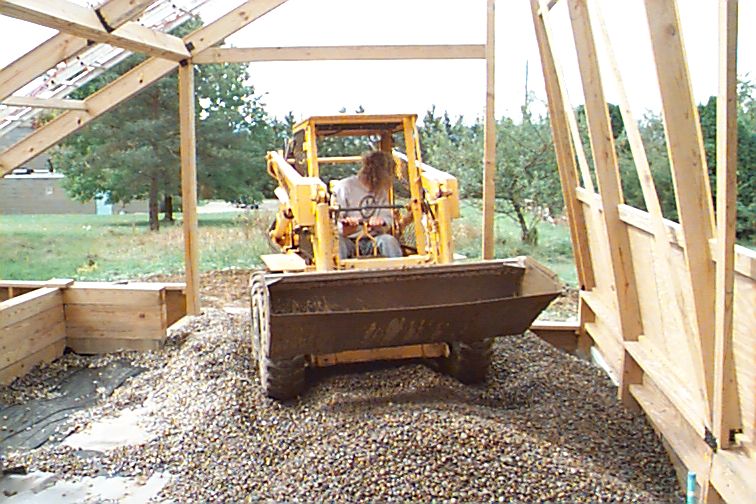
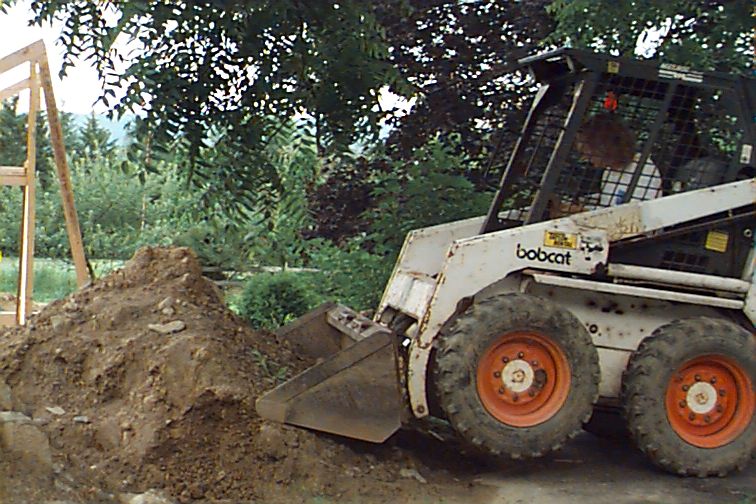
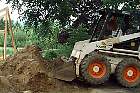 Pouring gravel into the trenches and
the floor occurred during and after framing. A total of 35 tons of No.2 gravel is now in
our back yard. Needless to say, we didn't move it with a wheelbarrow! I rented a bobcat
for a day to fill the utility trenches with the piles of dirt and the foundation with
gravel. And then a second time to fill the floor of the greenhouse with gravel.
Pouring gravel into the trenches and
the floor occurred during and after framing. A total of 35 tons of No.2 gravel is now in
our back yard. Needless to say, we didn't move it with a wheelbarrow! I rented a bobcat
for a day to fill the utility trenches with the piles of dirt and the foundation with
gravel. And then a second time to fill the floor of the greenhouse with gravel.

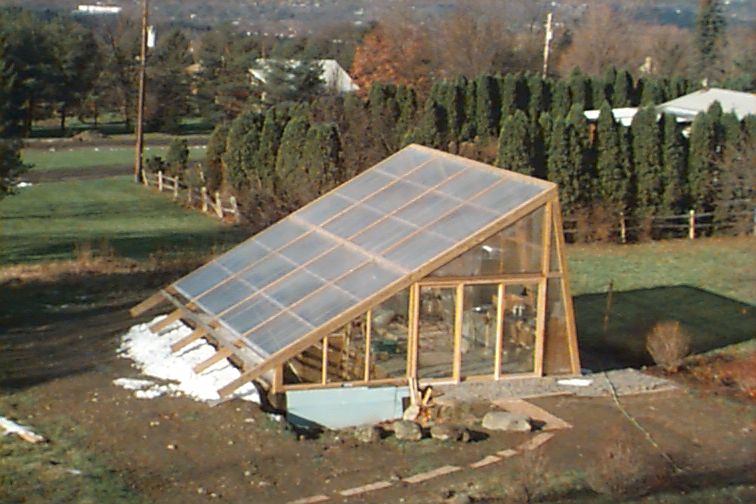
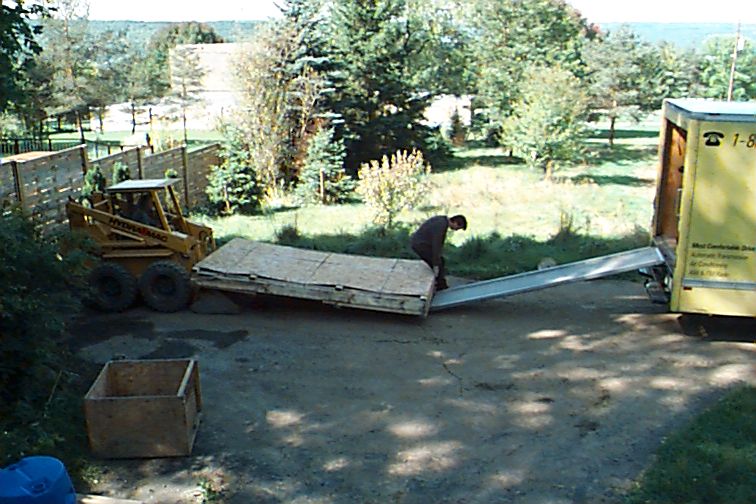
 Installing the polycarbonate glazing
was daunting at first, but ended up being relatively easy. It all began with the news that
a 12'x6'x1' 250lb box with the polycarbonate sheets was coming on a truck in September:
how do you get such a thing off the truck??? I ended up renting a small truck, driving to
the loading dock, having the box flipped over to lay flat and pushed into the truck. Back
home, we were going to push it down the ramp, but fortunately we still had the bobcat, so
that part ended up being almost trivial. Then we had to drill holes into the polycarbonate
sheets, close off the ends with tape, and mount them on the greenhouse. The sheets seem
incredibly flimsy at first (they're only 8mm thick), but they turn out to be incredibly
tough, except for the fact that they scratch very, very easily. (Btw: you see that white
stuff? That's the snow that fell the day after we finished closing off the greenhouse.
Yikes.)
Installing the polycarbonate glazing
was daunting at first, but ended up being relatively easy. It all began with the news that
a 12'x6'x1' 250lb box with the polycarbonate sheets was coming on a truck in September:
how do you get such a thing off the truck??? I ended up renting a small truck, driving to
the loading dock, having the box flipped over to lay flat and pushed into the truck. Back
home, we were going to push it down the ramp, but fortunately we still had the bobcat, so
that part ended up being almost trivial. Then we had to drill holes into the polycarbonate
sheets, close off the ends with tape, and mount them on the greenhouse. The sheets seem
incredibly flimsy at first (they're only 8mm thick), but they turn out to be incredibly
tough, except for the fact that they scratch very, very easily. (Btw: you see that white
stuff? That's the snow that fell the day after we finished closing off the greenhouse.
Yikes.)
More to come...
© 1996, 1997, 1998 by Thorsten von Eicken
& Angela Moll. Last modified Wednesday, November 04, 1998.
 Before
it all began, late fall '96, the back yard was mostly a boring lawn.
Then we started dreaming of a greenhouse because watering all these orchids every morning
in the house was just too painful.We started with some sketches and I decided to try Corel
Dream 3D to build a 3D model of our plans.
Before
it all began, late fall '96, the back yard was mostly a boring lawn.
Then we started dreaming of a greenhouse because watering all these orchids every morning
in the house was just too painful.We started with some sketches and I decided to try Corel
Dream 3D to build a 3D model of our plans.