Python in CS 1110
Python comes in several shapes and sizes. To make sure that everything works properly, we require that every single person in the course use the same version of Python. You are free to either work in the labs or to use your laptop. But whatever the case, your version of Python must be the same as what we are using in the labs. Hence, even if you already have Python installed on your computer, we ask that you install a new version (see instructions below) so you can be consistent with everyone else.
As you will see, these instructions are a bit long. Installing Python is often much more complicated than simply using it. As many people in this class have not programmed before, we have tried to make installation as simple as possible via step-by-step instructions. You are not expected to understand what many of these steps are doing. Furthermore, these instructions are lengthy mainly because we are trying to support as many operating systems as possible. In practice, you should be able to finish the installation in 15-20 minutes.
If you have problems, and if you have a laptop, the best thing to do is to bring it in to someone to look at. Any of the course staff can help you with this. If you cannot bring in your computer, we have provided you with some instructions below. If you are having difficulty with these instructions, please post on Ed Discussions or send email to Al Palanuwech.
Table of Contents
- Installing Python
- Installing Cornell Extensions
- Getting Started with Python
- Installing VSCode
- Using GitHub
Installing Python
While installing the base Python package is usually straight-forward, getting add-ons for Python can be a bit tricky. That is why we have decided to standardize on the Anaconda version of Python. This is a free version of Python that is used by many courses on campus. It contains a lot of add-ons, limiting the number of things you need to install later.
Once you have the base Python install, you need to install the “Cornell Extensions”. These are 3rd party extensions packaged by us (and sometimes made by us) to fit into Python. These extra packages include things like graphics capabilities to make games and flashy applications.
Before you install these, be sure to completely read the instructions for your operating system. While you are unlikely to make any mistakes, it is best for you to do things in exactly the order we tell you to. As we said, you do not need to understand what is going on here.
Installing on Windows
This class supports either Windows 10 or 11. We do not support Windows 8 or 7 anymore. If you are using an older version of Windows, we recommend that you upgrade now before the semester starts. If your machine cannot support a newer version of Windows, you will need to work on the lab computers in Phillips 318.
For this class, we need to use Python version 3.9.12. This is the most recent version
of Anaconda, and has proven to be the most stable on all (new) systems. Note that it is
not the most recent version of Python; the version on python.org is 3.10.6. However,
that version is not stable and we recommend that you uninstall it in favor of Anaconda.
Installing Anaconda for Python 3.9.12
|
Windows 64-bit Anaconda 3.9.12 |
Windows 32-bit Anaconda 3.9.12 |
Use one of the two links above to install the correct version for your operating system. Almost all modern Window installations are 64-bit. We recommend that you try this one first. If that does not work, then you can switch to the 32-bit version. The 32-bit version is guaranteed to work on all systems.
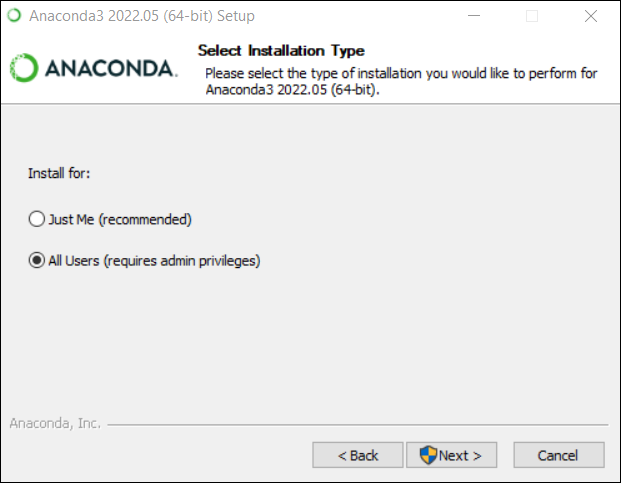
The file that you download is an installer app. Simply double click on it and follow directions. At one point in the installer, it will ask you whether you want to install for yourself or for all users. Select the option “All Users (requires admin privileges)”, as shown below.
When you do this, you will get a protection warning that looks like the one shown below.
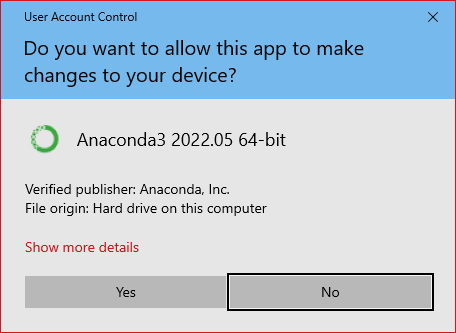
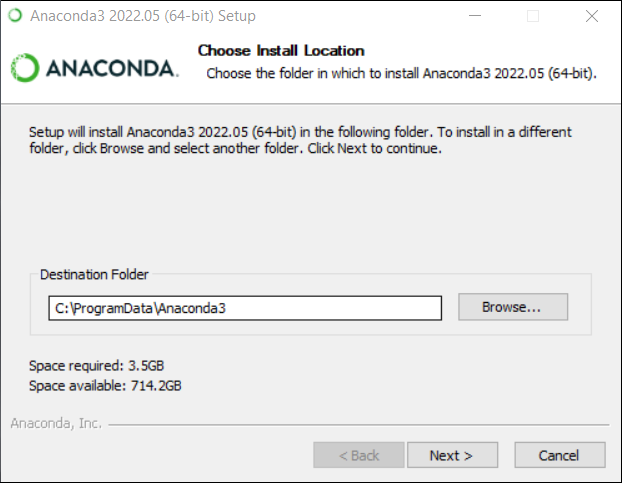
Click Yes to return to the installer. On the next page it will ask you what directory
you want to install in. By default, it will install in C:\ProgramData\Anaconda3. You
need this folder for Cornell Extensions to work properly. If what you see does not
match up seek help immediately.
Otherwise leave this alone and click Next,
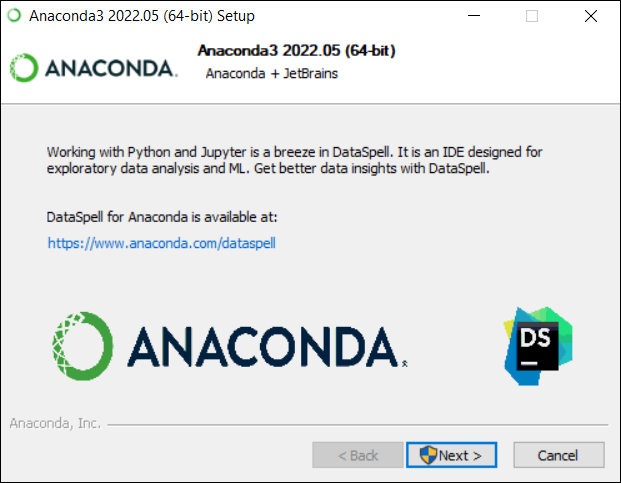
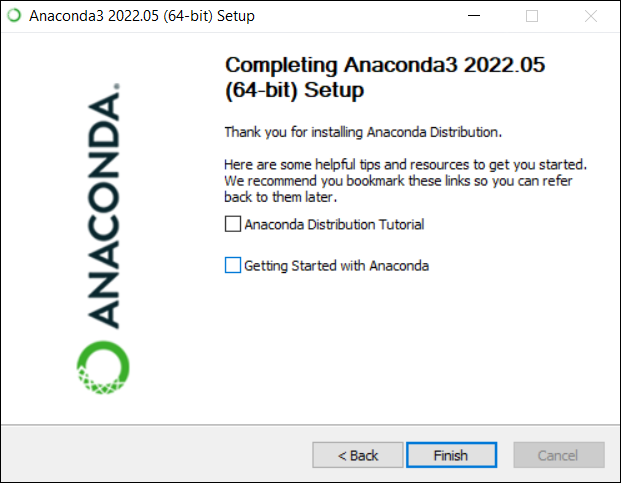
Click Next one more time to start the installation. When you are done, you will see some information about installing DataSpell. While you are not prohibited from installing this program, we will not be using it this semester, and we will not provide help on how to use it.
We also recommend that you leave the boxes blank on the final setup page.
Installing the Cornell Extensions
|
Windows (All) Extensions |
Download the file from the link above. Because these extensions contain a script file, your version of Windows might think it is a Trojan and give you the following warning.
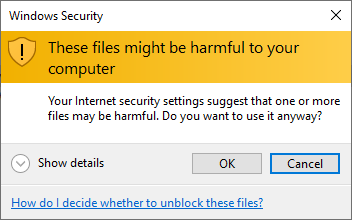
You should ignore this and click Ok. After downloading, you will see that this is a
folder with a zipper on it. Double click on the folder. This will open an Explorer
Window with another folder inside of it called CornellExtensionsInstall
Drag the CornellExtensionsInstall folder on to your Desktop. This is important,
as the installation is not guaranteed to work if you click on the installer
while it is still inside the folder with the zipper (files inside of zipped folders
are not “real” until you pull them out).
Now that you have a copy of CornellExtensionsInstall on your Desktop, open this
folder (again, not the one in the zipped folder!). Inside, you should see the
following two items:
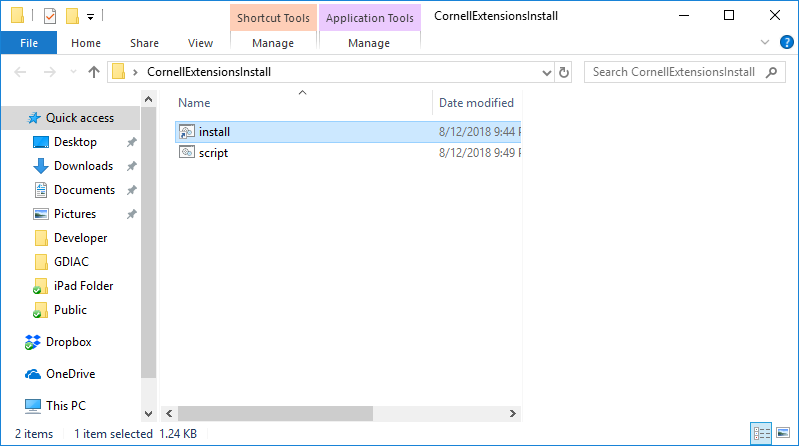
Double-click on the file that is named install. This will pop up a window
with a lot of scrolling text in it. Do not close the Window until you see the line that
says “Installation Complete”, and asking you to hit a key. If you close the Window too
early, you will have to install a second time.
On some Windows systems, the security settings may prevent you from installing Cornell Extensions. On those systems, you will see a security message like the one below.
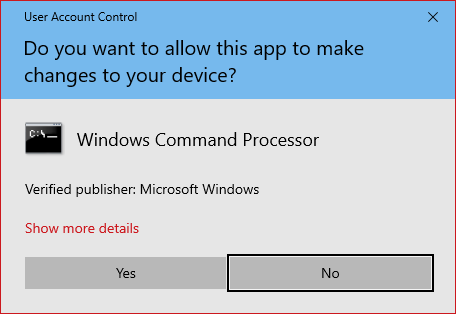
Click Yes to finish the installation. Once you have finished with the Cornell Extensions, you should immediately test your installation.
Installing on Macintosh
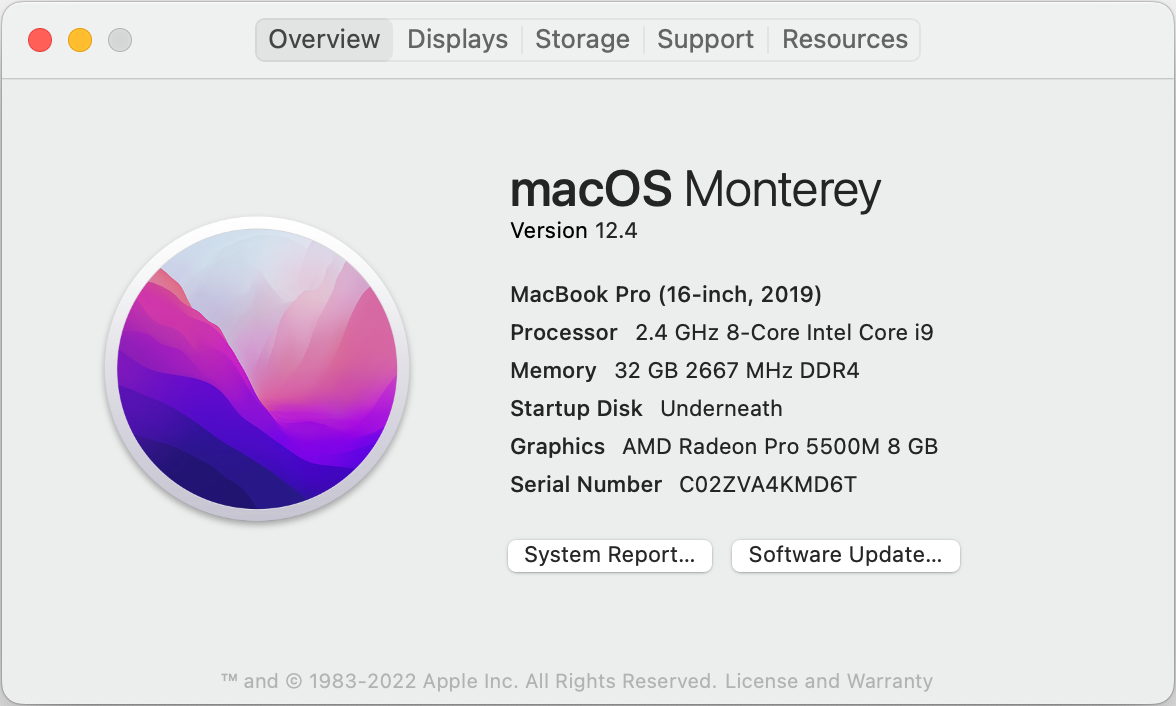
While Macs are a great platform to run Python on, the switch away from Intel has made things a little confusing. The first thing you need to do before you install on your Mac is to find the version of macOS you are running. You can find this out by selecting About This Mac from the Apple Menu. For example, in the picture below, the Mac is running Montery (macOS 12) on top of Intel.
We do not support any version of macOS older than Catalina (macOS 10.15). If you are running on Mojave (macOS 10.14) or older, you will need to update your computer. If this is not possible, please talk to one of the instructors, though it is likely that you will simply have to work on the lab computers in Phillips 318.
Provided that you are running an appropriate version of macOS, the next thing to indentify is the processor. Older Macs run on Intel chips, while newer Macs run on Apple Silicon. And Apple Silicon chip is often called an M1. When you choose About This Mac you will see the following.
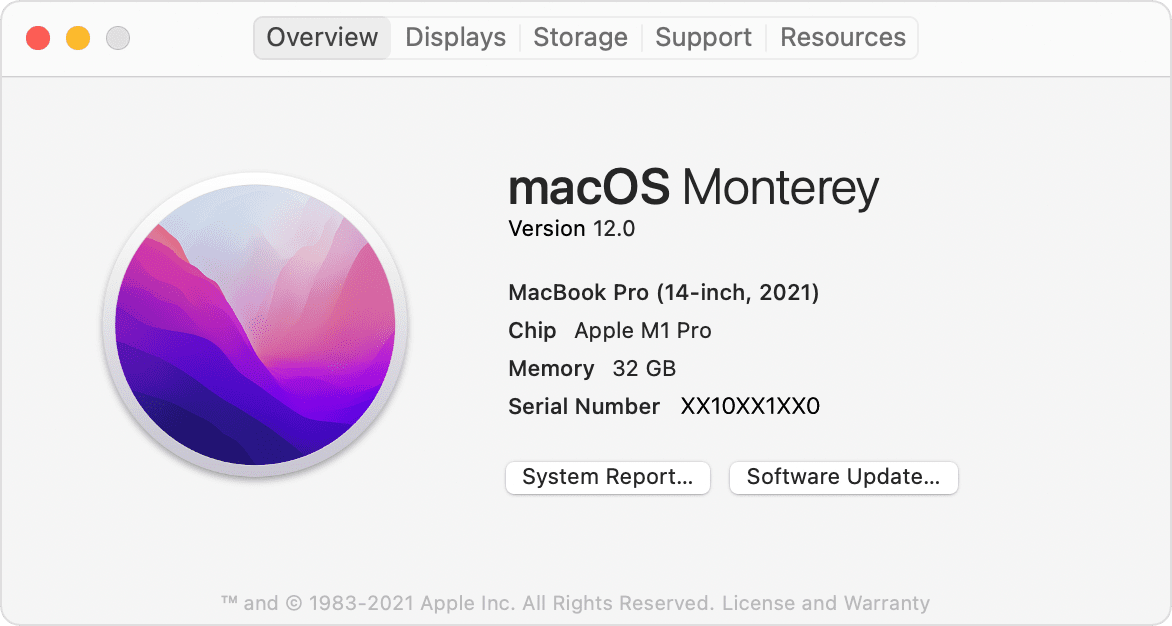
As a general rule, you can always be safe by using the Intel version. Silicon Macs can run Intel software, but the reverse is not true.
Installing Anaconda for MacOS
|
macOS (Intel) Anaconda 3.9.12 |
macOS (Silicon) Anaconda 3.9.12 |
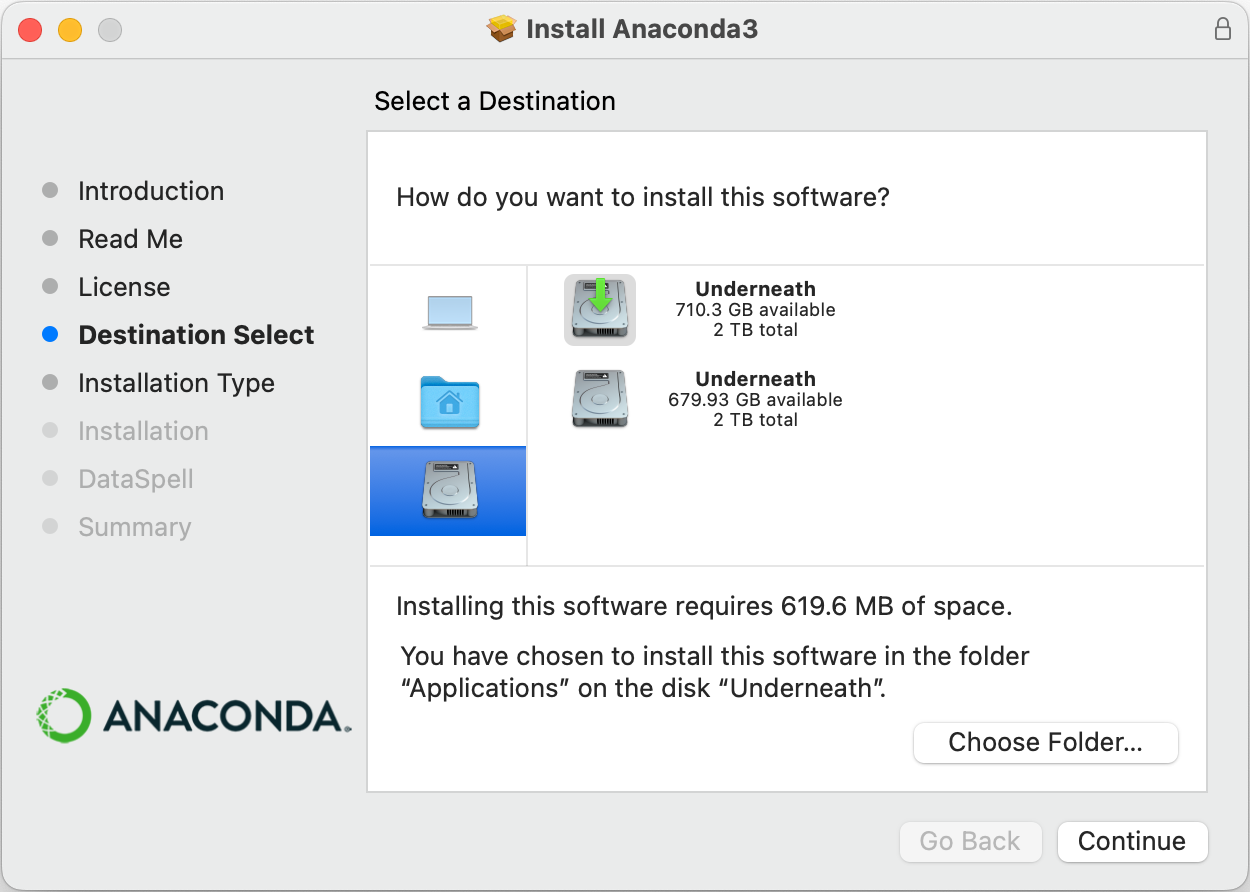
Use the above link to install the correct version for your operating system. The file that you download is an installer app. Double click on it to start the installation. Stop when you see this page.
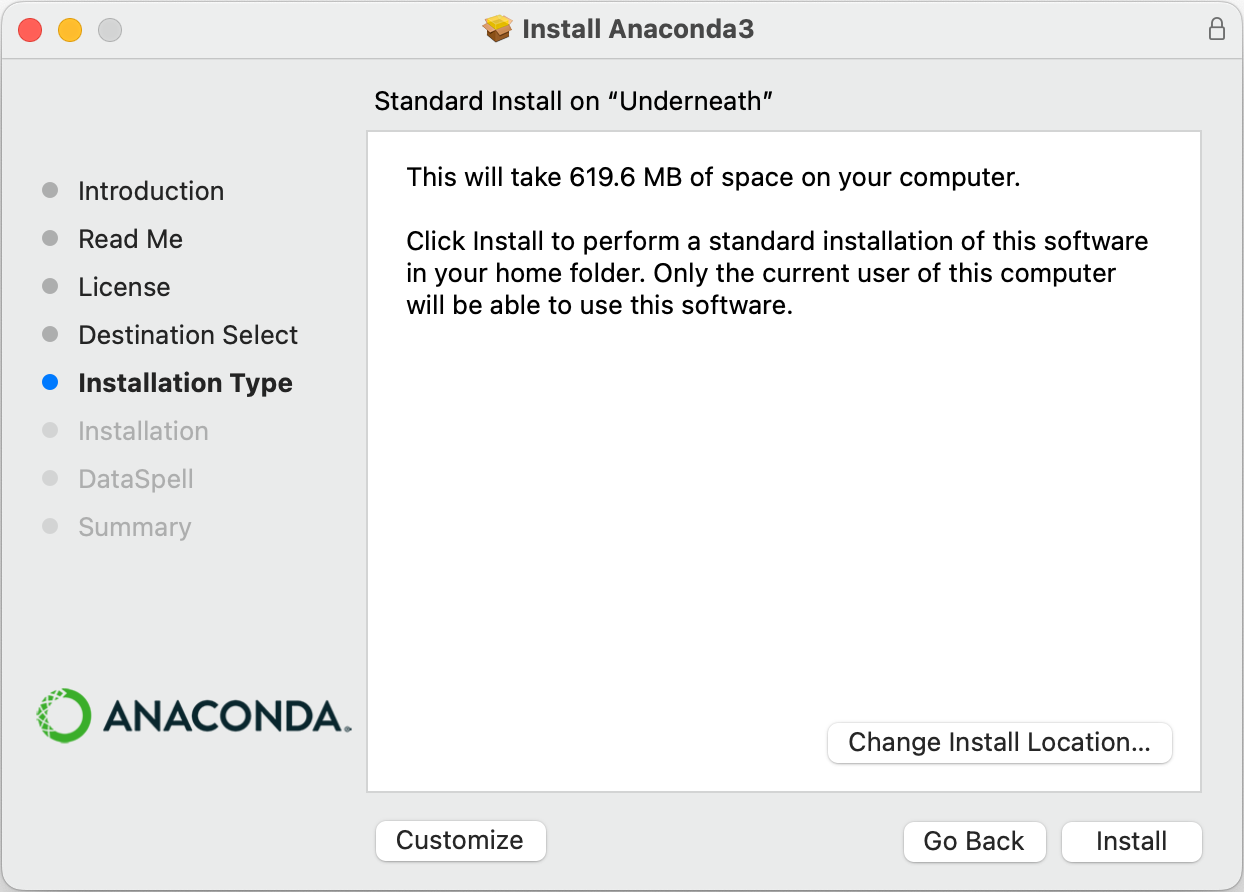
We have discovered that the default install location causes problems on Apple Silicon. Therefore, to make it easier to help you, we want everyone to click Change Install Location…. We recommend this even for Mac users on Intel processors.
After you click on this button, you should see the following.
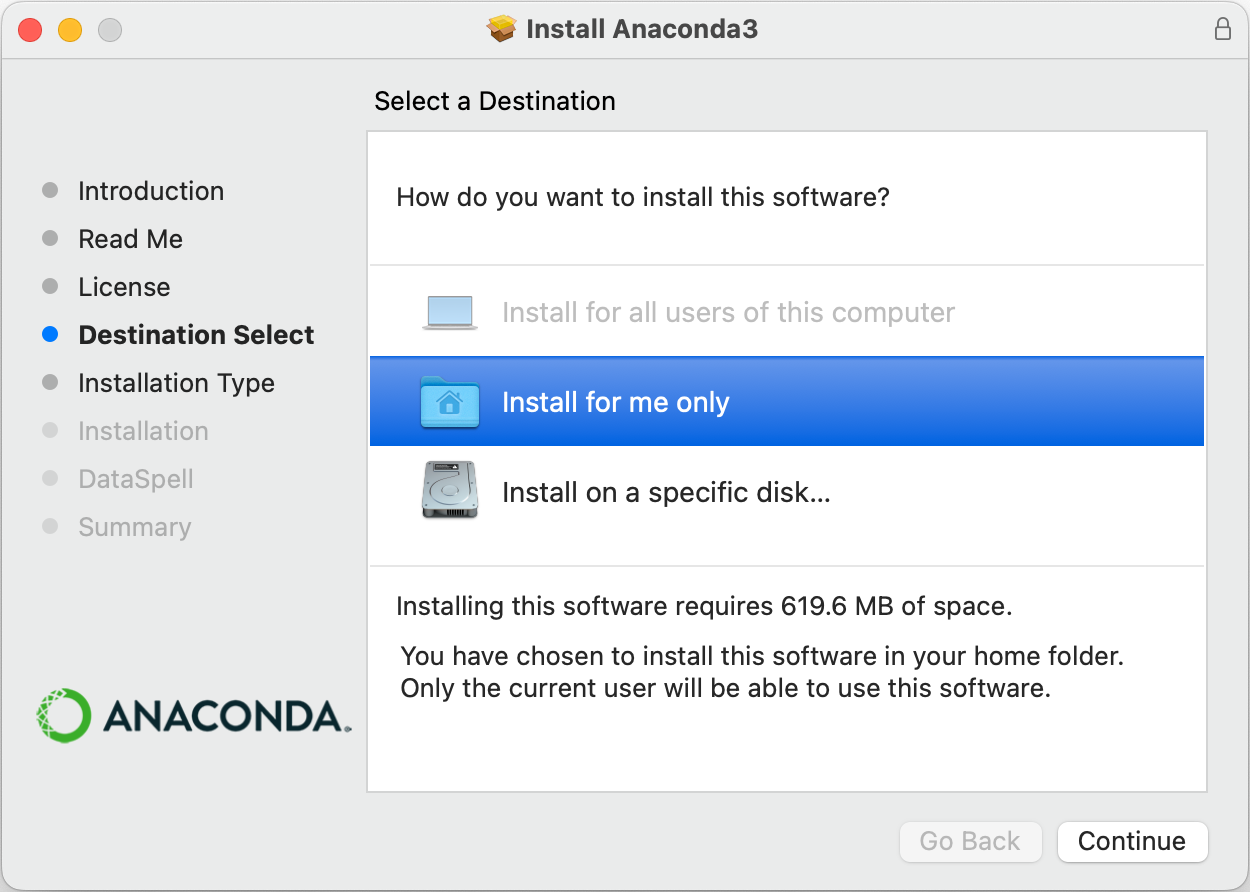
You must change this to Install on a specific disk…. Click on the image of the hard drive, and you will see a picture similar to the one below. Note that you might see the hard drive twice. This is a weird feature on new Macs where Apple splits your hard drive into two parts for security reasons. Simply click on the top hard drive so that is has the green arrow on it, like we have done.
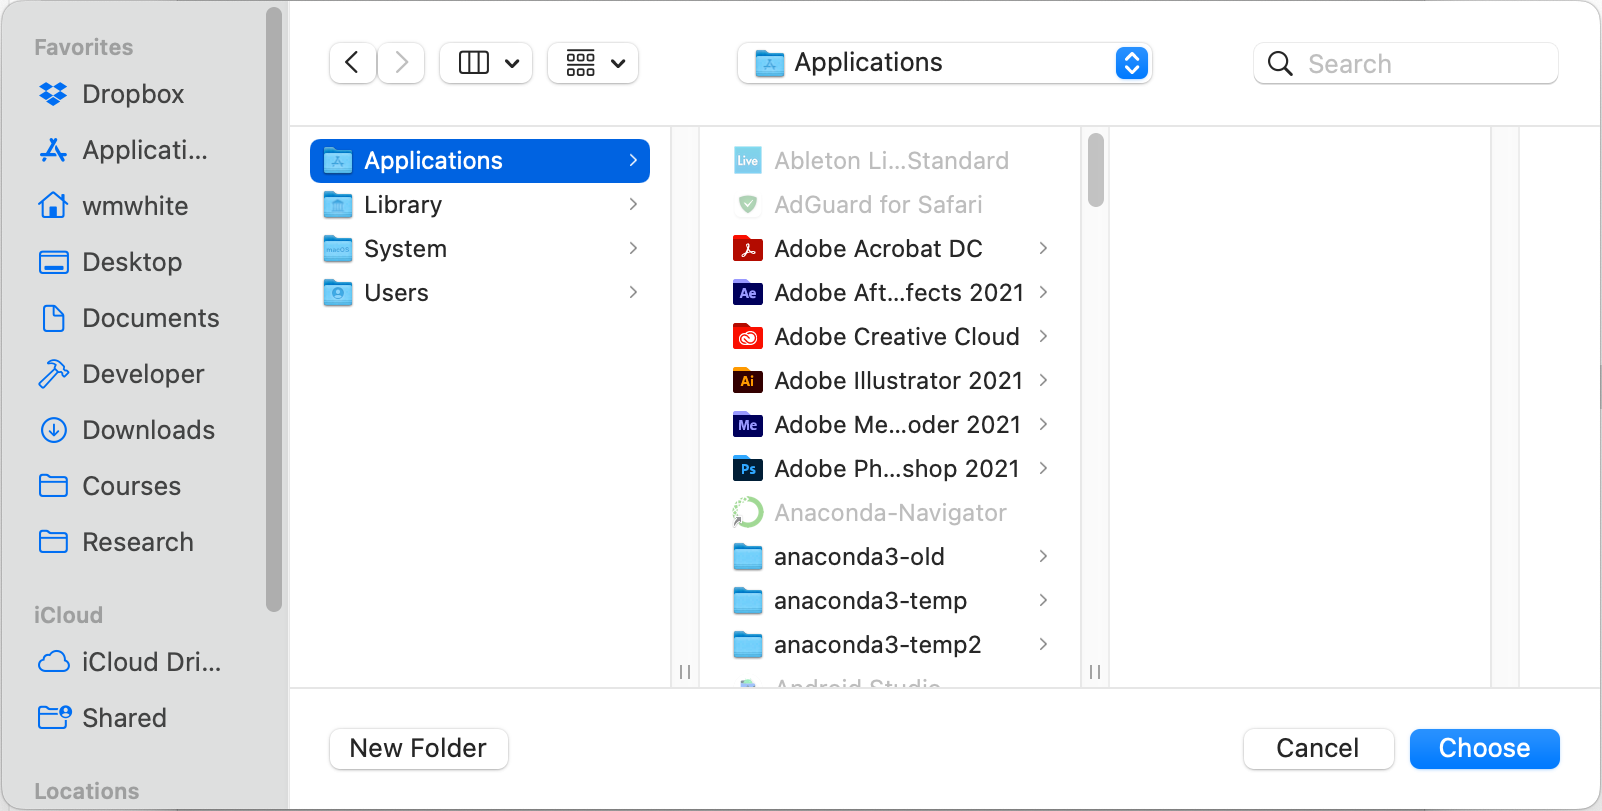
Now you need to select Choose Folder. We want you to put it in the Applications folder as shown below. This is the standard place to install apps on a Mac.
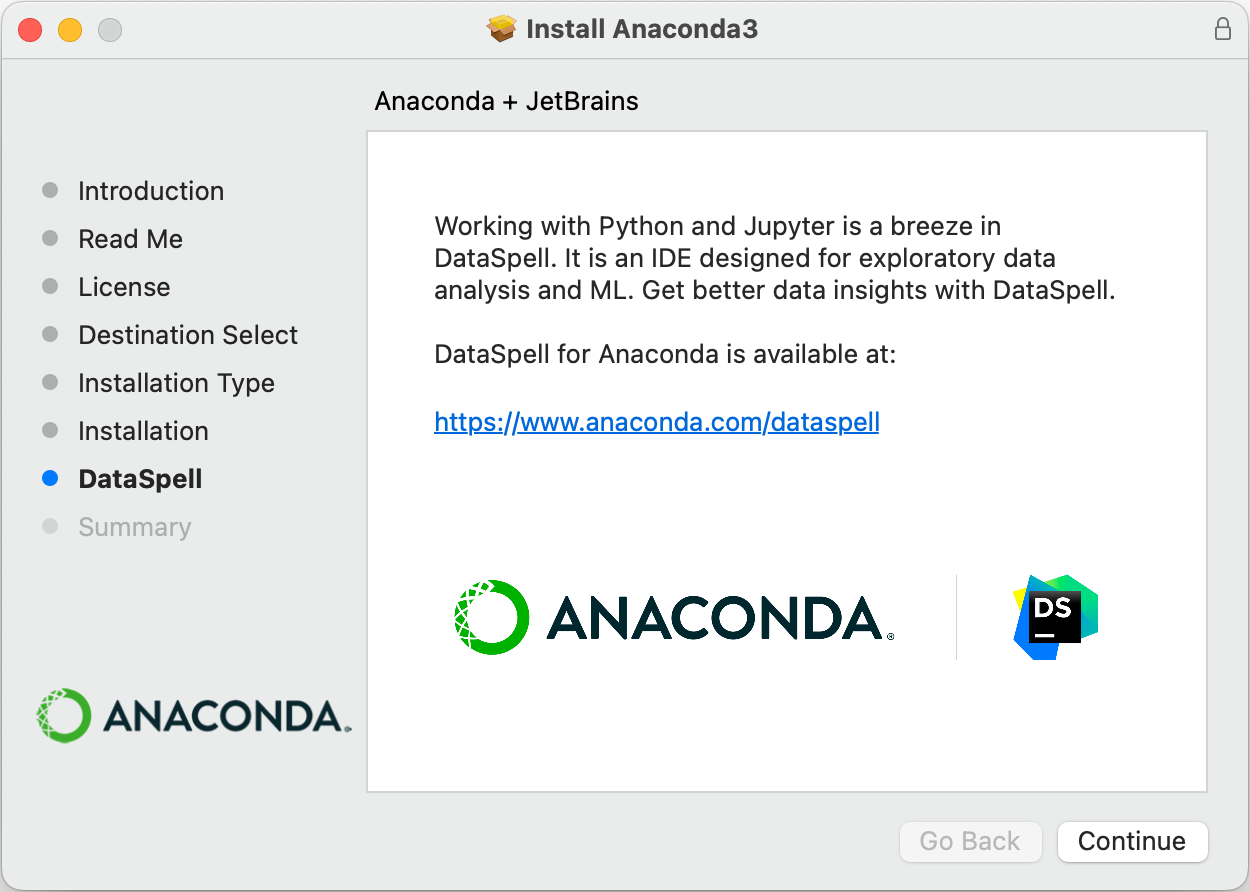
You should now continue the installation as normal. When you are done installing, you will receive some information about an application called DataSpell. While you are not prohibited from installing this program, we will not be using it this semester, and we will not provide help on how to use it.
Installing the Cornell Extensions
|
macOS (All) Extensions |
The last step is to install the Cornell Extensions for CS 1110. Download this file from the link above. After downloading the file, double click on it to unzip the contents into a folder somewhere on your computer.
Once again, you see will a package installer. Double click thid installer. You may see a warning telling you that this is not an official installer (because we made it). If that happens, you will need to control-click the installer and select Open from the drop-down menu.
If the installer launches properly, you will see the following window:
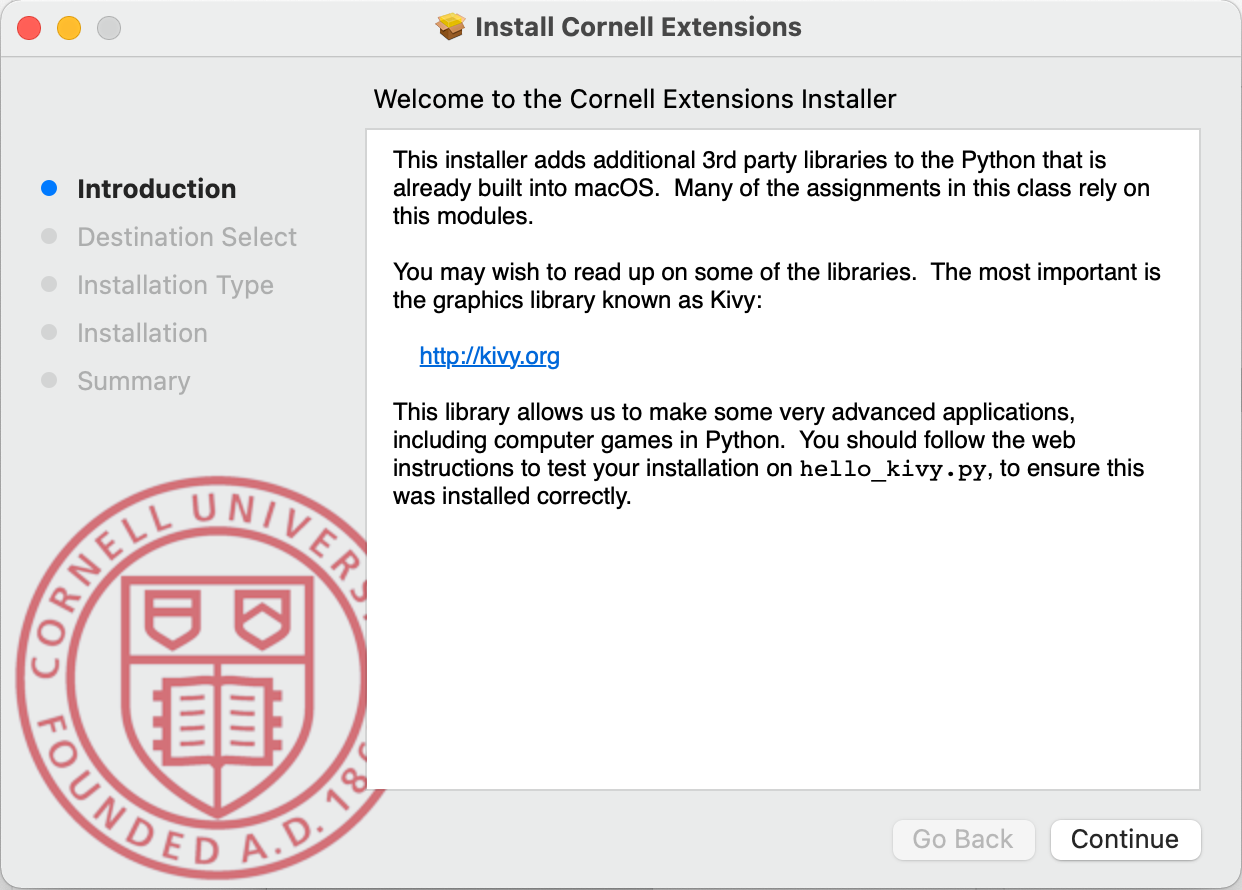
Follow the directions for the installer. Your installation is now complete. Once you have finished with the Cornell Extensions, you should immediately test your installation.
Installing on Linux
Linux installation is possible, but it is not as straight-forward as the two main OS options. In particular, to install on Linux, you have to be comfortable with the Terminal and be ready to install files with a package installer. If this sounds daunting to you, you might want to rethink about whether you want to use Linux just yet.
For this class, we need to use Python version 3.9.12. This is not the most recent version of Python, but it is the most recent version supported by Anaconda. If you do not want to install Anaconda you have to follow the instructions for an alternate Python.
In the past, we have had install parties for Linux users. We have worked to make the instructions more self-sufficient this year. However, if there is still demand for a Linux install party, post your request on Ed Discussions.
Installing Anaconda for Python 3.9.12
|
Linux Intel (x86_64) Anaconda 3.9.12 |
Linux ARM (aarch64) Anaconda 3.9.12 |
Use one of the two links above to install the correct version for your processor. While most Linux machines still use Intel, we are starting to see more ARM versions these days. As using Linux requires substantial technical know-how, we will assume that you know your machine’s processor.
Note that these are not a graphical installers. To install Anaconda, you must navigate to the folder with the downloaded file and run it with bash. For example, if you downloaded the Intel version, you would type:
bash Anaconda3-2021.05-Linux-x86_64.sh
You must use the “bash” command even if you are not using the bash shell.
You may install Anaconda where ever you wish. By default, it installs in your home
directory. However, we prefer to install it in /usr/local. The choice is
up to you.
Installing the Cornell Extensions
Because Linux platforms are so different, there is no one-click installer for Linux.
In particular, we would need to know whether you are using apt-get (Debian, Ubuntu)
or yum to install software. So we will let you do this on your own. There are
two important steps.
Installing Kivy
Kivy is the graphics library that we will be using for several of the assignments in this class. In the past, students have had to compile this library from source code. However, Kivy now has installers for several flavors on Linux. Look at the downloads page for more information.
For Ubuntu, you will notice that the instructions suggest using apt-get. This
only works for installing Kivy into the the official Ubuntu Python 3. This version of
Python is old and missing a lot of packages. Therefore, we suggest that you install
using PIP.
The exact sequence for installing on Linux (assuming you are running Python 3.9.12)
is as follows:
    > sudo pip install --upgrade pip setuptools
    > pip install kivy[base]
Installing introcs
If you got Kivy working, then you are almost done. The last step is the easiest. You need to install the introcs package using PIP. The command is
> pip install introcs
Once this is installed, you are are ready to test your installation.
Using An Alternate Version of Python
If anything goes really wrong, you may just want to use the built-in Python 3 provided
by your version of Linux. It is not ideal (many are still using 3.5 or 3.6), but it will
get you through the course. However, if you go your own way, there are several packages
that you must install (using PIP). All of these packages are in addition to Kivy
and introcs.
Keep in mind that this option may require you to build Kivy from source. If you cannot figure out how to do that, you may want to rethink using Linux for the semester.
Getting Started with Python
Before you do anything else, you must fully test out our Python installation. You need to verify that both Anaconda and Cornell Extensions are installed correctly. It is easier to fix problems now than waiting until later.
Running the Python Shell
The first thing that you need to do is to familiarize yourself with command shell for your OS. The command shell is a text-based version of the Windows Explorer or Finder; you can use it to move and rename files and folders. It is also how we will run Python in this class.
Using the command shell requires a bit of practice, so we have created a separate page of instructions for this. Right now, all you need to know is how to start up the command shell. You do not need to know any special commands. Start the command shell for your OS and type
python
This will put you in the “Python Interactive Shell”.
IMPORTANT: If you did not install CornellExtensions correctly on Windows this command will immediately launch the Windows Store. That is because the command shell cannot find Anaconda and is looking for an alternative. Go to consulting hours immediately for help if this happens.
The Python Interactive Shell looks exactly like the command shell except that it takes Python commands (and does not respond to operating system commands to list files or change the working directory). While the command shells are different for all operating systems, the Python Interactive Shell should look and behave exactly the same way for everyone. On Windows, it will look something like this.
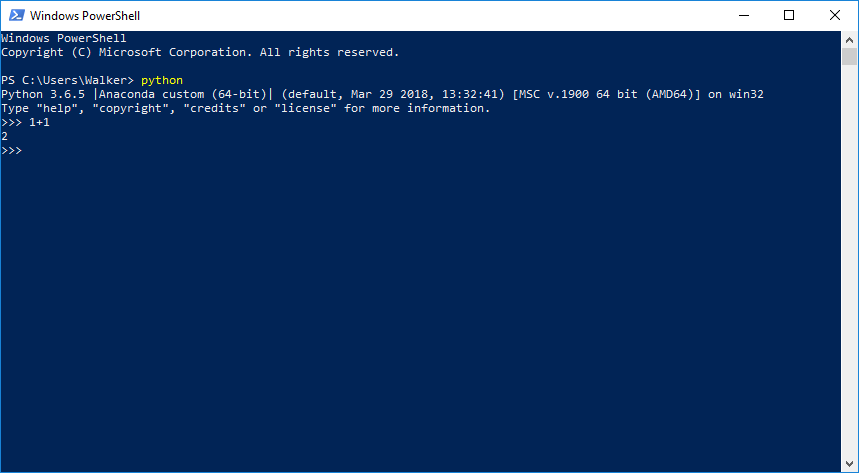
The >>> symbols are the prompt. To get the shell to do something, just type a Python command. For example, type
>>> 1+1
and hit Return (do not type the >>>; it is already there). See what happens?
To exit the Python Interactive Shell, type quit() and hit Return.
You can also exit by typing Control-D.
Testing a Script
It is possible to run a Python script from the command shell as well. A script
is a file (ending in suffix .py) containing Python code. We will
use them throughout the course. To run a script, you type
python <filename>
from the command shell. Do not try to type this in the Python Interactive Shell. This can be a bit confusing at first; it is important to keep the following straight:
- The command shell is a program for accessing files via text based commands. You start Python in this program, but it is not Python.
- The Python Interactive Shell is a program that runs inside the command shell. You can tell it is running by the presence of the >>> prompt.
Running a script does not start the Python Interactive Shell. It runs all of the commands in the file, and then quits immediately when done with the file.
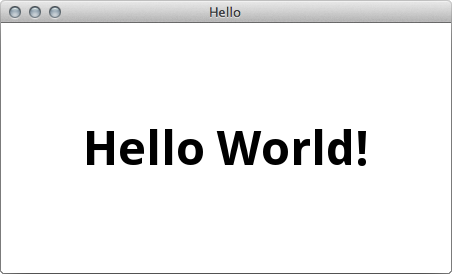
To test that your installation is working properly, we have two cute Python scripts that display a GUI with the phrase “Hello World!” inside it, as shown below.
To try these out on your computer, download the following files:
Put these both in some easy-to-find folder. To run them, open up a command shell and
navigate to this folder using the drag-and-drop
trick for changing directories.
Then run each of the scripts. To run hello_tk.py, type
python hello_tk.py
To run hello_kivy.py, type
python hello_kivy.py
If you have installed everything correctly, you should see the image above each time. The reason we have two scripts is because There are actually two different ways to create GUIs in Python, and we need to make sure that both work.
If either of the scripts fails, look very carefully at the error messages. If it says it cannot find the file, then you did not use the drag-and-drop trick correctly. We recommend that you practice with the command shell tutorial some more. Otherwise, this means is a problem with your installation of Python. Post your error message to Ed Discussions and we will try to help you out.
Installing VSCode
|
Windows (All) VSCode |
macOS (All) VSCode |
The last program to install is VSCode. Unlike Python, you will not use this program right away. In fact, we will not start to use it until the third week of class. The purpose of VSCode is to make these mysterious scripts that you tested in the previous step.
Technically, you can write Python scripts in any text editor (e.g. a Word processor that only produces text and does not have fonts or fancy formatting). NotePad and WordPad are text editors in Windows, while TextEdit is provided by MacOS. The reason we use VSCode is that it is the same across all platforms. That allows you to collaborate with partners who might be working on other operating systems. Some people prefer Sublime Text, but that program is not free. This course used to use Atom Edit, which is far better for beginners; however it will be discontinued this December, so we needed an alternative.
To install VSCode, click the button above download the appropriate file. If you are using a Windows computer, the downloaded file will be an .exe file. Double click it and VSCode should install automatically. If you are using a a Mac computer, the downloaded file should be a .zip. Double click on that .zip file, and then drag the resulting VSCode.app to your applications folder. Finally, if you are using Linux, you should go directly to the VSCode website and follow the instructions there.
Adding the Extension
One of the reasons we have used Atom over VSCode in the past is because VSCode does not support Python out of the box. It requires some additional set-up. But now that Microsoft has decided to pick favorites (Microsoft made both editors), we have no choice other than to take you through these additional steps.
Start up VSCode. You will see three icons on the left of the Window. The bottom one consists of four boxes, with the top right box pulling away from the other three. This is the extensions tab. Click on it. You should see a bewildering array of extensions, as shown below.
 Click for Bigger Image
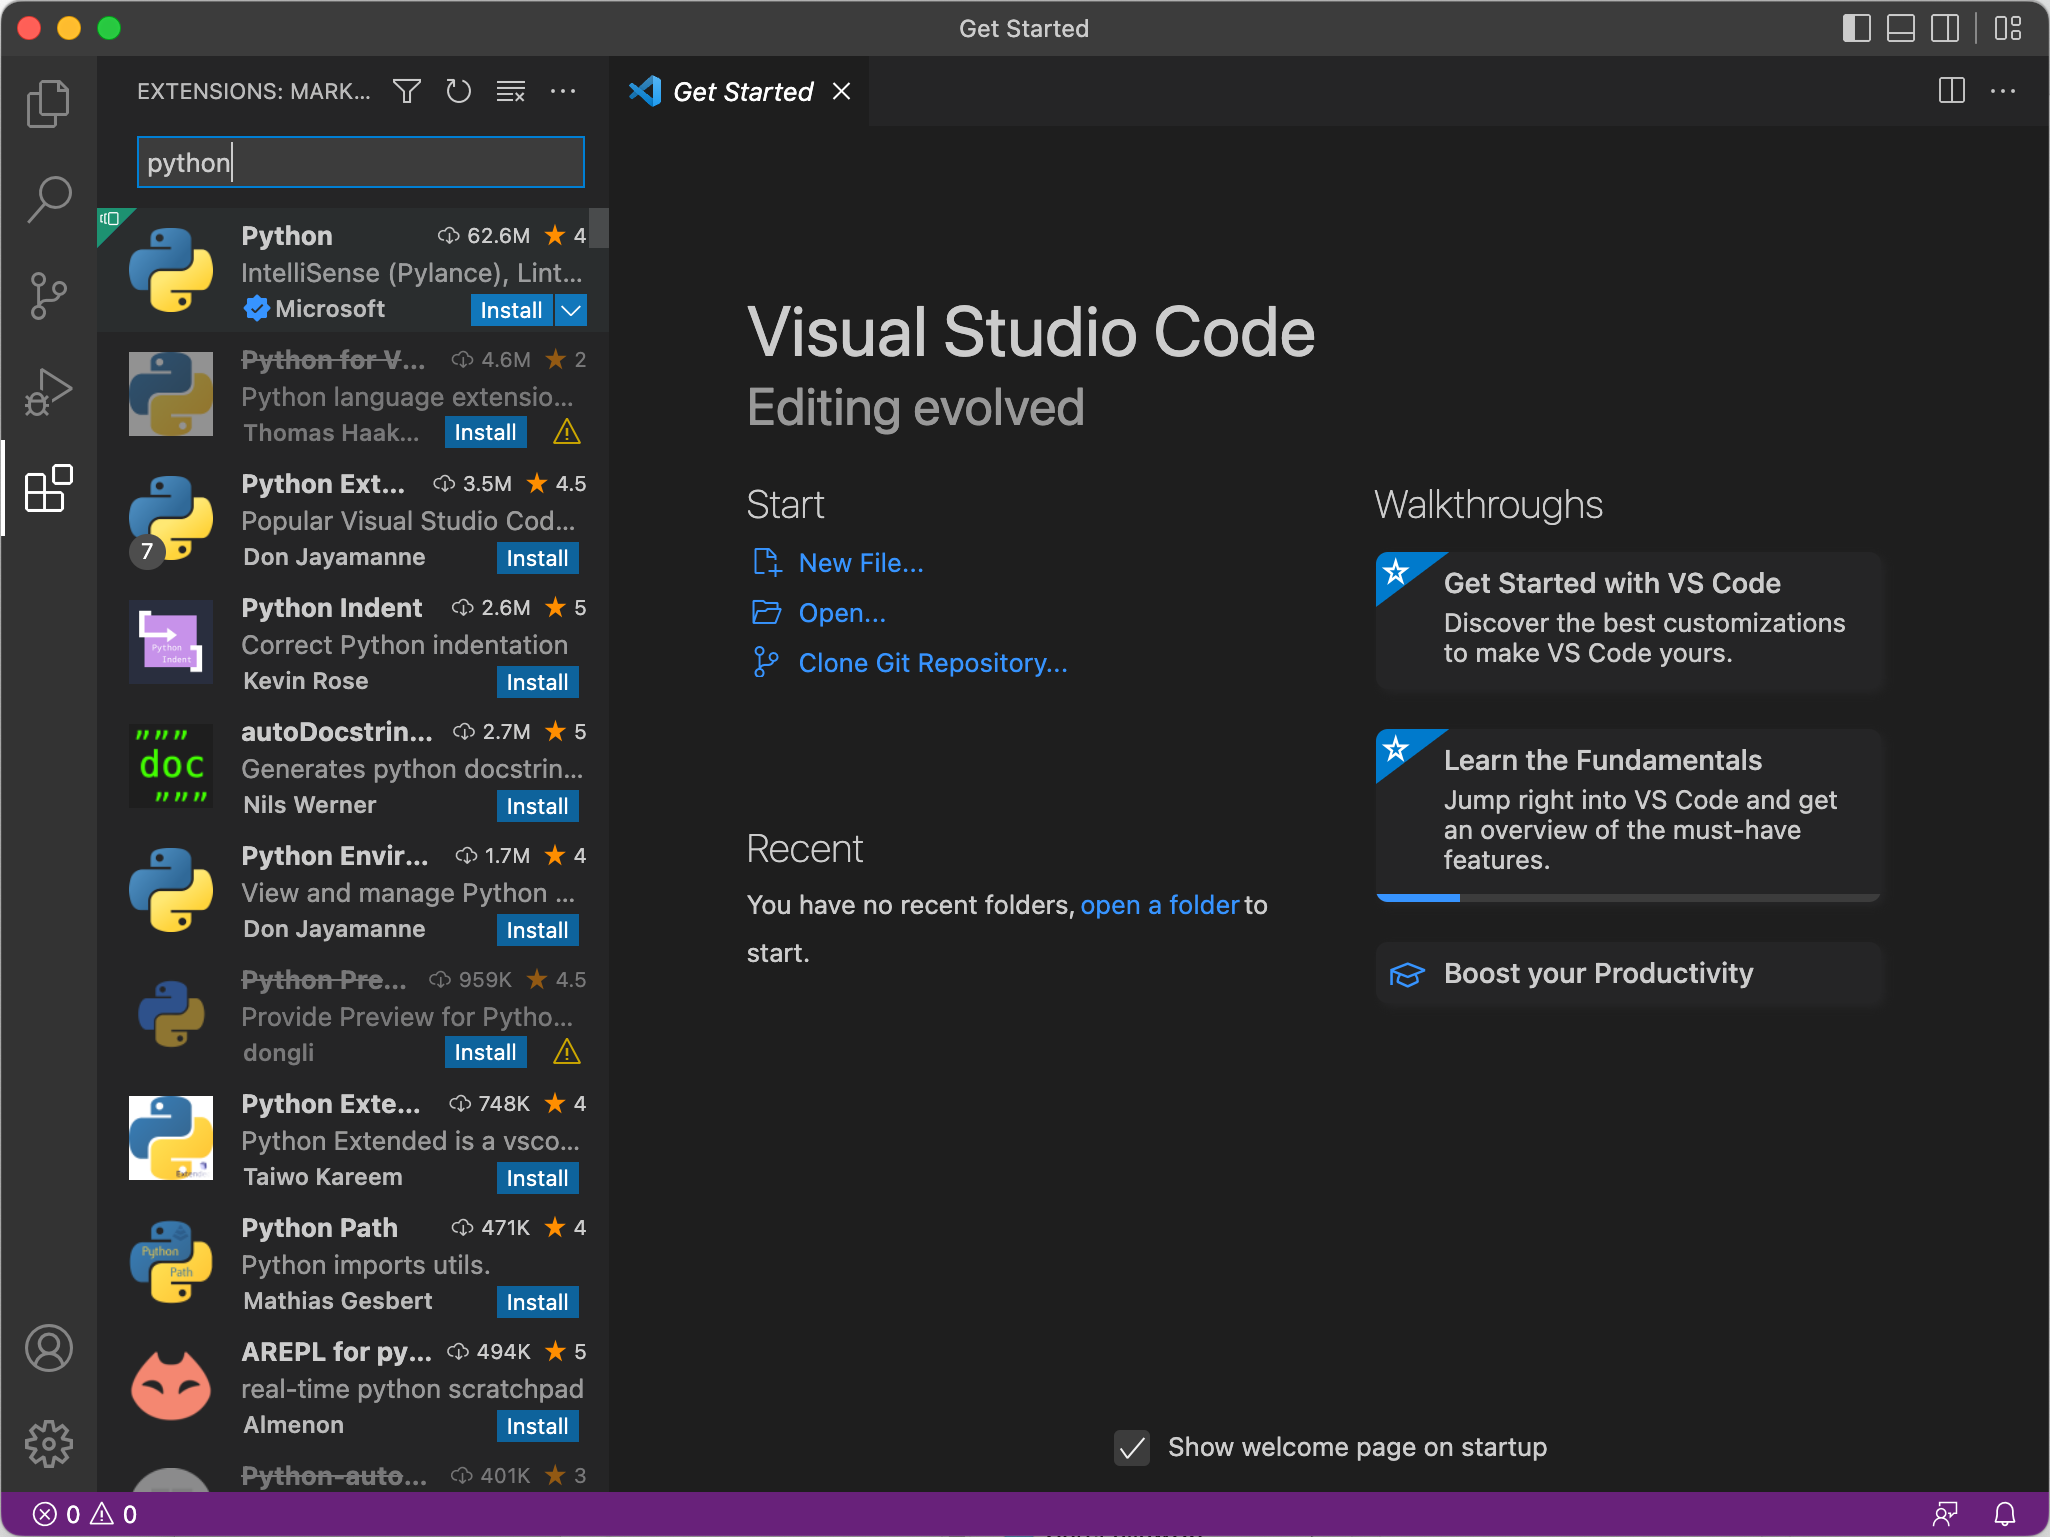
It is likely that the extension we want is already visible. But just to be sure, type “python” into the search box. This will restrict the extensions to those used for Python, as shown below.
 Click for Bigger Image
That top extension, simply labeled Python. Click on it and then press the Install button.
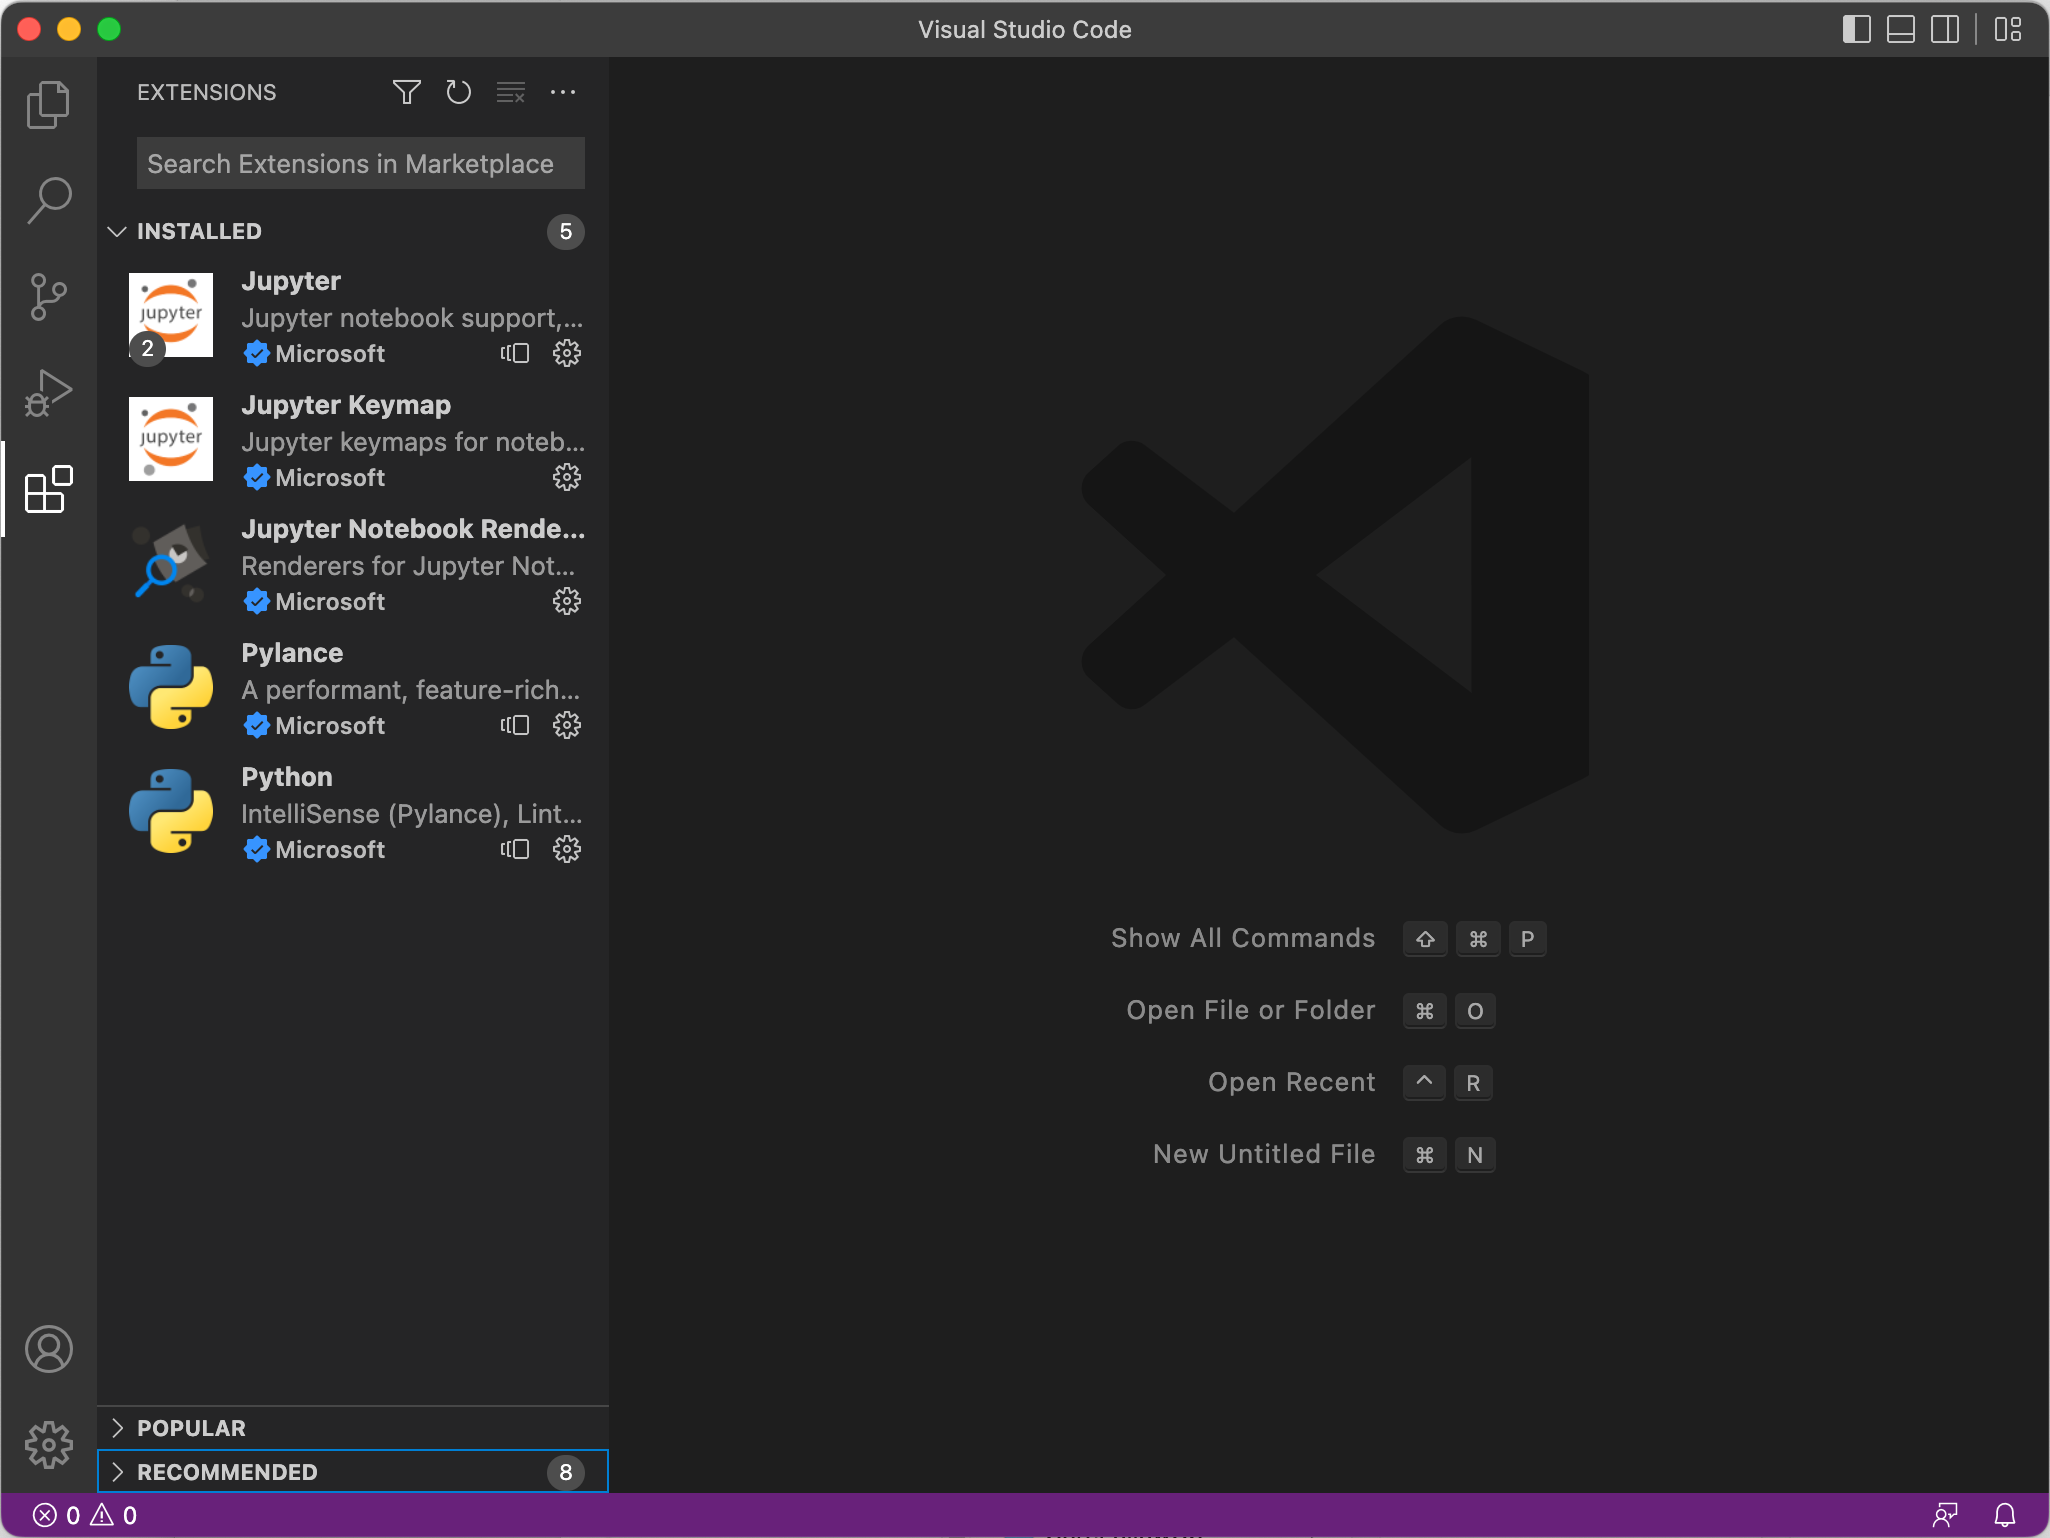
When you are done, we want to make sure everything is correctly installed. Remove “python” from the search box. It should now show you the installed extensions. Installing the Python extension actually installed five different extensions, as shown below.
 Click for Bigger Image
Configuring VSCode
There is one more thing that we need you to do. VSCode tries to be a little too helpful in its suggestions and it is known for making wrong suggestions. We want to turn those off. This is not an academic integrity issue. It is simply a matter of keeping you from fighting against VSCode when it decides to go full metal Clippy.
Open up Settings. To access settings, press Control-, (Control-comma) on all computers except Macs. Mac users should press ⌘, (Command-comma). When you do this, you should see the following.
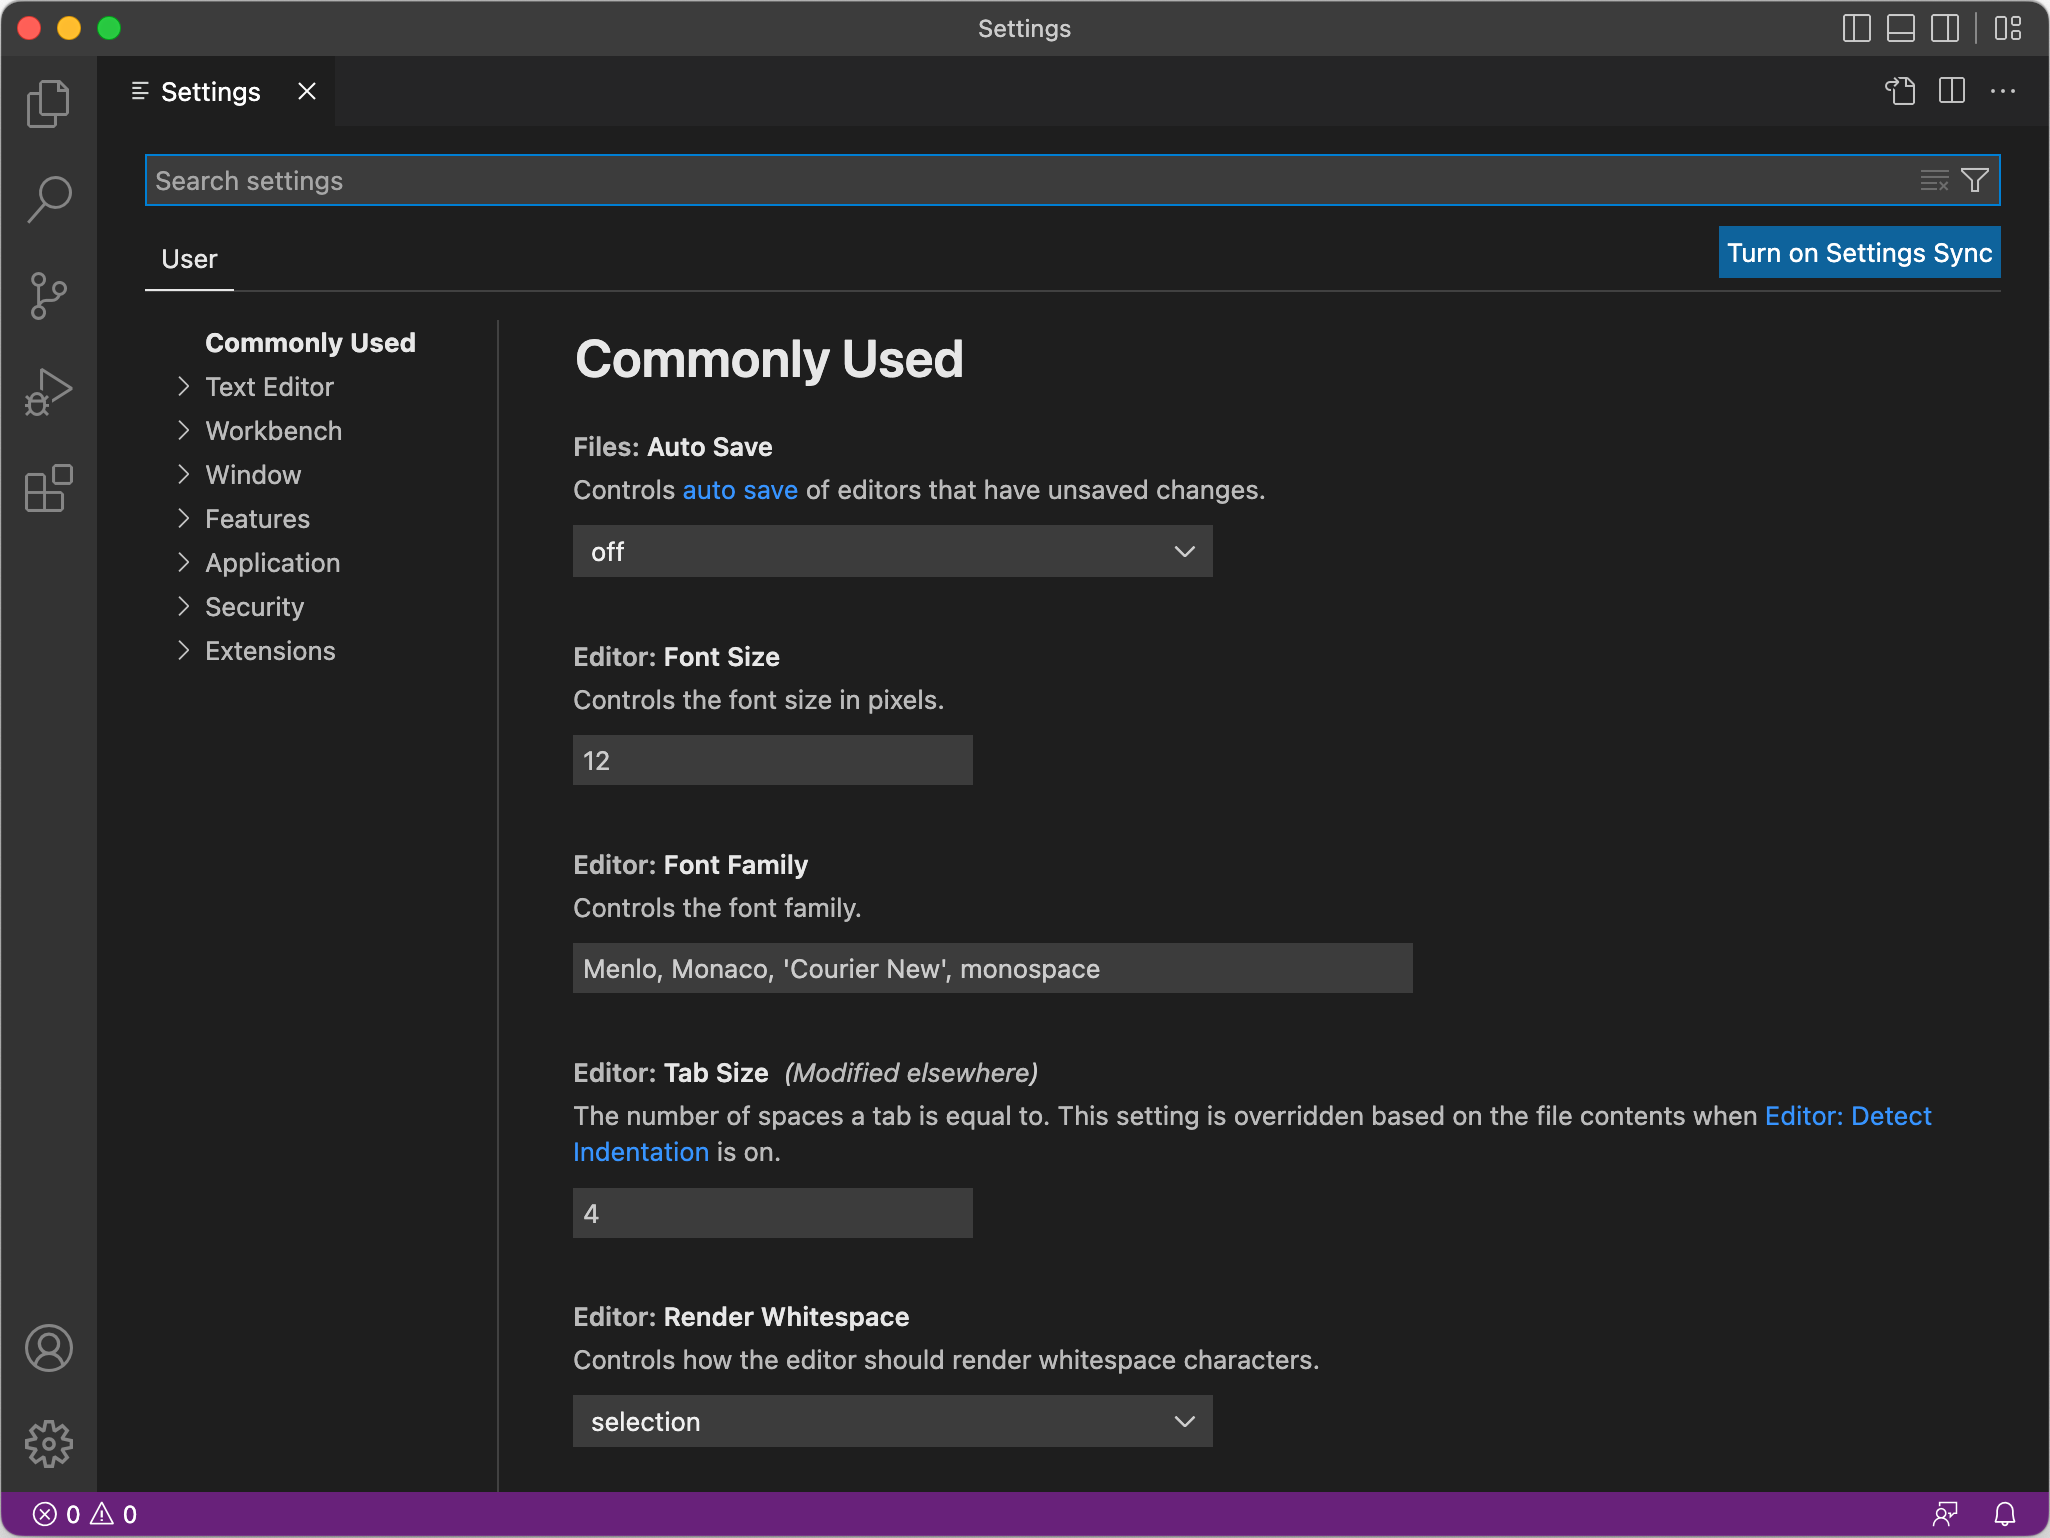 Click for Bigger Image
On the left, click Extensions and then click Pylance (not Python). The first option you should see on the right is Auto Import Completions. Remove the check from this box. When you do that, it should look like the image below (without the red box for emphasis).
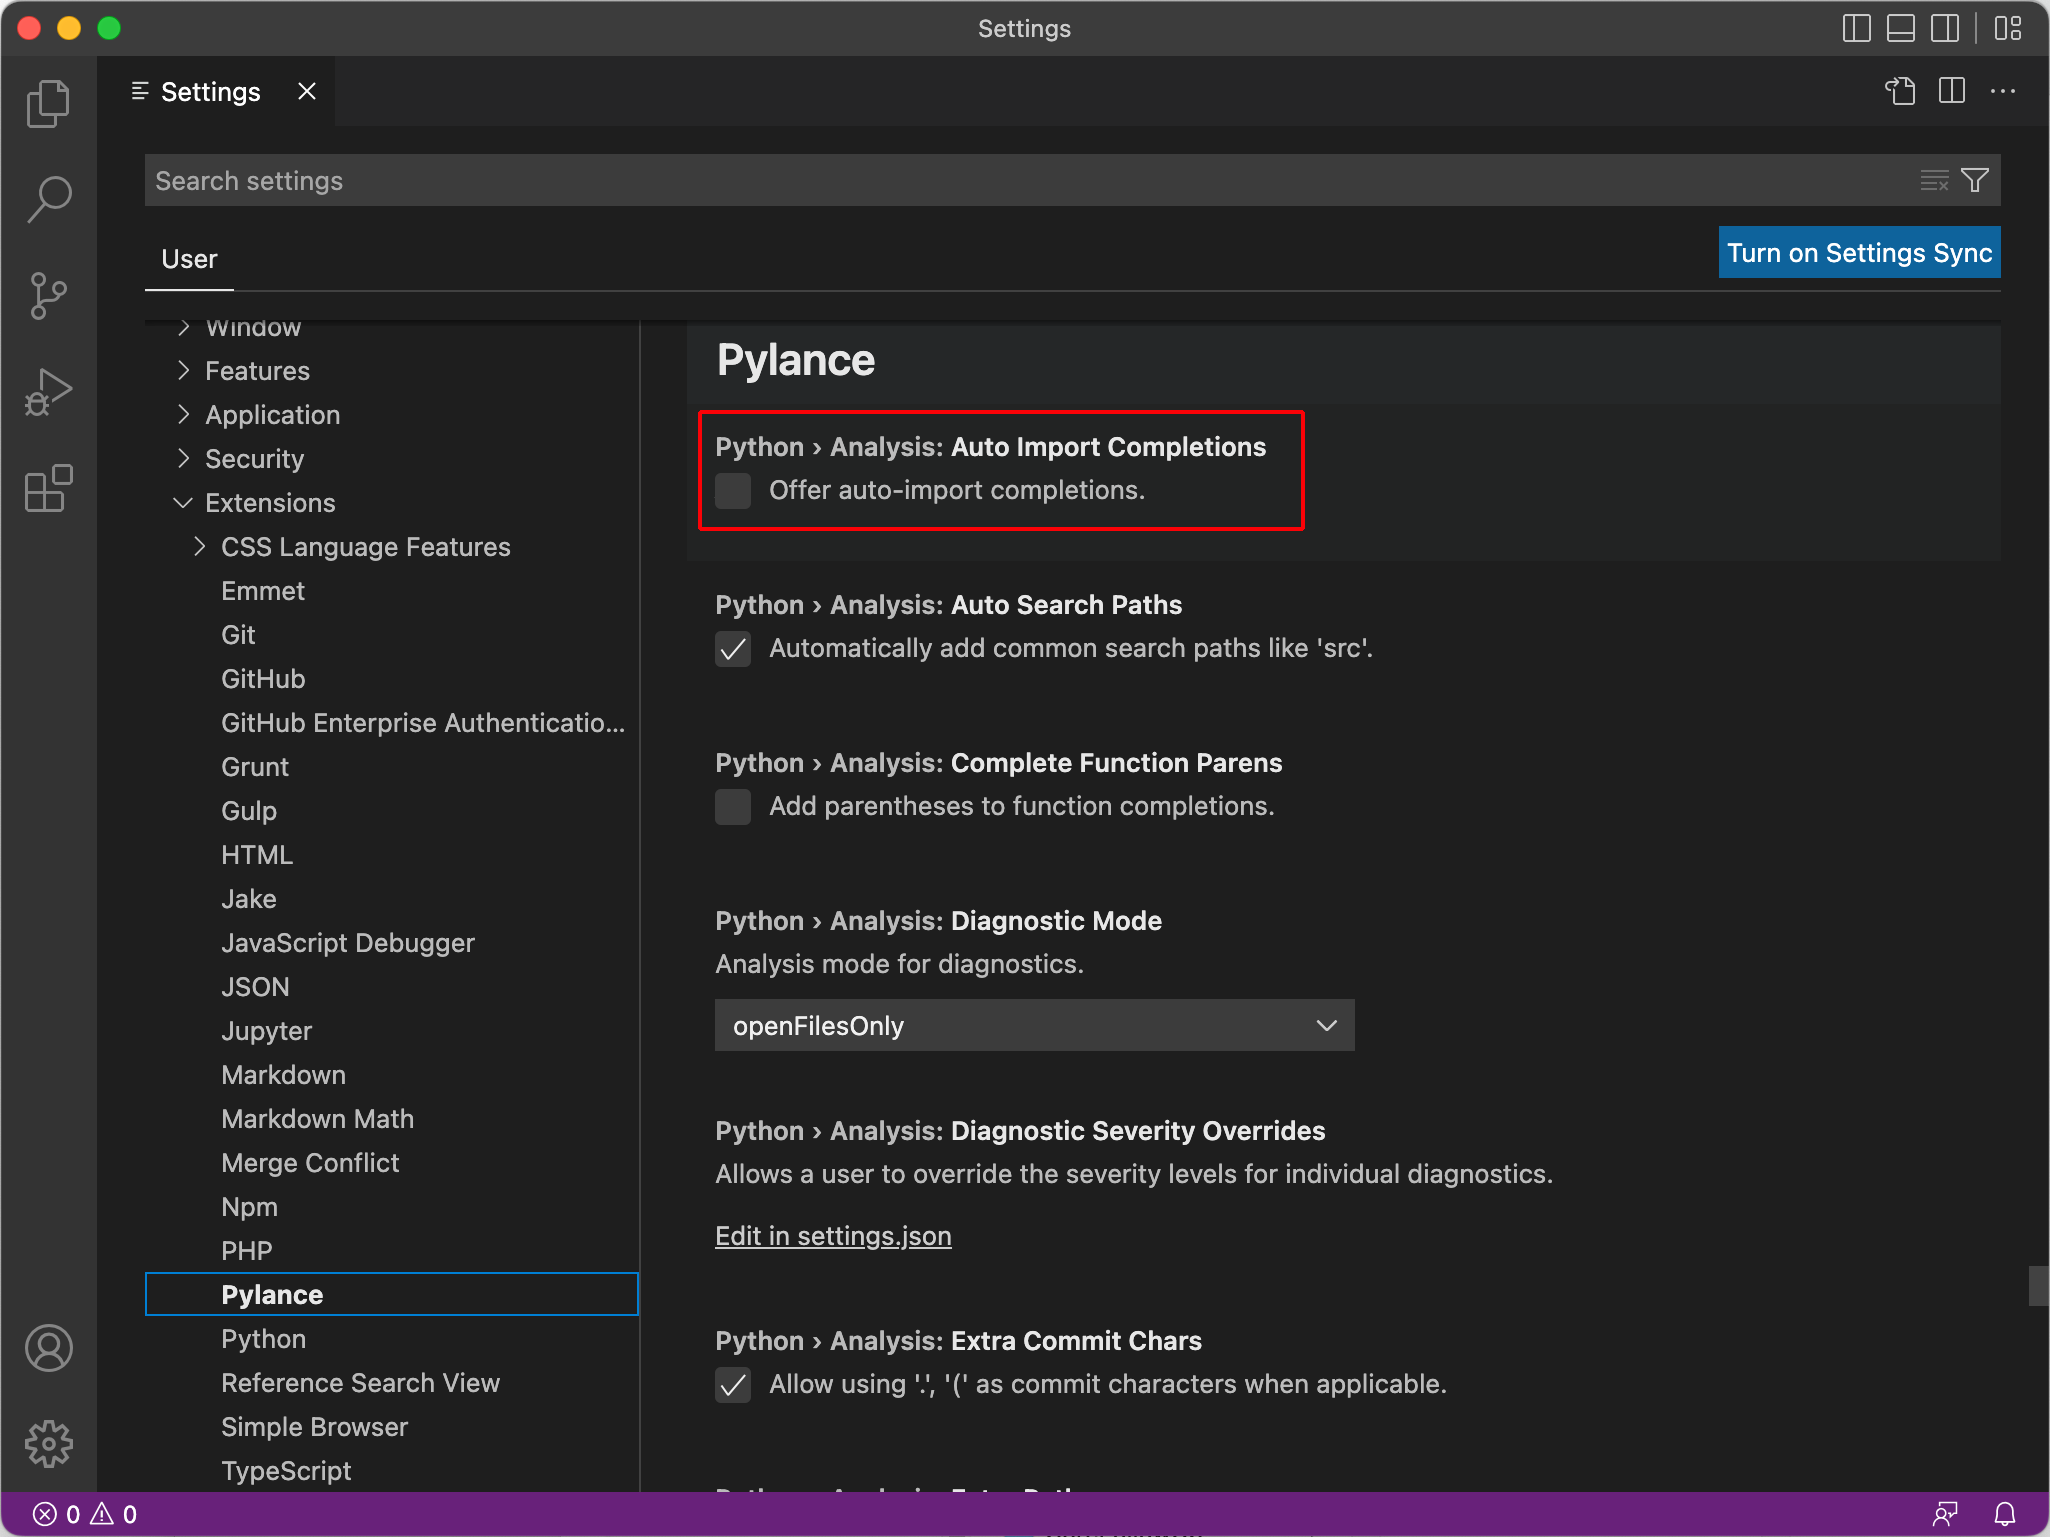 Click for Bigger Image
When you have done this, congratulations. You have successfully set up VSCode for the semester.
Using GitHub
We do not require the use of GitHub for this course, as it is a bit too advanced for many students. However, we know that some of you will use it anyway, particularly for sharing assignment code with your partner. Because of our academic integrity policy, we need to put strict rules on its use.
The free accounts that you get from github.com are publicly viewable. That means
anyone can see them, and anyone can download code from them. This means that if you put
your code on GitHub, and another student downloads it, you will be held liable for
cheating, even though you may have no idea who this other person is. In fact, any code
we find in publicly visibile in GitHub will constitute and academic integrity violation
whether or not anyone copies it.
If you want to use a code repository, you should use the official Cornell GitHub instead. Any projects that you put here will be protected and cannot be accessed by other students. You will not be held liable for security leaks that are not your fault.
We know that this is inconvenient for students that would like to show code to prospective employers. However, there has been enough abuse of this in recent years that we have had to take a stricter approach to GitHub. We recommend that you share your code through a private repository or else work on another Python project in your own time.