Interaction Modes
This walkthrough includes features that were added in response to student questions during office hours. Pull the most recent version of the code to make sure you have the most recent updates.
Interaction Modes:
In AniGraph, an interaction modes are objects that group together a series of related user interaction callbacks representing a particular user interface mode.
What is an interaction mode?
Imagine you are playing a game with first person camera controls. A first person camera is usually controlled with a pointer lock, meaning that while active, the mouse cursor disappears and mouse movement is interpreted directly as rotation of the first person camera. You can imagine setting up this type of control by specifying a bunch of callbacks. For example, one callback function that gets triggered by mouse movement, another that gets triggered by a mouse click, and yet another that responds to keyboard interactions. But if the player were to pause this game and enter some sort of 2D menu screen, the same interaction events (mouse movement and clicks, etc.) would have different meaning while navigating the pause menu. AniGraph supports this type of modal interaction with AInteractionMode objects. Each interaction mode groups together all of the interactions associated with a given mode so we can activate and deactivate them all at once, and specify actions that should be performed immediately before or after a mode is activated as well.
Defining Interaction Modes
In AniGraph, your scene controller keeps a dictionary of declared interaction modes that you can switch between. This bit of code from the initExampleInteractions() function in ExampleSceneController.ts shows how to declare interaction modes:
/**
 * This code adds the ExamplePlayer interaction mode and sets it as the current active mode
 */
let playerInteractionMode = new ExamplePlayerInteractionMode(this);
playerInteractionMode.cameraTarget = this.model.player;
this.defineInteractionMode("ExamplePlayer", playerInteractionMode);


let pointerLockInteractionMode = new ExamplePointerLockInteractionMode(this);
this.defineInteractionMode("ExamplePointerLock", pointerLockInteractionMode);
The callbacks associated with each interaction mode class are defined in its respective .ts file.
Switching Interaction Modes
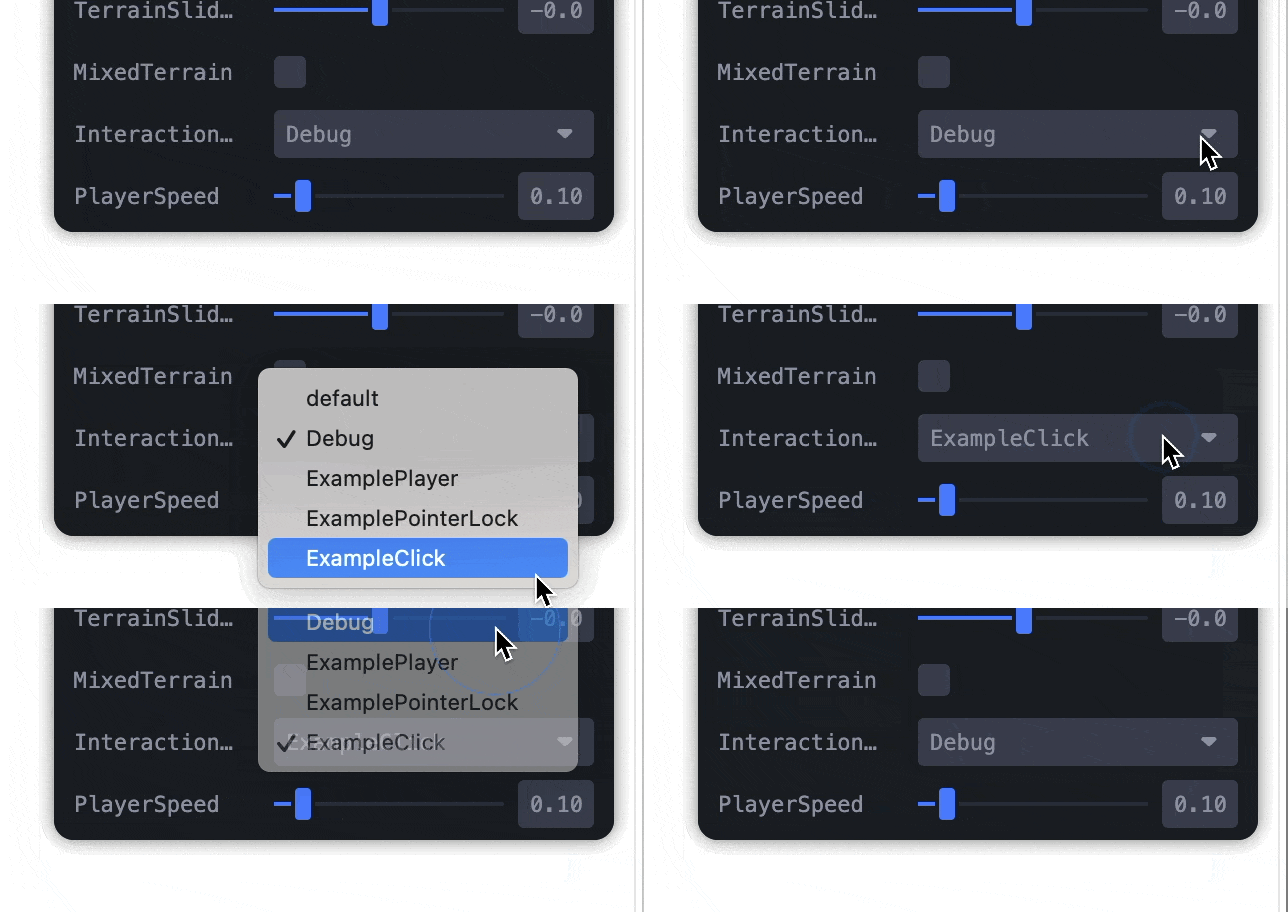
There are two ways to switch interaction modes in AniGraph. First, the starter scenes use scene controllers that inherit from ABasicSceneController.ts, which keeps track of all the currently declared interaction modes in a dropdown menu that you can access from the control panel. When you declare an interaction mode in a scene controller:

The second way to switch modes is programmatically. For example, if we wanted to define an interaction mode and immediately switch to it (e.g., in initInteractions() so that our application loads directly into a particular mode) we could accomplish that with this code:
/**
* Define the interaction mode
*/
this.defineInteractionMode("ExampleClick", ExampleClickInteractionMode.Create(this));

/**
 * We can optionally set the starting interaction mode to be whatever we want here
 */
this.setCurrentInteractionMode("ExampleClick");
Debug Interaction Mode
Most of the example code starts off in an ADebugInteractionMode.ts interaction mode by default. This is to make it easier for you to debug basic features without having to implement your own camera controls first. The Debug interaction mode uses orbital mouse controls, meaning the camera orbits around the origin of world coordinates when you click and drag your mouse. You can also use the mouse wheel/scroll to move the camera in an out, and you can use wasd to move the camera forward/backward and side to side.
Examples:
You will find three different example interaction mode classes in the /src/FinalProject/Examples/InteractionModes/ directory of the starter code.
- ExamplePlayerInteractionMode moves the camera with the player when you click and drag the mouse.
- ExamplePointerLockInteractionMode uses a pointer lock to move the player with the mouse. This would be a good reference for implementing first person camera controls.
- ExampleClickInteractionMode renders a graphic that moves with the cursor on screen. When you click, it triggers an `onClick` function that must be defined in your scene model.
If an interaction mode contains logic that is specific to a particular scene mode, you will need to make sure it has whatever scene-specific information it needs. There are different ways to do this. For example, the ExamplePlayerInteractionMode and ExamplePointerLockInteractionMode have a cameraTarget property that needs to be set when they are created. Alternatively, you can declare that the scene model connected to a given interaction mode must have certain properties by using a typescript interface. For an example of this strategy, see the IsSceneModelWithRequirements interface declared at the top of ExampleClickInteractionMode.ts.