This document provides a tutorial introduction to Rivl, a Tcl/Tk extension for multimedia processing. Rivl provides primitives for manipulating image, audio, and video objects.
A few examples will give you a feel for Rivl. In the following script, we implement and apply a "picture-in-a-picture" effect:
    proc pip {im1 im2} {
        im_scale! im1 0.3
        im_trans! im1 [expr 0.6*[im_width $im1]] [expr 0.15*[im_height $im1]]
        im_overlay $im1 $im2
    }
    im_write [pip [im_read football.jpg] [im_read red.ppm]] new.jpg
The pip procedure takes two images, im1 and im2. The first two
lines of pip reduce im1 and translate it to the upper right corner
of its box. The third line of pip overlays the new im1 onto im2.
Finally, the im_write line reads two images (a JPEG
and a PPM), calls pip to place one inside the other, and writes
the result as a new JPEG.
The following script is an example of video assembly editing:
    set andre [seq_read andre.mpg]
    set luxo [seq_read luxo.mpg]
    set out [seq_concat [seq_crop $andre 0.0 10.0] $luxo]
    seq_write $out new.mpg
The first two lines read MPEG files called andre and luxo. The
third line pastes together the first ten seconds of andre with
luxo. Finally, the seq_write command writes the result as a new
MPEG.
This tutorial is designed to be used interactively. That is, although you could just read the tutorial, you will get more out of it by trying the commands as you read them.
To use the tutorial, create a temporary working directory:
    % cd ~
    % mkdir tutorial
    % cd tutorial
Then, copy the image and video files used in this tutorial with the following command, replacing RIVL with the root directory of your Rivl source distribution.
% cp RIVL/data/images/* RIVL/data/movies/* .
Finally, type the command
% wish-rivl
to invoke wish-rivl, which behaves like an ordinary wish interpreter, reading commands from standard input and writing the results to standard output. Your path must contain the directory in which wish-rivl was installed. For Cornell CS users, wish-rivl is located in /home/sww/arch/bin, where arch is an architecture name like sun4, hpux, or solaris.
We assume that the reader is already familiar with Tcl/Tk. If not, the books by John Ousterhout and Brent Welch [ref,ref] provide excellent introductions.
Besides this tutorial, there are several other sources of Rivl
documentation. Rivl contains on-line help on every built-in command
and some general subjects. This help system is accessed using
the rivl_help command, followed by the command or topic name.
Rivl_help topics returns a list of available help topics. Rivl_usage
prints a one-line description of any command.
The file RIVL/doc/lang.doc is an organized compilation
of the on-line help text.
Several conference papers about Rivl can be found on-line at
http://www.cs.cornell.edu/Info/Projects/zeno/rivl
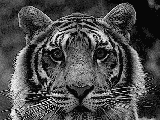
The simplest image processing task involves reading an image from a file, transforming it, previewing the result, and writing it out to a file. The following command reads an image from a file:
    % im_read tiger.jpg
    rivl_im3
The file tiger.jpg is in JPEG [ref] format, one of several file
formats Rivl supports. (See rivl_help File-types for more about
file formats.) The return value of im_read, rivl_im3
in this case, is a handle to the new image object. The exact name
of the handle may differ on your machine. This handle is used
in subsequent commands to access the image, much like a file handle
is used to access an open file. The next two commands scale and
rotate the image around its center:
    % im_scaleC rivl_im2 0.5
    rivl_im6
    % im_rotateC rivl_im5 30
    rivl_im14
These commands, like all Rivl image commands, are non-destructive:
they return a handle to a new image rather than modifying an existing
image. We can display the original image using im_display:
    % im_display rivl_im2
    .imwin1
im_display brings up a display window like the one
shown above, and returns the name of the created window (.imwin1).
Because we display images often in this section, we define a procedure:
    proc ? {im} {
        im_display $im .imwin1
    }
The second argument to im_display causes the existing
window to be used rather than a new one. To see the scaled and
rotated image, we type
% ? rivl_im13
To save the new image permanently, use im_write:
% im_write rivl_im13 new-tiger.jpg
This command creates a new image file called new-tiger.jpg.
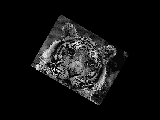
Issuing commands interactively is a quick way to find out what Rivl commands do, but for complex tasks, one normally writes procedures and refers to image handles through variables. The following procedure scales and rotates an image as a function of a numeric parameter a numeric parameter p:
    % proc whirlpool {im p} {
        set im [im_rotateC $im [expr 360*$p]]
        set im [im_scaleC $im $p]
        return $im
    }
The following commands read an image and show the effect of different values to whirlpool.
% set tiger [im_read tiger.jpg]
% ? [whirlpool $tiger 0.8] 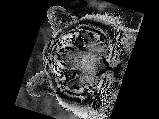 % ? [whirlpool $tiger 0.6]
  % ? [whirlpool $tiger 0.4]
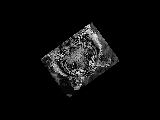
The set im... notation used in whirlpool is cumbersome. Most Rivl commands have a destructive form, which is invoked by appending a ! to the command name. That is,
op! im ... is equivalent to set im [op $im ...]
Using this notation, we can rewrite the procedure whirlpool:
    % proc whirlpool {im p} {
        im_rotateC! im [expr 360*$p]
        im_scaleC! im $p
        return $im
    }
This procedure is equivalent in behavior to the first one, but the notation is more compact. Note that we omit the dollar sign for the first parameter of a destructive command so that its name, rather than its value, is passed.
Every image has a size that you can access with im_size:
    % im_size $tiger
    320.000000 240.000000
The size of an image is initialized when it is read from a file.
You can change the size with im_setsize:
% ? [im_setsize $tiger 480 360] 
Notice that the displayed region is larger than before. When Rivl displays or writes an image, it clips the data inside the image's region of interest (ROI), which is simply the rectangle from (0,0) to (width,height). Because this rectangle is always anchored at the origin, the terms "ROI" and "size" express the same information and are used interchangeably.
Forcing the ROI to anchor at (0,0) is not as restrictive as it seems. It simply means that rather than moving the ROI around the image, you move the image in relation to the ROI. For example, to effectively set the ROI around the rectangle 50,100 - 250,200, you shift the image -50,-100 and then set the size to 200,100:
% ? [im_setsize [im_trans $tiger -50 -100] 200 100] 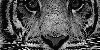
The ROI of this image is (0,0) to (200,100); there is no record of the upper corner's original location.
Image data and ROI are independent notions. You can see this by
comparing the output of im_setsize with im_scale:
% ? [im_setsize $tiger 480 360] 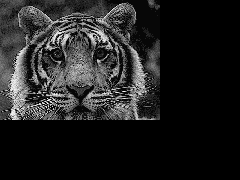 % ? [im_scale $tiger 1.5]
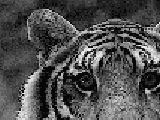
Im_setsize modifies the size without affecting the data in the
image, while im_scale modifies the data without affecting
the size. For modifying both size and data, Rivl provides several
shortcuts. First, you can scale both image and size by the same
factor using the -scaleROI flag to im_scale. Second,
you can force the image data and ROI to fit an exact size using
im_conform. This command is especially useful for
working with images of different aspect ratios.
The commands introduced so far operate on single images. To combine
multiple images, one normally uses im_overlay, which
lays one image on top of another. To illustrate overlaying, let's
implement a pip (picture-in-a-picture) effect.
    % set fb [im_read football.jpg]
    % set red [im_read red.jpg]
    % im_scale! fb 0.3
    % im_trans! fb [expr 0.6*[im_width $fb]] [expr 0.15*[im_height $fb]]
The last two lines reduce and shift over fb so that it resides in the upper right corner of its ROI. Below the two images and their composition are shown.
    % ? $fb
    % ? $red
    % ? [im_overlay $fb $red]
Red can be seen behind fb because fb is transparent outside
its box. When two images are overlaid, the bottom image shows
through where the top is transparent. An image's transparency/opacity
is determined by its matte. A matte is a bi-level image
that indicates, for every pixel in an associated image, whether
that pixel is opaque or transparent. An image's matte can be extracted
using im_matte:
% ? [im_matte $fb] 
An image's matte need not be rectangular, as the following example shows:
% ? [im_rotate $fb 20] 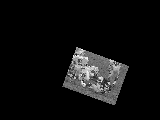 % ? [im_matte [im_rotate $fb 20]]
  % ? [im_overlay [im_rotate $fb 20] $red]
When an image is displayed or output to a file, it is overlaid onto a solid black background. Thus, transparent pixels inside the ROI appear as black, as in the first image above.
Rivl provides three primitives for clearing parts of an image
(i.e., modifying its matte): im_clear, im_clip,
and im_crop. Each takes five parameters: an image
and the corners of a box. Im_clear clears everything inside the
box, and im_clip clears everything outside the box:
    % ? [im_clear $tiger 50 100 250 200]
    % ? [im_clip $tiger 50 100 250 200]
im_crop is like im_clip, but also sets
the ROI to the box. It is equivalent to:
    proc im_crop {im x1 y1 x2 y2} {
        im_clip! im $x1 $y1 $x2 $y2
        im_setsize! im [expr $x2-$x1] [expr $y2-$y1]
        im_trans! im [expr -$x1] [expr -$y1]
    }
% ? [im_crop $tiger 50 100 250 200] 
The mattes described so far have been bi-level. In general, a
matte is an arbitrary byte-valued image representing a continuous
range from opaque (255) to transparent (0). One way to achieve
partial transparency is with im_fade:
    % set fb [im_read football.jpg]
% ? [im_fade $fb 0.7] 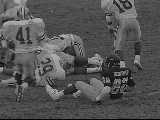
im_fade multiplies an image's matte by the specified
constant. Thus, im_fade with 1.0 has no effect, and
im_fade with 0.0 clears the image. When overlaying
a partially transparent image onto another image, the pixels are
combined with a weighted sum according to the top matte:
% set house [im_read house.jpg]
% ? [im_overlay [im_fade $fb 0.7] $house] 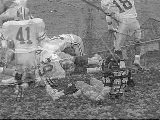 % ? [im_overlay [im_fade $fb 0.5] $house]
  % ? [im_overlay [im_fade $fb 0.2] $house]
im_fade and im_overlay are used to create
cross-fade transitions in video, as shown in the next section.
That concludes our introduction to image processing. In this section you saw a small but representative set of image operations, enough to read the next section on video processing. In section 3 you will see more built-in image operations and learn how to create your own.
If you still have an image display window open, type `q' inside it to destroy the window.
This section shows you how to read, manipulate, display, and write video sequences through a simple example: assembling a short TV commercial. Before we begin, however, we have to introduce a bit of terminology.
A sequence is a one-dimensional array of images. All the images in a sequence are the same type (e.g. RGB) and size (e.g. 320x240), and can be read from and written to several formats: MPEG files, motion JPEG files in CMT clipfile [ref] format, and directories full of image files. The following command reads a sequence from an MPEG file:
% set farmers [seq_read farmers.mpg]
You can preview a sequence with seq_display:
    % seq_display $farmers
    .strip1

This brings up farmers in a sequence previewer. You may wish to expand the width of the window to view more frames at a time. Because we display sequences often in this section, we define a procedure:
    % proc ? {seq} {
        seq_display $seq .strip1
    }
The second argument to seq_display causes the existing window
to be used rather than a new one.
As with images, sequences have a ROI, except that a sequence's
ROI is expressed in the time dimension. When Rivl displays or
writes a sequence, it clips the data inside the ROI. Sequence
ROIs are always anchored at 0.0 on the left. Thus, rather than
describing an ROI with two coordinates, we simply use the length
of a sequence. The sequence length is displayed in the lower right
corner of sequences in this document, as well as in the previewer.
You can query the length of a sequence with seq_length:
    % seq_length $farmers
    6.0
The effect of Rivl commands on ROIs is different for images and sequences. Most image commands maintain the size of images despite geometric changes to the data (e.g. rotating). In contrast, most sequence commands expand and contract the length of sequences as frames are added or removed.
Now that we have defined our vocabulary, we are ready to assemble the commercial. It consists of three video clips and a still sequence of a corporate logo, all connected with fade transitions. farmers (defined above) will be our first video clip, followed by child and house:
    % set child [seq_read child.mpg]
    % set house [seq_read house.mpg]
The corporate logo is an image file in logo.jpg:
    % set logo [im_read logo.jpg]
    % im_display $logo
To combine the logo with child, house, and farmers, it needs to
be made into a sequence. This is accomplished with im_to_seq:
    % set logoseq [im_to_seq $logo -length 3.0]
    % ? $logoseq

im_to_seq constructs a video by repeating one still
image for the specified length of time.
Now that we have the four pieces of the commercial, we connect
them with seq_concat:
% ? [seq_concat $farmers $child $house $logoseq]

seq_concat is analogous to taping together pieces of film end
to end. The resulting sequence switches abruptly between clips
(this is called a cut). Suppose we want to join farmers
and child with a one-second cross-fade transition instead.
This effect is created as follows:
To cut out the required pieces from farmers and child, we use
seq_crop:
    % set farmers_end [seq_crop $farmers 5.0 6.0]
    % set child_beg [seq_crop $child 0.0 1.0]
seq_crop is analogous to cutting out a piece of film with scissors:
it returns a sequence containing just the specified range, anchored
at 0.0. Both farmers_end and child_beg are 1 second sequences.
The next step is fading farmers_end to transparency over time.
Recall the im_fade command, which multiplies an image's
matte by a fraction. The idea is to apply im_fade
to the images of farmers_end with a parameter that decreases from
1 to 0 over time. To apply an image operation over a sequence,
we use seq_map:
    % seq_map! farmers_end {im_fade %1 [expr 1-%p]}
    % ? $farmers_end

seq_map applies the script {im_fade %1 [expr 1-%p]}
to every image in farmers_end. Each time seq_map applies the script,
it replaces %1 with the image and %p with the relative time of
the image, from 0.0 to 1.0. The results are collected into a new
sequence and returned.
To overlay the new farmers_end onto child_beg, you can use another
seq_map script:
    % set transition [seq_map "$farmers_end $child_beg" {im_overlay %1 %2}]
    % ? $transition

This time, seq_map maps over two sequences. It applies im_overlay
to corresponding pairs of images from farmers_end and child_beg,
collecting the results into a new sequence. Since overlaying sequences
is a common operation, Rivl provides seq_overlay, defined as
proc seq_overlay {args} {seq_map $args "im_overlay %*"}
seq_overlay works for any number of sequences. The substitution
character %* is equivalent to %1 %2 ... %n, where n is the number
of sequences given to seq_map.
The one-second transition is put into place with seq_concat:
% ? [seq_concat [seq_crop $farmers 0.0 5.0] $transition [seq_crop $child 1.0 6.0]]

To summarize, here is the code to connect farmers to child with a one-second fade:
    % set farmers_end [seq_crop $farmers 5.0 6.0]
    % set child_beg [seq_crop $child 0.0 1.0]
    % seq_map! farmers_end {im_fade %1 [expr 1-%p]}
    % set transition [seq_map "$farmers_end $child_beg" {im_overlay %1 %2}]
    % seq_concat [seq_crop $farmers 0.0 5.0] $transition [seq_crop $child 1.0
            0 6.0]
The task of connecting two sequences with a transition is generalized in the following procedure, which is included in the standard Rivl library:
    rivl_proc! seq_connectWithTransition {movieA movieB script duration} {
        set lengthA [seq_length $movieA]
        set lengthB [seq_length $movieB]
        set begin [seq_crop $movieA 0.0 [expr $lengthA-$duration]]
        set end [seq_crop $movieB $duration $lengthB]
        set mid1 [seq_crop $movieA [expr $lengthA-$duration] $lengthA]
        set mid2 [seq_crop $movieB 0.0 $duration]
        seq_map! mid1 $script
        set transition [seq_overlay $mid1 $end]
        seq_concat $begin $transition $end
    }
seq_connectWithTransition takes two sequences, a seq_map script,
and a duration. First, it crops out the parts of movieA and movieB
that are outside the transition. Next, it maps the effect over
the end of movieA and overlays the result on the beginning of
movieB. Finally, it concatenates the three segments together.
Now, to assemble the commercial, apply seq_connectWithTransition three times:
    % set fadeScript {im_fade %1 [expr 1-%p]}
    % set comm [seq_connectWithTransition $farmers $child $fadeScript 1.5]
    % set comm [seq_connectWithTransition $comm $house $fadeScript 1.5]
    % set comm [seq_connectWithTransition $comm $logoseq $fadeScript 1.5]
    % ? $comm

The clips are connected with 1.5 second fade transitions. You'll have to zoom in, or make your window longer, to see the transitions.
To save the commercial to an MPEG, use seq_write:
% seq_write $comm out.mpg
This command creates a new MPEG file called out.mpg. The movie can be played with an application such as the Berkeley MPEG player:
% mpeg_play out.mpg
Temporal manipulation involves changing the time position of frames
without changing their contents. Two examples of temporal commands
are seq_speedup, which makes a sequence faster or slower, and
seq_reverse, which flips a sequence in time.
Suppose we want to stretch our 16.5 second commercial to the standard 30 second slot, without adding new footage. One way to accomplish this task is to make everything slow-motion:
% set long-comm [seq_speedup $comm [expr 16.5/30.0]]
seq_speedup takes a sequence and a factor. If the factor is greater
than 1, the sequence is sped up and becomes shorter; otherwise
it is slowed downand becomes longer, as in this case.
So far, seq_map has proved adequate for operating on the frames
of a sequence. However, seq_map is limited to applying image operations
independently to each frame. For example, you cannot use seq_map
to compare pairs of adjacent frames, or to create a sequence whose
images are not in one-to-one correspondence with the input sequence.
Several Rivl commands provide low level access to a sequence's
frames. seq_sample samples a sequence at a point in time, returning
a single image. seq_to_ims samples a sequence repeatedly at a
fixed frame rate (see the next section) and returns a list
of images. ims_to_seq performs the reverse operation: it takes
a list of images and returns a sequence.
If you look at our commercial closely, you'll notice that one of the frames is damaged:
% im_display [seq_sample $comm [expr 8/24.0]]
The frame at 8/24 seconds is the ninth frame. The following command removes the frame from the sequence:
    % set imlist [seq_to_ims $comm]
    % set comm [ims_to_seq [lreplace $imlist 8 8]]
This alters the length of the movie slightly. You could also use lreplace $imlist 8 8 [lindex $imlist 7], which replaces the damaged frame with its predecessor.
In principle, some finite sequences could be represented and manipulated
as lists of images. However, the operations are many times slower,
and the abstractions less powerful, than those of the Rivl sequence
type. You should use direct sequence commands (rather than converting
a sequence to a list of images) whenever possible. The above task,
for example, could be accomplished with the seq_replace command.
Every sequence has a default frame rate that you can access
with seq_fps
    % seq_fps $comm
    24
and modify with seq_setfps. Its value is used by commands that
sample a sequence at a fixed rate, such as seq_write and seq_to_ims.
For example, the call to seq_to_ims above returned a list of 16.5
*24 = 396 images, where 16.5 is the length and 24 the frame rate.
A sequence's frame rate is independent from its other properties.
For example, setting the frame rate of comm to 12 does not affect
its length or contents; it simply halves the number of images
written by seq_write or returned from seq_to_ims.
Rivl is designed to be a framework for media processing. Philosophy similar to Tcl and Unix - provide a very small core, make it easy to write extensions and dynamically load just the ones you need.
One way to extend Rivl is to use the basic commands in procedures, like whirlpool. You can do some sophisticated things. However, the built-in commands are limited to very common operations like translation and scaling. At some point you'll want to define exactly what happens at the pixel level.
Since Tcl is a convenient high level language, it would be nice to manipulate images at the Tcl level. You could have pixel_read and pixel_write commands and do anything to the pixels in-between. However, this would be many orders of magnitude slower than transforms written in C because of loop interpretation. Therefore, image transforms must be written in C. However, there is no reason why we can't use tcl to generate the C code. Rivl has an interface to do this, called generics. Since this method is so much easier to use, we teach it first.
Generics
Rivl generics is a (system/mini-language) which allows you to specify image transformations with small expressions - usually one or two lines of code. It works by taking C code and inserting into a template. The result is a C module that can be dynamically linked into a running Rivl application and applied to images.
Some kinds of transforms.
Once again we define ? to mean display an image. And read in the flowers image.
Here is an example of a generic.
    rivl_generic define im_scalarmult {{image out} {image in}} {{double m}} {
        out(x,y) = in(x,y) * m;
    }
This takes a few seconds. The arguments are:
rivl_generic - the name of the command
To apply the new command:
? [im_scalarmult $flowers 0.6]
Note that this operation is different from im_fade,
which affects the matte. This image is dimmed but still opaque.
    generic im_ramp {{gray image out}} {
        out = (x+y)%255;
    }
? [im_ramp]
An image declaration can take two forms: {type image name} or {image name}. If the first form is used, then this image must be a particular type. For an output image, this gives the output type of the function.
If the second form is used, then the image is a wildcard: it can match any type in the wildcard list of the generic, which by default is all types but ptr. See Syntax, below, for how to specify the wildcard type list.
You can have multiple wildcard images in a generic. For a given
invocation, all wildcard images must match in type. For example,
you can call im_add with two gray images or two rgb
images, but not one of each.
If the output image is a wildcard type and there is at least one wildcard input, then the output type of the operation is determined by the type of the wildcard inputs (which must all match). However, if there is no wildcard input, then the type must be specified as the first argument to the generic.
For example, im_random can generate gray, rgb, short,
and long - the first argument is a type.
RGB distribution
RGB image parameters are treated differently than wildcard parameters that happen to be instantiated with an RGB input. In the first case, the color fields of the pixel (r, g, b) may be referred to. In the second case, however, the fields are acted on as a group.
For example, in im_mult, inner body is applied three
times for each pixel, once for each color field.
Here are some examples that take advantage of access to color
fields. im_rotatergb, rgb_to_gray.
Maintenance of generic files
You can customize where generic commands are created and where existing commands are searched for.
The -outDir flag to rivl_generic define specifies the directory
in which the C file and shared object file should be created.
If -outDir is not specified, then the value of rivl_params(genericOutDir)
is used. This is ., the current directory, by default. You may
wish to have all of your generic files created in a single subdirectory
off your home directory, or a common project group directory.
It is convenient to locate rivl_generic define commands in .tcl
scripts, intermixed with other .tcl code. Such a script may be
source'd many times, especially during prototyping. Before generating
the C file, Rivl searches the directories in a path for a .c and
.so file of the same name. If it exists, it checks to see whether
the .c file is from exactly the same generic as the one it is
creating; if so, it need not generate it. It then checks whether
the .so is older than the .c file, and if so compiles and links
it. Finally, it loads the .so file. The search path is in rivl_params(dlPath).
By default it contains only ., the current directory.
Syntax
As in regular expressions, token* means zero or more of token and token? means optional.
cmd = rivl_generic define {image-param*} {numeric-param*} inner-loop option*
image-param = {value-type? image name}
value-type = byte | gray | rgb | short | long | float | ptr
numeric-param = {numeric-type? name}
numeric-type = double | int
option = -loopSetup C-body | -rowSetup C-body | -loopCleanup C-body | -outDir dirname | -types {value-type*} | -types all | -local
inner-loop = C-body
Option summary
-loopSetup: This C body is inserted before the outer loop. It may begin with variable declarations.
-rowSetup: This C body is inserted inside the outer loop but before the inner loop. It may begin with variable declarations.
-loopCleanup: This C body is inserted after the outer loop.
-outDir: Specifies the directory in which the C file and shared
object file should be created. If omitted, the value of rivl_params(genericOutDir)
is used.
-types: Specifies which value types are allowed for wildcard images. By default, all types are allowed except for ptr. If all is specified, then all types including ptr are allowed.
Examples
Lower-level commands rivl_generic define im_scalarmult
... performs three tasks:
We examine each of these below
rivl_generic generate name cFileName
This command takes the same arguments as the define subcommand, plus a cFileName.
    rivl_generic compile cFileName soFileName
    dl_use soFileName