Setting up on Openstack
Openstack is a software platform for management of cloud-computing resources. It grew as a joint project between Rackspace and NASA, but nowadays the project has grown considerably and is very widely used. Most importantly for us, Openstack makes managing our instances a whole lot easier.
To log in to our Openstack instance, make sure you VPN to the Cornell network. Go to the Openstack Console, and log in with your netid as both username and password. Immediately upon logging in for the first time, make sure you change your password. For this tutorial, we will be using my account ks2232.
Upon logging in, you will be presented with the central console:
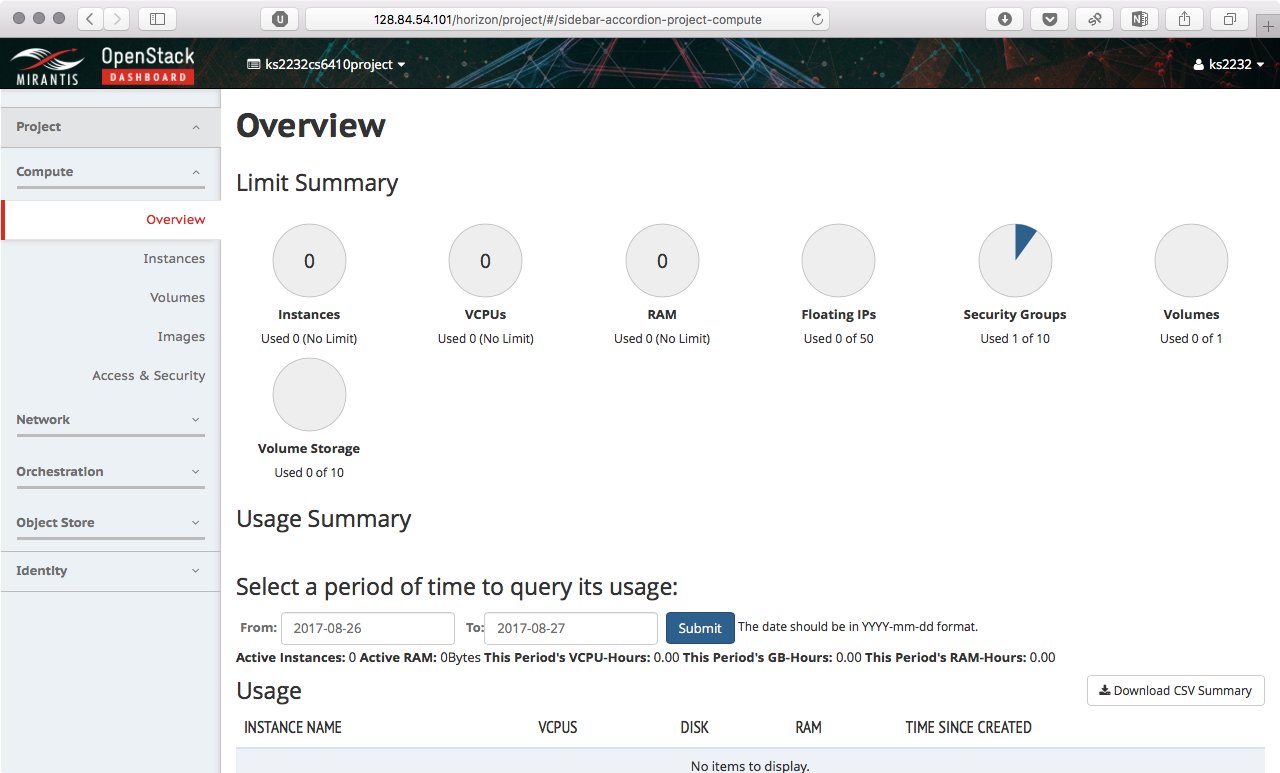
IMPORTANT: Resource management
Each student in CS6410 this semester will be given unlimited (read: large enough) vCPUs, RAM, and storage; 50 floating IPs, 10 security groups; 10 storage volumes; and only one compute volume; two flavors for instance types: ''6410.small'' has 2GB memory, 2 vCPUs, and 20GB storage, while ''6410.large'' has 8GB memory, 4 vCPUs, and 50GB storage.
Although you may launch as many instances as you would like, you may only have two active instances at any time. We will be able to view all instances through the admin console, and if we see more than two active instances for a user at any time, we will shut you down.
Building your environment
NOTE: If the instructions DO NOT state a field to be changed, leave the setting as the autopopulated setting.
Building your network
In Openstack, before launching your instance, you must build your network. This is the virtual equivalent to first setting up your home internet connection, then your router, and finally your computer.
Go to Projects > Network > Network Topology, and you will be presented with the following:
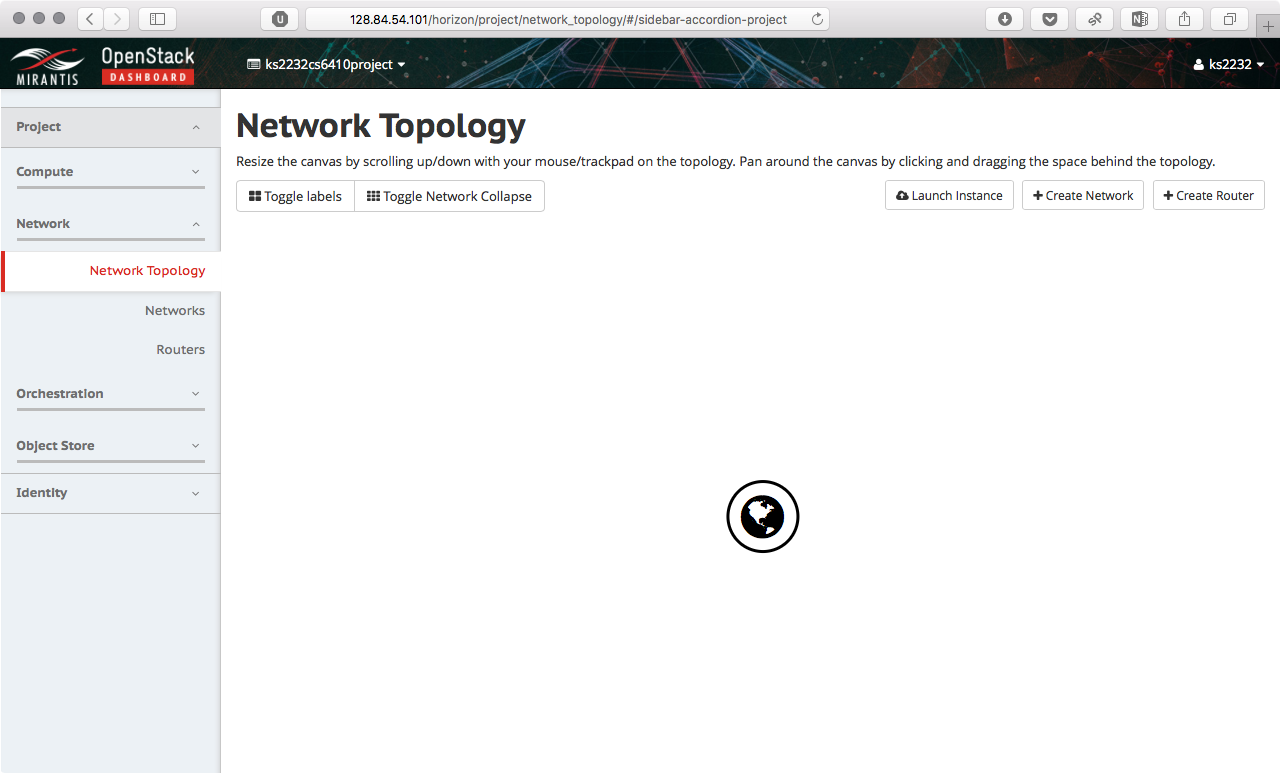
The globe logo in the middle is the main entry point of all network requests, called admin_floating_net. Your instances cannot connect to this directly, but will instead be connected via an internal network. To create your internal network, click on Create Network. On the Network tab, write netid_internal_net (replace netid accordingly). Click Next to edit subnet information. For subnet name, wrte netid_internal_subnet. For Network Address, write ''192.168.0.0/24''. Go to Subnet Details tab by clicking Next. For DNS name servers, we can simply use the Google DNS at address ''8.8.8.8''. Click Create.
To connect your internal network to admin_floating_net, you must create a virtual router. Back on Network Topology, click on Create Router. Set router name to netid_router and the External Network option to admin_floating_net. Click Create. You now will have plugged your router to the external network.
Let's plug in the router to the internal network you created before. In the Network Topology page, you will have the following view:
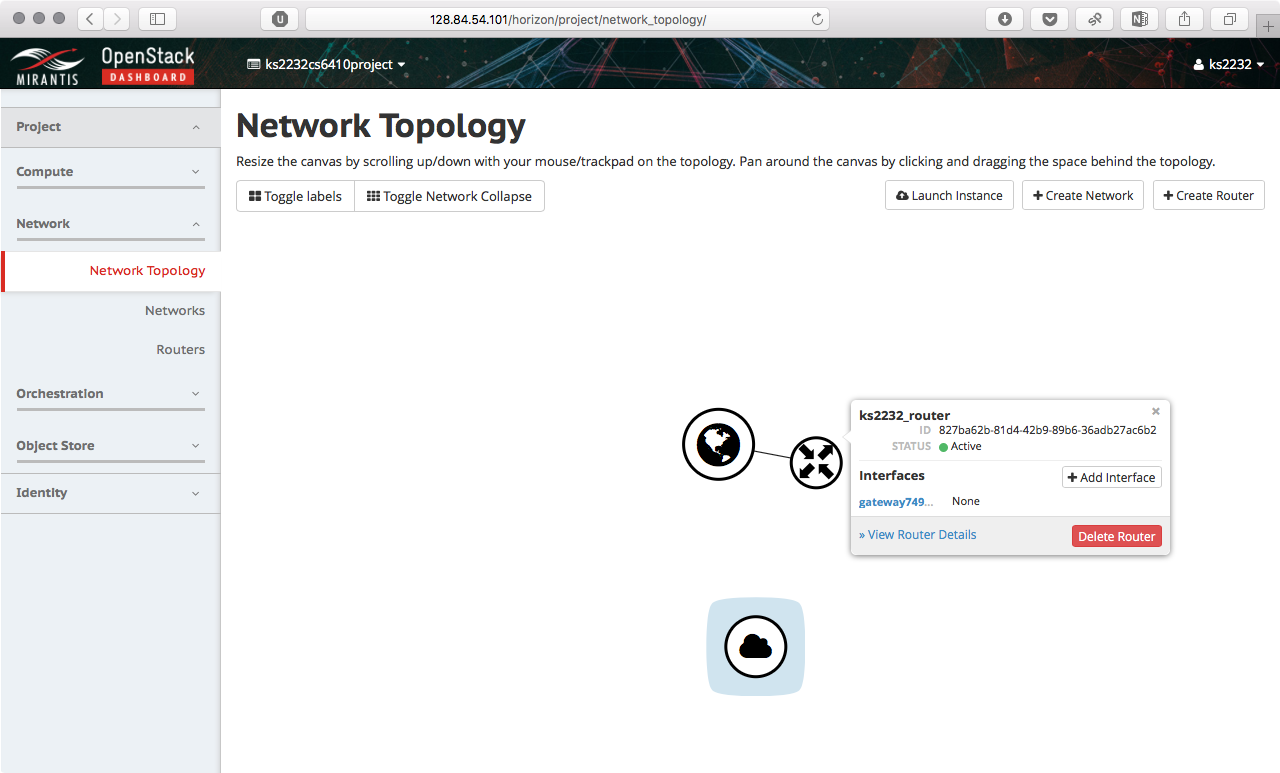
Select the router, then click on Add Interface. For Subnet select the subnet you created before, and click Submit.
Creating an Instance
You are now ready to start your instances.
Go to Project > Compute > Instances, and click Launch Instance.
- Name your instance, for example ks2232_small_instance.
- In the Source tab, select the Ubuntu image (Ubuntu-xenial-server-cloudimg-amd64). This is a 64bit Ubuntu 16.04 image.
- In the Flavor tab, select ''m1.small''.
- In the Key Pair tab, click on Create Key Pair to generate a new keypair. Do not share this file. If you prefer, you may also import an already existing keypair.
- Finally, launch your instance by clicking Launch Instance.
Wait a few minutes for your instance to start.
Once your instance is in ''Running'' state, you can finally associate a floating IP. Go back to Project > Compute > Instances, click on the drop-down menu for the instance and click on Associate Floating IP, as follows:
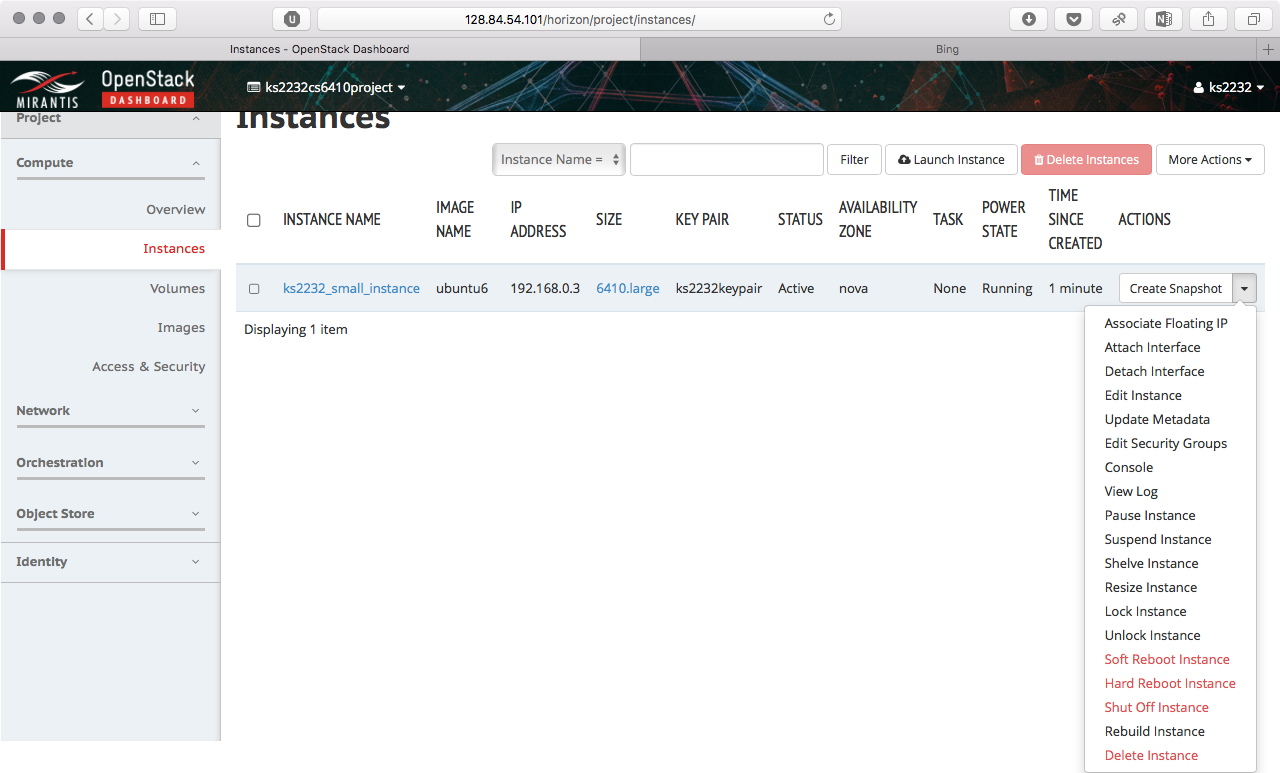
Click on the plus sign next to ''No floating IP addresses associated'', and in the new window click on Allocate IP. Finally, click on Associate.
Edit Security Policies
Before you can ssh into your new instance, you must set up three
policies. By default, the firewall will block on all connections.
Go to
Project > Compute > Access & Security.
Click
on Manage Rules, and then on Add Rule.
In the new ''Add Rule'' window add the 3 following rules:
- Drop down on the ''Rule'' menu, and select ALL ICMP. For direction, select Ingress, and click on Add.
- Repeat previous steps, but change direction field to Egress, and click Add.
- Finally, select SSH from the rule menu & click Add .
Launching
You are now ready to launch. Go back to Project > Compute > Instances, and copy the floating IP of the new instance you created. To launch:
- Ensure your keypair is read only
$ sudo chmod 400 /path/to/yourkeypair.pem $ ssh -i yourkeypair.pem ubuntu@youripaddress
Post launch
Congrats, you now have been able to launch an instance using Openstack. Before we end this tutorial, there is one last step: ensuring that you shutdown your instances properly.
-
Disconnect from machine by typing:
$ exit. - Next, go to Project > Compute > Instances.
-
Click on the Actions menu for your instance.
Select Shut Off Instance.
Note that there are many more options available to you, and we recommend taking time to explore deeper content. The official Openstack website has all the information you will need.
Questions or comments? email hweather@cs.cornell.edu
Policy on academic integrity