VMs
Table of Contents
Access your VM
Connect to the Cornell VPN and then enter your NetID below to continue to your VM.
You will be redirected to https://rpal.cs.cornell.edu/foundations/vm/<NetID>/. That page will then redirect you to the secure sign-on page for your VM.
For details on what to do next, see Logging in to your VM.
Required Software
In order to use your VM, you need to be connected to Cornell’s VPN service, which requires a VPN client. If you already have the client used to connect to Cornell’s VPN service installed on your machine, congratulations, you’re all set! If not, follow the directions below to install it. Please try to install the client as soon as possible so that if there are any issues with the installation, we can resolve them before the first coding project is released.
- Installation instructions for Linux
- Installation instructions for macOS
- Installation instructions for Windows
The instructions are fairly straightforward; however, note that although step 3 says “It may take a few seconds to a few minutes to collect information about your system,” it may actually be a lot of minutes. If nothing seems to be happening, just leave the page open for a while and then come back to it in an hour or so. If you end up needing to wait this long for the download button to appear, your session will time out, and the download button will open a new tab that redirects to the login screen. If this happens, do not fret! Just enter your credentials again, go back to the original tab, and click the download button again. At this point, your download should begin.
Usage Guide
Whenever you’d like to use your VM, you must be connected to Cornell’s VPN service. Follow the instructions below to get connected.
Connecting to the VPN
If you have not done so already, you will need to install the client for Cornell’s VPN service. See Required Software for details.
Launch the installed client, which is called Cisco AnyConnect Secure Mobility Client.
In the AnyConnect window, you’ll see a prompt to connect to a VPN server. Make sure the box contains cuvpn.cuvpn.cornell.edu and then click “Connect”.
You will now be prompted to enter your username and password. Your username is <netid>@en-cc-vpn-temp and your password is your NetID password. The AnyConnect window should look something like this:
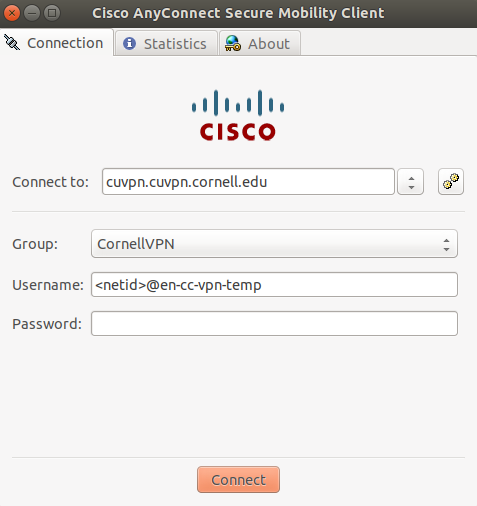
After entering your credentials, click “Connect”. You are now connected to CU VPN.
Logging in to your VM
Enter your NetID in the form at the top of the page. If entering your NetID leads to a 404 Not Found, you either entered you NetID incorrectly or you joined the class late and your VM is not ready yet. (It may take up to 24 hours to get access.)
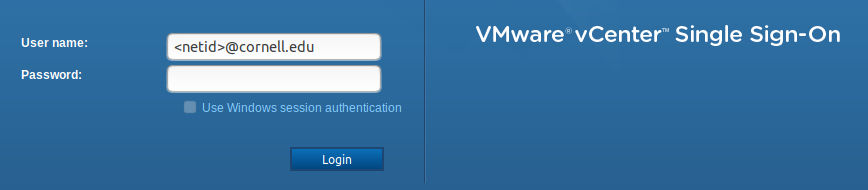
After entering your NetID, you should be redirected to a single-sign on page for VMware that prompts for a username and password. Use <netid>@cornell.edu for your username and your NetID password. The page should look something like this:
At this point, you should be on the web console for your own personal VM! You should be greeted by a lockscreen with a cheerful beaver background. Hit the spacebar or drag up with your mouse to get to the login page.
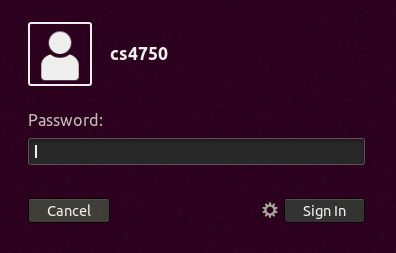
There are three accounts on your VM: admin, cs4750, and support. Your account is cs4750, and your initial password is temppass. Enter that password and hit enter or click “Sign In”. The login page for the cs4750 user looks like this:
You should now be on your desktop. If this is your first time using your VM, you need to change your password. To do this, open up a terminal window by clicking its icon on the dock (shown below).

In the window that opens, type
passwdand hit enter. You will be prompted for the current password (temppass), and then you’ll be prompted to enter a new password. Please try to remember your new password. In the event that you forget it, we can reset it for you. Make a private post on Piazza to all the course staff if you forget your password.Leave that terminal window open and start working on your first coding project!
Other things to know about your VM
You do not have sudo (root) privileges on this VM. If you’re trying to run some command and it starts with “sudo”, don’t try it — it won’t work. You should not need to install anything on your VM; we have provided all the required software. However, if there is some additional package that you’d like to have on there, make a private post on Piazza to all the course staff about it.
There are several text editors that you can use on your VM. If you prefer a command-line text editor, you can use vim or nano. If you’d prefer an editor in its own window, use gedit, which you can launch via the notepad icon pinned to the application dock. You can also launch it from the command line by running gedit <filename>.
As of right now, you cannot copy-and-paste between your own machine and your VM. We may be able to enable this later on. But your VM is connected to the internet, so you can work fully within your VM and not worry about copying things back and forth. With this said, we strongly recommend that you back up the work you do on your VM, whether that’s transferring files to your own machine or backing them up to a cloud service.
If your VM does not seem to be functioning properly (e.g. it is slow or is frozen), you may need to reset it. Follow these instructions prior to seeking help.
Resetting your VM
There may come a time where your VM acts up and you need to reset it. If it’s not totally frozen, open up a terminal window, type reboot, and hit enter. The system will restart and will hopefully come back to life as fresh as a daisy. If it is totally frozen or became powered off, you’ll need to reset it from the back-end. Here’s how you do that:
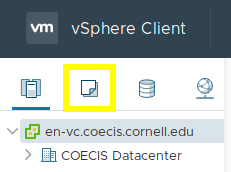
Go to https://en-vc.coecis.cornell.edu/ui/ (as always, you’ll need to be connected to the VPN for this to work). You should be greeted with a rather blank-looking page. The first thing you’ll need to do is click the “VMs and Templates” icon on the left-hand sidebar (shown below).
Next, you’ll need to click through several dropdowns. Eventually you should reach something that looks like this:
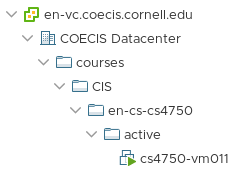
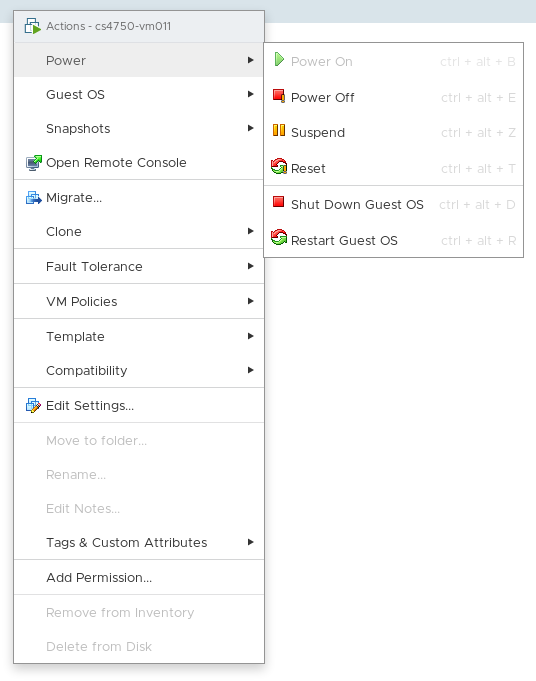
Right-clicking your VM will give you a dropdown menu. Hover over “Power” to get the reset options. The option that says “Restart Guest OS” will send the restart signal to your VM. Depending on what state your VM is in, this option might not be sufficient. In that case, use the “Reset” option, which is like holding down the power button (it forces the VM to turn off). The dropdown menu will look like this:
Wait for your VM to reboot, and then try using it again. If you follow these steps and are still are unable to use your VM, make a private Piazza post to all of the course instructors about it. Even if your VM is completely messed up, we can fix it! However, you should make sure that you always back up your work in the event that fixing your VM results in file loss.