CS4670/5670: Computer Vision, Spring 2016
Project 5: ConvNets
Brief
- Assigned: Thursday, April 28, 2016
- Due: Tuesday, May 10, 2016 (11:59pm) (turn in via CMS)
- Teams: This assignment should be done in teams of 2 students.
Synopsis
In this project, we will be visualizing and manipulating AlexNet [1]:

For this project, we are using Caffe, an open-source deep learning library that has an efficient implementation of AlexNet. Other similar libraries include Torch, Theano, and TensorFlow.
Some parts of this assignment were adapted/inspired from a Stanford cs231n assignment. The parts that are similar have been modified heavily and ported to caffe.
The assignment is contained in an IPython Notebook; see below.
[1] Krizhevsky et al, "ImageNet Classification with Deep Convolutional Neural Networks", NIPS 2012
Written part
There is a written part to be separately completed by each person. All submissions should be PDF and include your name/netid.
Download the written part here.
Coding part
The coding part will be completed in teams of 2.
There are many pieces to the assignment, but each piece is just a few lines of code.
- Visualize AlexNet structure (TODO 1).
- Classify Dogs vs Food (TODO 2, 3).
- Visualize class saliency (TODO 4).
- Fool AlexNet into making wrong predictions (TODO 5).
- Visualize a learned class (TODO 6)
- Invert AlexNet features (TODO 7a, 7b).
Unit tests: to help verify the correctness of your solutions, you can run pytest in a shell (same directory as the notebook):
Running out of memory: the VM should be able to hold exactly one AlexNet in memory by default, which is enough to complete the assignment. If you run the unit tests with the notebook open, you will either need to close the notebook server or give the VM more memory (2GB or more).
Setup
- Check out the code base from our 4670 github repo.
- Unzip the codebase and run our installer to install caffe in your home directory ~/caffe:
bash install-caffe.sh
-
If you haven't used iPython Notebooks before, first read the tutorial from cs231n.
Start the notebook server:jupyter notebookand open pa5.ipynb. Implement your code in student.py, but run it in the notebook. The notebook will auto-import any changes to the student module. Note that you need to run each cell in the notebook (shift+enter), including the ones without TODOs. When you are done, you should be able to run all cells without errors (there are menu items that let you run all cells in one command).
What to hand in
- Submit the written portion separately as a PDF.
- Save your notebook file, and then package up the submission code/images by running bash collect_submission.shwhich creates submission.zip.
What should my images look like?
This section contains images to illustrate what kinds of qualitative results we expect.
Saliency: we expect that pixels related to the class have a higher value. Left: Input image. Right: saliency.

Fooling image
These images look nearly identical, and yet AlexNet will classify each image on the middle as "snail". If you look really closely you can notice some tiny visual differences. The right image shows the difference magnified by 5x (with 0 re-centered at gray).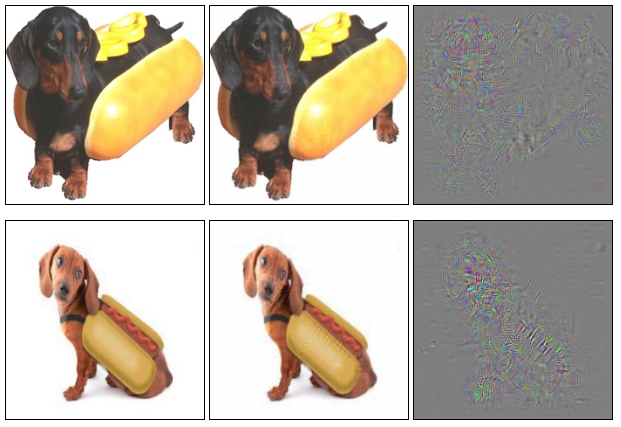
Class visualization
These images are classified as 100% belonging to different classes by AlexNet. If you run these for longer or adjust the hyperparameters, you may see a more salient result.
Many classes don't give very good results; here we show some of the better classes.
| strawberry | throne | mushroom |
| tarantula | flamingo | king penguin |
| goblet | sax | llama |
| cloak | moped | indigo bunting |
| bulbul | squirrel monkey | cock |
Feature inversion
Note that we could probably obtain higher quality reconstructions if we ran the optimization for longer, or added a better regularizer. To keep things simple, your images only need to be mostly converged.
| original | conv1 | conv2 |
 |
||
| conv3 | conv4 | conv5 |
| fc6 | fc7 | fc8 |
Last updated 28 April 2016