To install JCreator, first you must install Java.
Please note the location where Java is placed on your computer, typically C:\Program
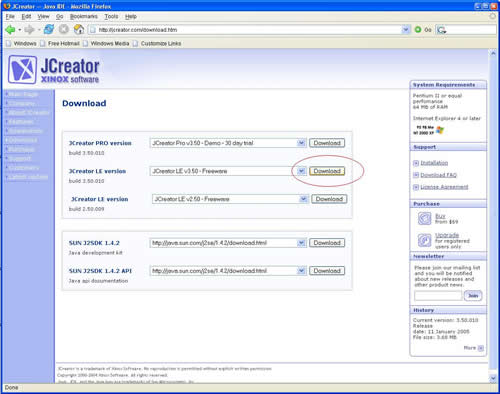
Files\Java\jdk1.5.0_01. Next access JCreator's Download link. On the download page, select JCreator LE version. The PRO version is $29 for
students or you can try the 30 day trial version. The only differences between
the two versions are added convenience features (automatic code completion, etc).
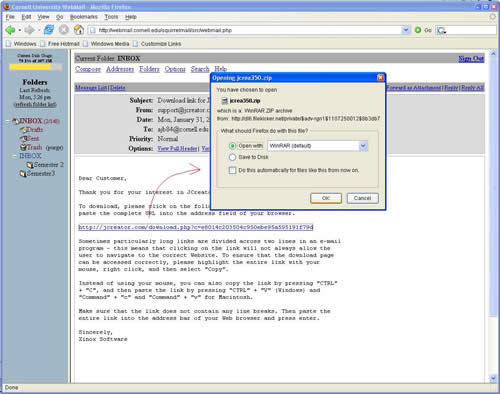
One the next page fill in your Name, and Email and click submit. You will receive
an email with a link. Click on the link to open the automatic download page.
Save the zip file and open it with your favorite unzipping application
(winzip, winrar),
and run setup.exe.
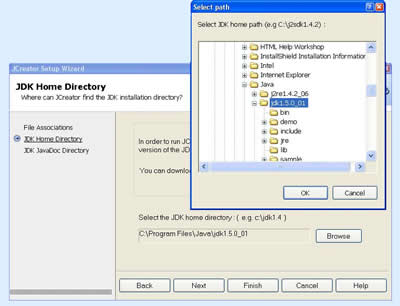
Just hit next for the first install dialog. Obviously you want to associate
JCreator files with JCreator. The next dialog box prompts you to locate java.
If you installed java in the default location (C:\Program Files\Java\jdk1.5.0_01),
the field should already be filled. Otherwise locate it on your machine. If
you downloaded the
documentation
files from Java, hit Next to locate them. Otherwise, select Finish.
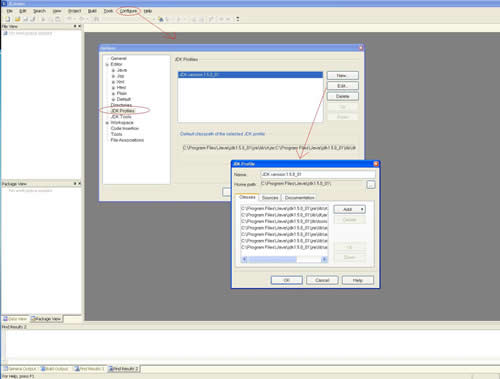
That's all there is to installing JCreator. If something bad happened while you were setting the locations of java files, or you decided to move Java's location on your computer, you can go to the Configure menu item while running JCreator and select Options. Then, Select JDK Profiles. From there hit Edit and select the location where you would like JCreator to associate with Java.
To write java code you have two options. You can either create a project, or create a single Java class file. The difference between a single class and a project is if you need to write just a few classes, just create a single class file. If, however, you are working on a larger project which encompasses a number of interdependent classes, create a project.
To create a single class, open up JCreator and close all the wizards and windows that appear. Go to File→New→File. A File Wizard will popup.

Select the Java File icon and press next. Give your file a name (don't add
.java at the end) - make sure the filename is the same as your class name.
Select where you would like the file to be saved in the location text input
box and hit Finish.
To create a project, open up JCreator and close all the wizards and windows that appear. Go to File→New→Project. A Project Wizard will popup.

Select the Empty Project icon and click Next. Next give a name for your project
(eg, Assignment1). A folder with that name will appear in the directory which you
will specify next. Location refers to where the project file itself will be stored
(whenever you create a project, JCreator behind the scenes creates a special
project file that contains vital information about your project). Source Path is
where your source code or your Java files will be stored. Output Path refers to the
path to which your project will write output (eg, if your project creates and
writes to a file, it will be saved in the directory specified by output path).
If you are confused about these, keep them all the same (eg, make all directories
c:\CS 211\ProjectName). Check (if possible) Create new workspace radio button and
press Finish.
To open an existing project, go to File→Open Workspace and locate your project folder. Open that and doubleclick on the workspace file. To switch between projects simply follow instructions on how to open an existing one. Now go to View→ File View and you can see all the files in your current project. To add a new class go to Project→New Class, give it a name and hit finish. To add an existing class to a project, go to Project→Add Files and add the ones you wish. Otherwise, even files that are in the same folder, but that were not added or created as above will not be part of the project.
JCreator allows you to open multiple files simultaneously tabbing them at the top as you see in the picture below. Simply click on a tab and the corresponding file will appear in front of you and be the one you are currently working in. In the picture below notice the "x" circled in top right. It will close the currently selected file. The two buttons simply shift the file tab to the right or left.

Compiling with JCreator is very simple. Once you create a class, or a project,
simply click on the compile class, or compile project (depending on which you
created) button on the toolbar. If you created a lone class without a project,
the .class file will be created in the same directory as the .java file. If
you created a project, then you will notice that in the directory where the
project is saved there are 2 folders, src and classes. The src directory holds
all the .java files you create within JCreator, and the classes directory contains,
what else, but the class files.

To specify the command line arguments when you execute a program from JCreator, you must enable this setting. Goto Build→Runtime Configuration. Then click on Default→Edit. In the next dialog box select Default→Edit again, and finally select the option for Prompt for main method arguments.
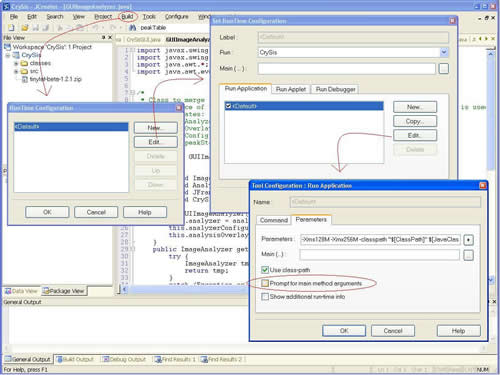
When we grade projects we will run the programs from the command line; this
feature emulates this and prevents you from having to constantly use the command
line every time you want to run the program. As shown in the image below, when
the run button is pushed, a dialog will appear asking for the args. Input them
as if you were using the command line and hit OK. Just keep in mind that when
you run a java progam from within JCreator, the 'local' directory is the directory
where the .class files are. So if you try to load "input.txt" from
one of your programs, its going to look for that file in the class directory.
It never hurts to run your program once from the command line when you are done
to be sure it will work when we grade it.

Now you know the basics of using JCreator. Enjoy!