M, W, F 12:20-1:10
in Upson 142
CS 1133: Short Course in Python
Spring 2019
About: Announcements
Overview
Course Staff
Calendar
Materials:
Lectures
Texts
Python
Text Shell
Videos
Assessment:
Grading
Assignments
Activities
Resources:
CMS
Piazza
Python API
Introcs API
Python Tutor
Style Guide
Terminology
Academic Integrity
Python in CS 1110
Python comes in several shapes and sizes. To make sure that everything works properly, we require that every single person in the course use the same version of Python. You are free to either work in the labs or to use your laptop. But whatever the case, your version of Python must be the same as what we are using in the labs. Hence, even if you already have Python installed on your computer, we ask that you install a new version (see instructions below) so you can be consistent with everyone else.
As you will see, these instructions are a bit long. Installing Python is often much more complicated than simply using it. As many people in this class have not programmed before, we have tried to make installation as simple as possible via step-by-step instructions. You are not expected to understand what many of these steps are doing. Furthermore, these instructions are lengthy mainly because we are trying to support as many operating systems as possible. In practice, you should be able to finish the installation in 15-20 minutes.
If you have problems, and if you have a laptop, the best thing to do is to bring it in to someone to look at. Any of the course staff can help you with this. If you cannot bring in your computer, we have provided you with some instructions below. If you are having difficulty with these instructions, please email Craig Frey <craig.frey@cornell.edu>.
Table of Contents
Installing Python
While installing the base Python package is usually straight-forward, getting add-ons for Python can be a bit tricky. That is why we have decided to standardize on the Anaconda version of Python. This is a free version of Python that is quickly becoming standard on this campus. It contains a lot of add-ons, limiting the number of things you need to install later.
Once you have the base Python install, you need to install the "Cornell Extensions". These are 3rd party extensions packaged by us (and sometimes made by us) to fit into Python. These extra packages include things like graphics capabilities to make games and flashy applications.
Before you install these, be sure to completely read the instructions for your operating system. While you are unlikely to make any mistakes, it is best for you to do things in exactly the order we tell you to. As we said, you do not need to understand what is going on here.
Installing on Windows
We prefer that all students with Windows use Windows 10. This version has been out long enough, and is stable enough, that everyone should be using it. We do not support Windows 7 or 8 anymore. If you are using an older version of Windows, we recommend that you upgrade now before the semester starts. If your machine cannot support Windows 10 you will need to work on the lab computers.
For this class, we need to use Python version 3.6. This is the most recent version of Python for Anaconda. If you have the 2.7 version of Anaconda already installed, we recommend that you uninstall it first. Anaconda does not handle version switching well, and it is best to start over.
Installing Anaconda for Python3.6 |
Windows 32-bit Anaconda 3.6 |
Windows 64-bit Anaconda 3.6 |
Use one of the two links above to install the correct version for your operating system. Most modern Window installations are 64-bit. However, if you are unsure, download the 32-bit version. The 32-bit version is guaranteed to work on all systems.
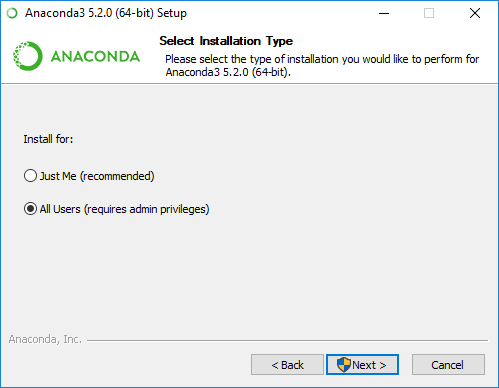
The file that you download is an installer app. Simply double click on it and follow directions. At one point in the installer, it will ask you whether you want to install for yourself or for all users. Select the option "All Users (requires admin privileges)", as shown below.
On the next page it will ask you what directory you want to install in. By default,
it will install in C:\ProgramData\Anaconda3. We need this folder for
Cornell Extensions, so leave this alone and click Next.

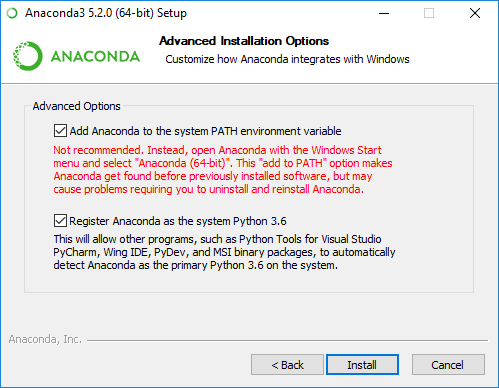
Finally, you will see a page with check boxes talking about your Path. You must select the top box, even though it warns you not to. If you do not check this box, you will not be able to use Python from the PowerShell.
Installing the Cornell Extensions |
Windows (All) Extensions |
Download the file from the link above. After downloading, you will see that this is a
folder with a zipper on it. Double click on the folder. This will open an Explorer
Window with another folder inside of it called CornellExtensionsInstall.
Drag the CornellExtensionsInstall folder on to your Desktop. This is
important, as the installation is not guaranteed to work if you click on the installer
while it is still inside the folder with the zipper.
Now that you have a copy of CornellExtensionsInstall on your Desktop, open
this folder (again, not the one in the zipped folder!). Inside, you should
see the following two items:

Double-click on the file that is named install. This will pop up a window
with a lot of scrolling text in it. Do not close the Window until you see the line that
says "Installation Complete", and asking you to hit a key. If you close the Window too
early, you will have to install a second time.
On some Windows systems, the security settings may prevent you from installing Cornell Extensions. On those systems, you will see a security message like the one below.

If this happens to you, click on the "More info" link. When you do that, the information message should now look like this:

Click the "Run anyway" button to complete the installation.
Once you have finished with the Cornell Extensions, you should test your installation.
Installing on Macintosh
The version of Python that we are using for this class is only compatible with El Capitan (10.11) or higher. If you have an older version of MacOS, we recommend that you upgrade to High Sierra (10.13) immediately. Otherwise, you will have to work on the lab computers for the semester.
For this class, we need to use Python version 3.6. This is the most recent version of Python for Anaconda. If you have the 2.7 version of Anaconda already installed, we recommend that you uninstall it first. Anaconda does not handle version switching well, and it is best to start over.
Installing Anaconda for Python3.6 |
Mac OS X 64-bit Anaconda 3.6 |
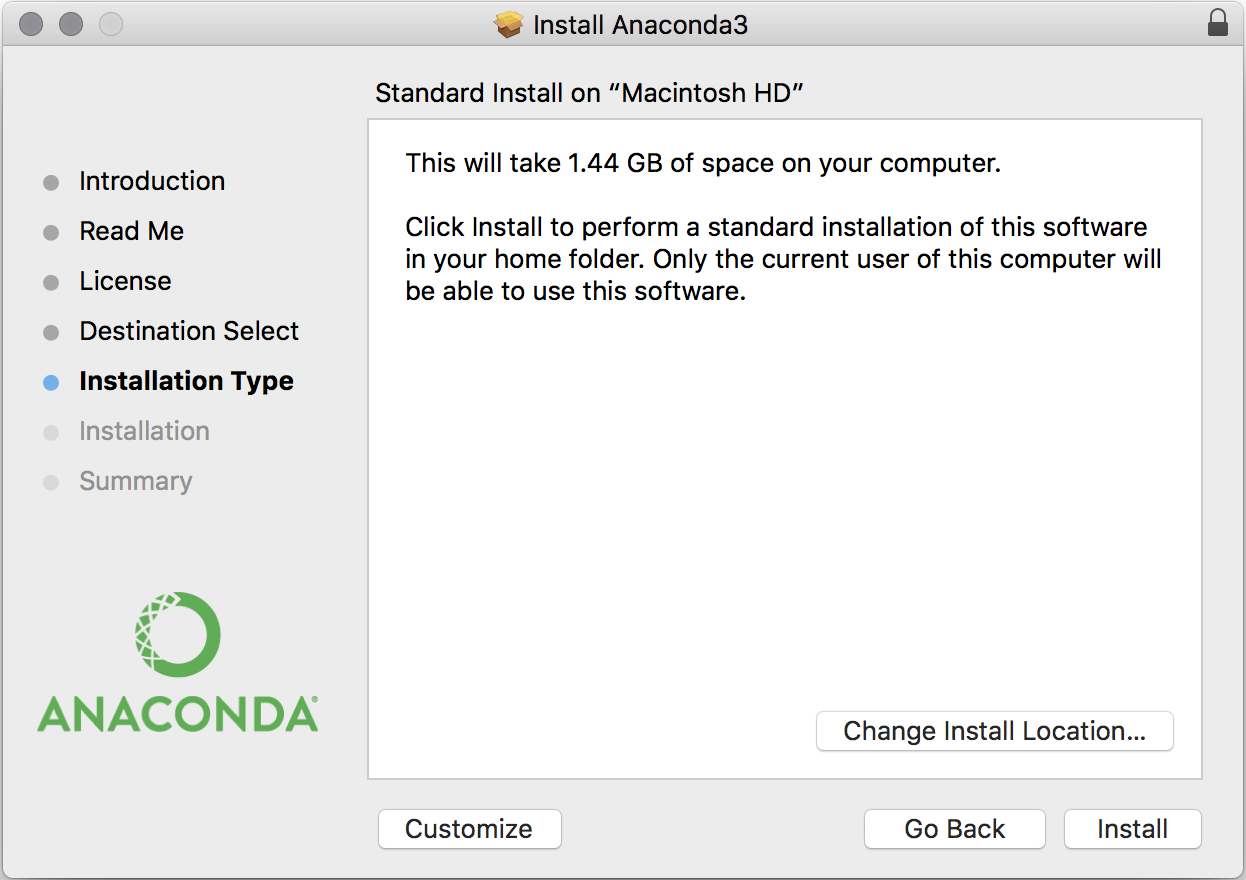
Use the above to install the correct version for your operating system. The file that you download is an installer app. Simply double click on it and follow directions. You may wish to change the install location on this page:
However, there is something weird with the OS X installer when you do this. In particular, you may see the following error:
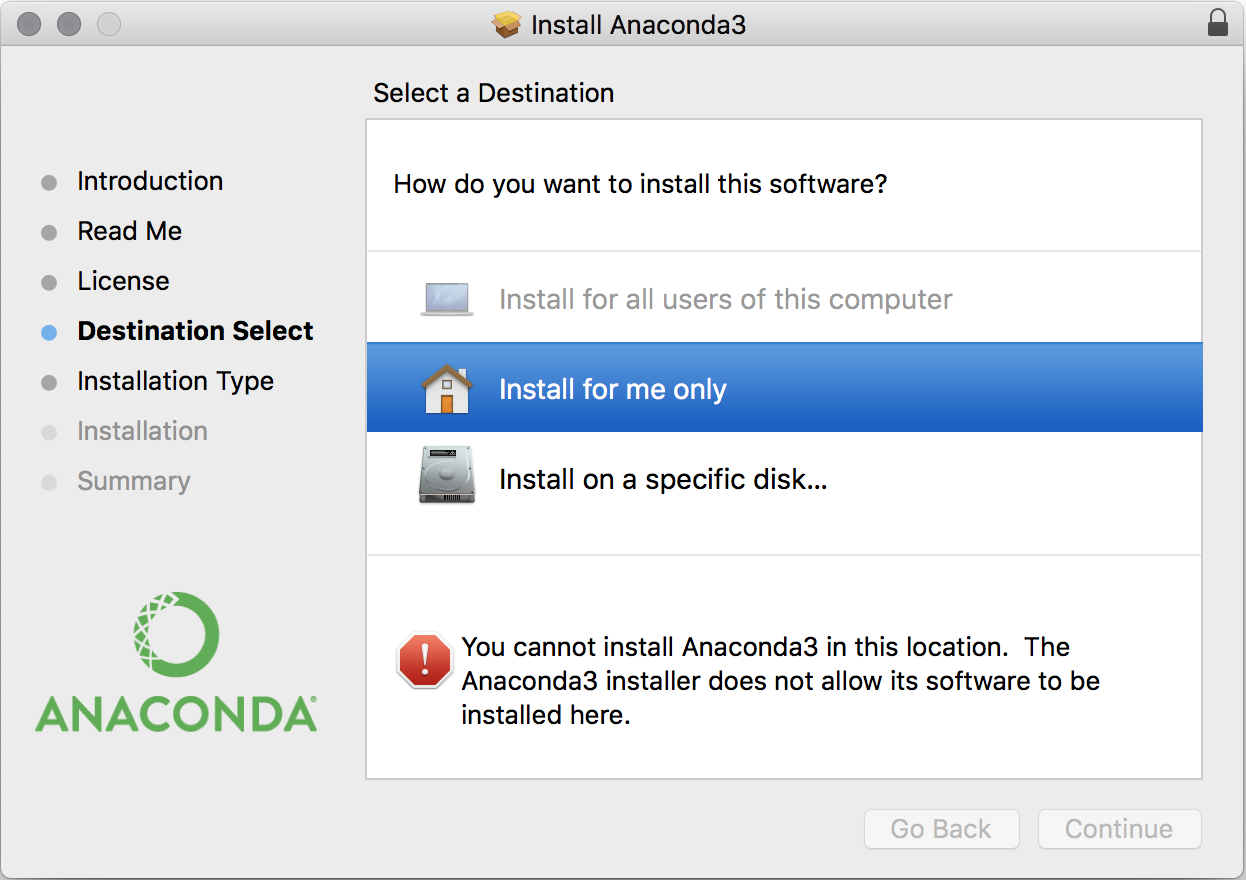
This problem is easy to solve. If you just click on the house, it will now look like this.
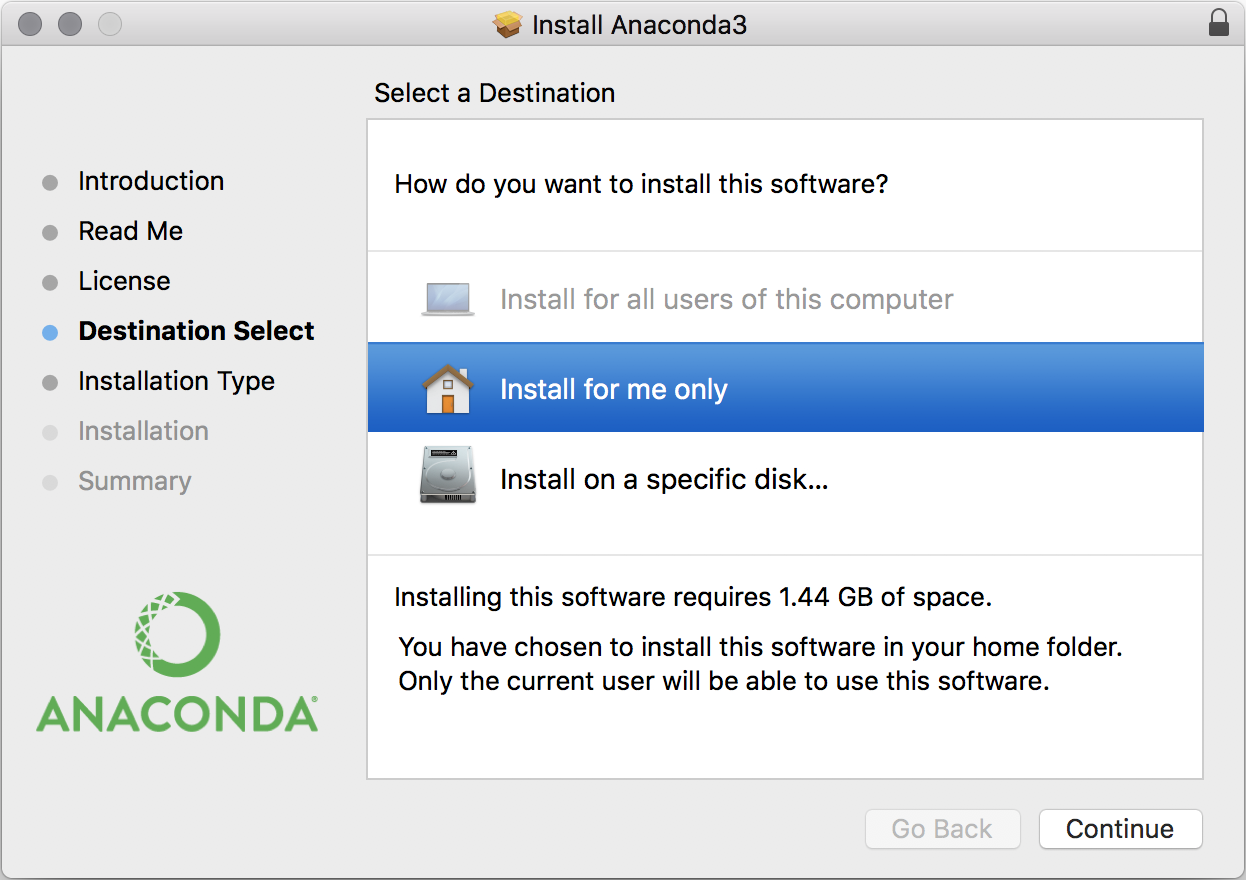
It is okay for you to install Anaconda this way. However, we would prefer that you install it for all users instead. Select the hard drive icon below the house. When you are done, it should look like this.
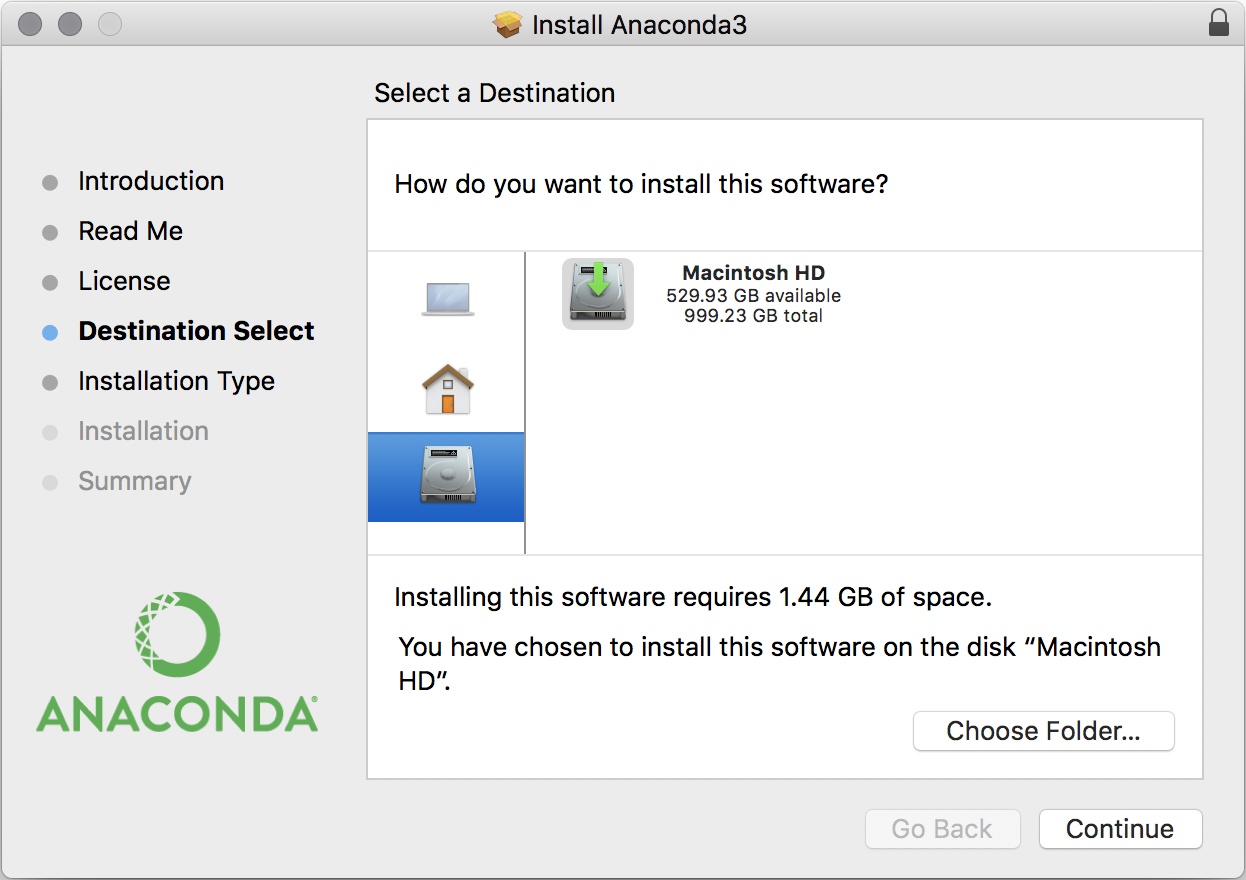
Select the button Choose Folder to the right. This will tell it where to put Anaconda. We recommend that you put it in the Applications folder.
When you download this file, you will get a web page asking you to fill in some information. Ignore this web page. You do not need to fill in the information; your download has started already.
Installing the Cornell Extensions |
Mac OS X 64-bit Extensions |
The last step is to install the Cornell Extensions for CS 1110. Download this file from the link above. After downloading the file, double click on it to unzip the contents into a folder somewhere on your computer.
Once again, you see will a package installer. Double click thid installer. You may see a warning telling you that this is not an official installer (because we made it). If that happens, you will need to control-click the installer and select Open from the drop-down menu.
If the installer launches properly, you will see the following window.
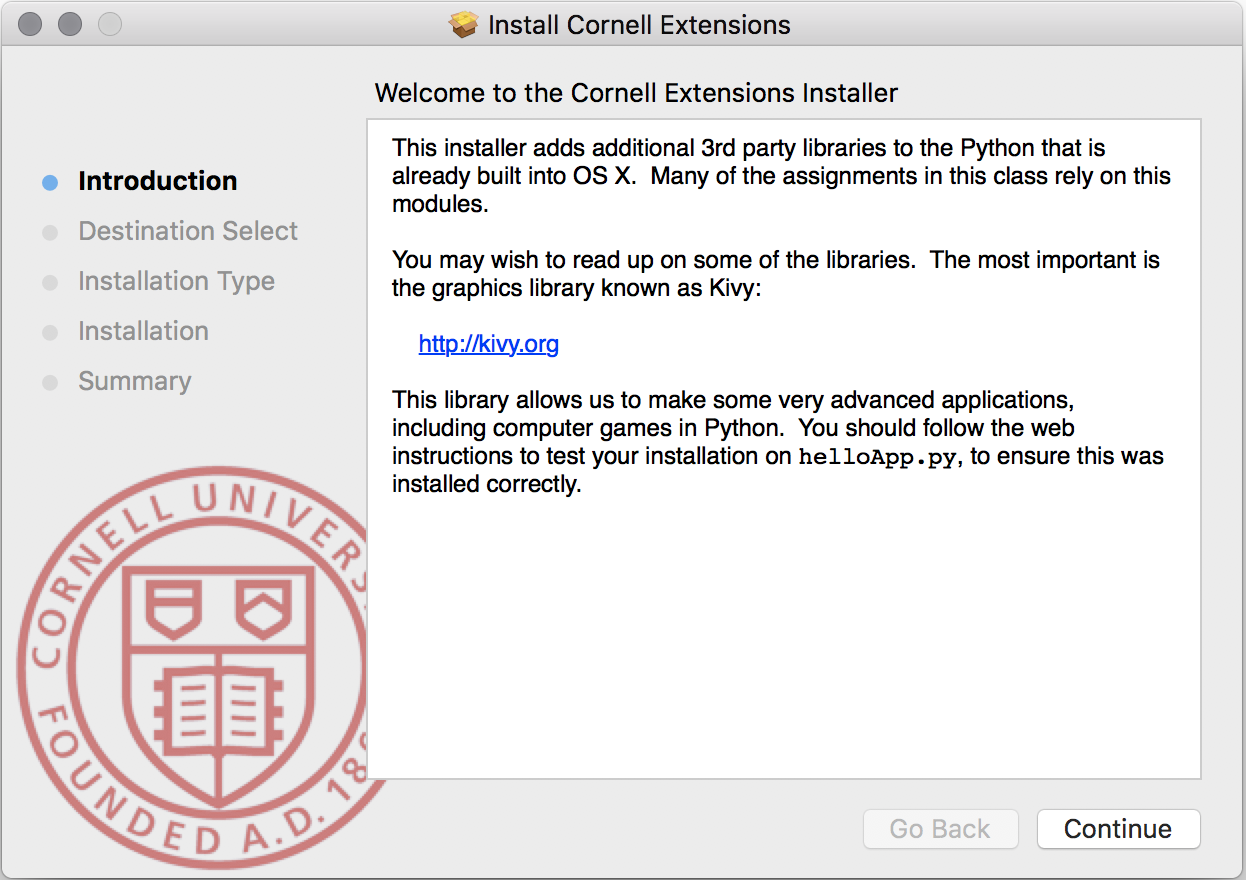
Follow the directions for the installer. Your installation is now complete. Once this is done, you are now are ready to test your installation.
Installing on Linux
Linux installation is possible, but it is not as straight-forward as the two main OS options. In particular, to install on Linux, you have to be comfortable with command shell and be ready to install files with a package installer. If this sounds daunting to you, you might want to rethink about whether you want to use Linux just yet.
For this class, we need to use Python version 3.6. This is the most recent version of Python for Anaconda. We highly prefer that you use Anaconda because otherwise you will need to install a lot of extra packages. However, some flavors of Linux (e.g Ubuntu really want you to use their version of Python). If you cannot use Anaconda, look at the instructions for using an alternate version of python.
In the past, we have had install parties for Linux users. We have worked to make the instructions more self-sufficient this year. However, if there is still demand for a Linux install party, post your request on Piazza.
Installing Anaconda for Python3.6 |
Linux 32-bit Anaconda 3.6 |
Linux 64-bit Anaconda 3.6 |
Use one of the two links above to install the correct version for your operating system. We highly doubt that you need the 32-bit version, but you should use this one if you are unsure. The 32-bit version is guaranteed to work on all systems.
This is not graphical installer. To install it, you must navigate to the folder with the downloaded file and run it with bash. For example, if you downloaded the 64-bit version, you would type
bash Anaconda3-5.2.0-Linux-x86_64.sh
You must use the "bash" command even if you are not using the bash shell.
You may install Anaconda where ever you wish. By default, it installs in your home directory. However, we prefer to install it in /usr/local. The choice is up to you.
Installing the Cornell Extensions
Because Linux platforms are so different, there is no one-click installer for Linux. In particular, we would need to know whether you are using apt-get (Debian, Ubuntu) or yum to install software. So we will let you do this on your own. There are two important steps.
Installing Kivy
Kivy is the graphics library that we will be using for several of the assignments in this class. In the past, students have had to compile this library from source code. However, Kivy now has installers for several flavors on Linux. Look at the downloads page for more information.
For Ubuntu, you will notice that the instructions suggest using apt-get. This only works for installing Kivy into the the official Ubuntu Python 3. This version of Python is old and missing a lot of packages. Therefore, we suggest that you install using PIP. The exact sequence for installing on Linux is as follows:
    > sudo pip install --upgrade pip setuptools
    > pip install Cython==0.28.3
    > pip install kivy
If this does not work, and you are using Anaconda, you may want to use the conda command instead. Kivy is an optional Anaconda package using Conda Forge. Simply use the command
> conda install -c conda-forge kivy
Installing introcs
If you got Kivy working, then you are almost done. The last step is the easiest. You need to install the introcs package using PIP. The command is
> pip install introcs
Once this is installed, you are are ready to test your installation.
Using An Alternate Version of Python
If anything goes really wrong, you may just want to use the built-in Python 3 provided by your version of Linux. It is not ideal (most are still using 3.5), but it will get you through the course. However, if you go your own way, there are several packages that you must install (using PIP). All of these packages are in addition to Kivy and introcs.
Getting Started with Python
Now that you have installed Python, it is a good idea to test it out. While you do not need to know anything about Python yet, you do need to learn how to run Python programs that are already made for you.
The Command Shell
The first thing that you need to do is to familiarize yourself with command shell for your OS. The command shell is a text-based version of the Windows Explorer or Finder; you can use it to move and rename files and folders. It is also how we will run Python in this class.
Using the command shell requires a bit of practice, so we have created a separate page of instructions for this. Right now, all you need to know is how to start up the command shell; you do not need to know any special commands. Start the command shell for your OS and type
python
This will put you in the "Python Interactive Shell".
The Python Interactive Shell looks exactly like the command shell except that it takes Python commands (and does not respond to operating system commands to list files or change the working directory). While the command shells are different for all operating systems, the Python Interactive Shell should look and behave exactly the same way for everyone. On Windows, it will look something like this.
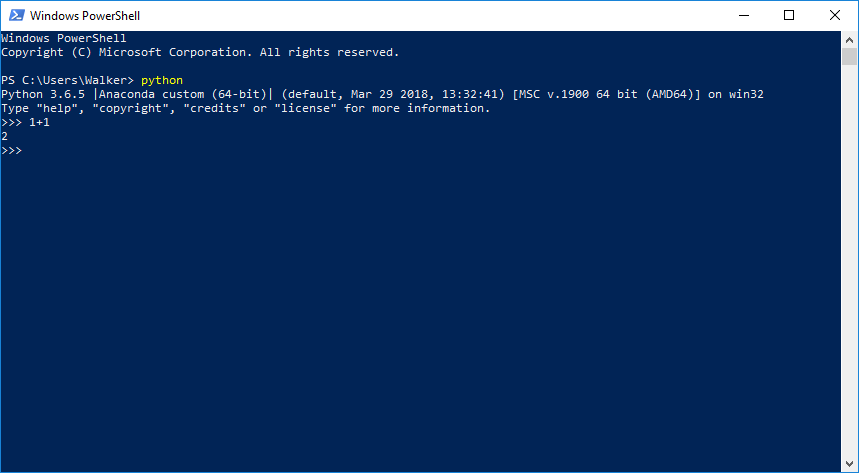
The > > > symbols are the prompt. To get the shell to do something, just type a Python command. For example, type
>>> 1+1
and hit Return (do not type the > > >; it is already there). See what happens?
To exit the Python Interactive Shell, type quit() and hit Return.
You can also exit by typing Control-D.
Testing a Module
It is possible to run Python modules from the command shell as well. A module
is a file (ending in suffix .py) containing Python code. We will
use them throughout the course. To run a module, you type
python <filename>
from the command shell. Do not try to type this in the Python Interactive Shell. This can be a bit confusing at first; it is important to keep the following straight:
- The command shell is a program for accessing files via text based commands. You start Python in this program, but it is not Python.
- The Python Interactive Shell is a program that runs inside the command shell. You can tell it is running by the presence of the >>> prompt.
Running a module does not start the Python Interactive Shell. It runs all of the commands in the file, and then quits immediately when done with the file.
To test that your installation is working properly, we have a cute Python module that displays a GUI with the phrase "Hello World!" inside it, as shown below.

To try out this module, download the file the file helloApp.py and put it in some easy to find folder. Open up a command shell and navigate to this folder using the drag-and-drop trick for changing directories. Then type the command
python helloApp.py
If you get the window shown above, congratulations! You have successfully installed all the Python libraries needed for this class.
If the Window does not show, look very carefully at the error messages. If it says
it cannot find the file helloApp.py, then you did not use the drag-and-drop
trick correctly. We recommend that you practice with the command
shell tutorial some more. Otherwise, there is a problem with your installation of
Python. Post your error message to
Piazza and
we will try to help you out.
Installing Atom |
All Platforms Atom Editor |
The last program to install is Atom Editor. Unlike Python, you will not use this program right away. In fact, we will not start to use it until the third week of class. The purpose of Atom is to make these mysterious modules that you tested in the previous step.
Technically, you can write Python modules in any text editor (e.g. a Word processor that only produces text and does not have fonts or fancy formatting). NotePad and WordPad are text editors in Windows, while TextEdit is provided by OS X. The reason we use Atom is that it is the same across all platforms. That allows you to collaborate with partners who might be working on other operating systems. Some people prefer Sublime Text, but that program is not free.
To install Atom, click the button above to take you to the Atom website. You should see a yellow "Download" button, which has your computer system's OS information above it. Click on that button.
If you are using a Windows computer, the downloaded file will be an .exe file. Double click it and Atom should install automatically. For Linux computers, install the .deb file and then double click on it. You should then be able to install it using your package manager.
If you are using a Mac computer, the downloaded file should be a .zip. Double click on that .zip file, and then drag the resulting Atom.app to your applications folder. The first time you attempt to open it, it may warn that it is an unverified application from the internet. Ignore this and click open on the window that pops up.
Configuring Preferences
One of the most controversial aspects of Python is that it treats spaces and tabs very differently. If you accidentally put a tab in your program, it will cause your program will crash. And you will have a hard time finding it because both tabs and spaces look exactly the same.
Most of the time, this is not a problem. However, we must first configure Atom so that indentation is consistent across all of our files. First, open Atom. Then, open the Settings menu option; in Windows, it is under the File category, and in Mac, it is under Atom (and is named Preferences). Then, in the settings window that opens, select the Editor category, and scroll down. First, check the boxes "Show Indent Guide" and "Show Invisibles" so that your settings match this image:

Click for Bigger Image
This will allow you to see both tabs and spaces, and to tell the difference between both. Spaces will look like light dots which are centered vertically on each line. Tabs will look like two '>' characters next to each other. These are illustrated in the examples below.
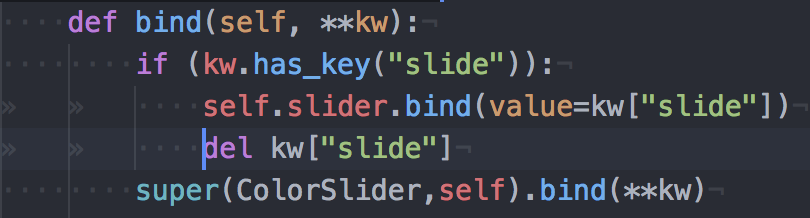 |
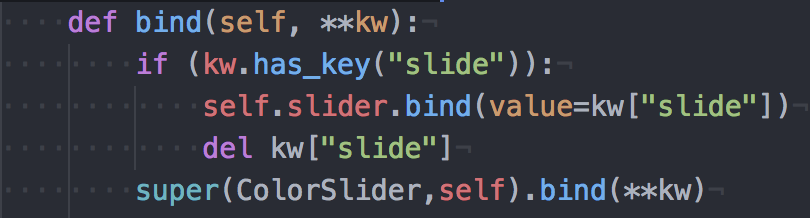 |
|
| Atom with Tabs (Bad) | Spaces Only (Good) |
Continue scrolling down. Change the value in "Tab Length" to 4, and click on the value in "Tab Type". This should open a drop-down menu. Select "soft". This will make Atom automatically replace all Tabs you input with 4 spaces. After configuring, these two settings should look like this:

Click for Bigger Image