T-Th 9:05
or
T-Th 11:15
in Olin 155
CS 1110: Introduction to Computing Using Python
Fall 2012
About: Announcements
Staff
Consultants
Times & Places
Calendar
Materials:
Texts
Python
Command Shell
Terminology
Handouts:
Lectures
Assignments
Labs
Assessment:
Grading
Exams
Resources:
CMS
Piazza (link)
Piazza (about)
AEWs
FAQ
Python API
Style Guide
Academic Integrity
Python in CS 1110
Python comes in several shapes and sizes. To make sure that everything works properly, we require that every single person in the course use the same version of Python. You are free to either work in the ACCEL labs or to use your laptop; but whatever the case, your version of Python must be the same as what we are using in the labs. Hence, even if you already have Python installed on your computer, we ask that you install a new version (see instructions below) so you can be consistent with everyone else.
As you will see, these instructions are a bit long. Installing Python is often much more complicated than simply using it. As many people in this class have not programmed before, we have tried to make installation as simple as possible via step-by-step, "do this, do that" instructions. This is not what the rest of the course is like. You are not expected to understand what many of these steps are doing. Furthermore, these instructions are lengthy mainly because we are trying to support as many operating systems as possible. In practice, you should be able to finish the installation in 15-20 minutes.
If you have problems, and if you have a laptop, the best thing to do is to bring it in to someone to look at. Any of the course staff or consultants can help you with this. If you cannot bring in your computer, we have provided you with some instructions below. If you are having difficulty with these instructions, please email TA Ilias Bilionis <ib227@cornell.edu>.
Table of Contents
Installing Python
While installing the base Python package is usually straight-forward, getting add-ons for Python can be a bit tricky. For that reason, we have tried to simplify this process as a two-step install. First you need to install Python. We have decided to standardize on the ActiveState Community Edition of Python. This is a free version of Python that is fairly complete and has a lot of nice features. You will notice that their webpage is trying to upsell you to a paid version of Python. Ignore that.
Once you have the base Python install, you need to install the "Cornell Extensions". These are 3rd party extensions packaged by us (but not made by us) to fit into the ActiveState version of Python. These extra packages include things like graphics capabilities to make games and flashy applications.
Before you install these, be sure to completely read the instructions for your operating system. While you are unlikely to make any mistakes, it is best for you to do things in exactly the order we tell you to. As we said, you do not need to understand what is going on here.
Installing on Windows
The version of Python that we are using for this class is only compatible with Vista and Windows 7. If you are still using Windows XP (and some people still are), you will not be able to use this version of Python. In that case you will either need to upgrade your OS or work in the ACCEL lab.
This installation is going to put Python in the directory C:\Python27.
If you already have a folder of that name (which might be the case if you used Python
before taking this class), you have two options: move it or delete it. You have to
use our version of Python and that is where it wants to go.
Install ActiveState Python
Go to the ActiveState web page and download the free 32 bit Community Edition of Python 2.7.2. This should be the first big blue button on the right. Do not download the 64 bit version, even if you are using a 64 bit version of Windows. Some of our extensions do not play well with 64 bit Python. In addition, make sure you have Python 2.7.2 and not Python 3.2.2. Python 3 is "bleeding-edge" software and too new to safely use in this course (particularly because it is not backwards compatible with Python 2.7).
When you download this file, you will get a web page asking you to fill in some information. Ignore this web page. You do not need to fill in the information; your download has started already.
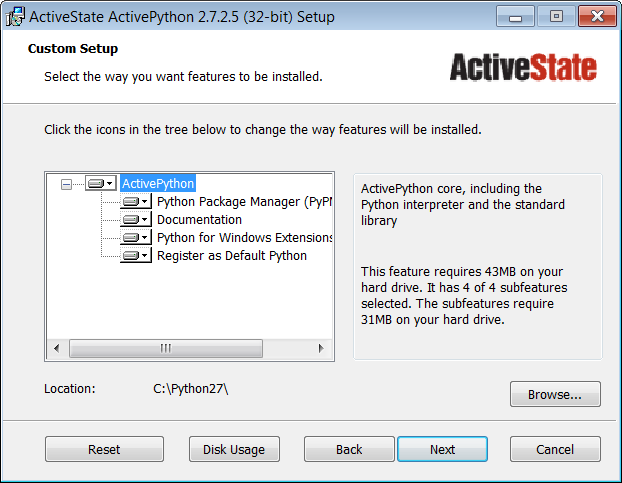
The file that you download is a MSI installer. Simply double click on it and follow
directions. At one point in the installer, it will ask you what directory you want
to install in. By default, it will install in C:\Python27; leave this
alone and click Next.
Install the Cornell Extensions
Download the file CornellExtensionsWindows.zip. Unzip the file into a folder somewhere on your computer. If you look inside of the folder, you should see the following two items:
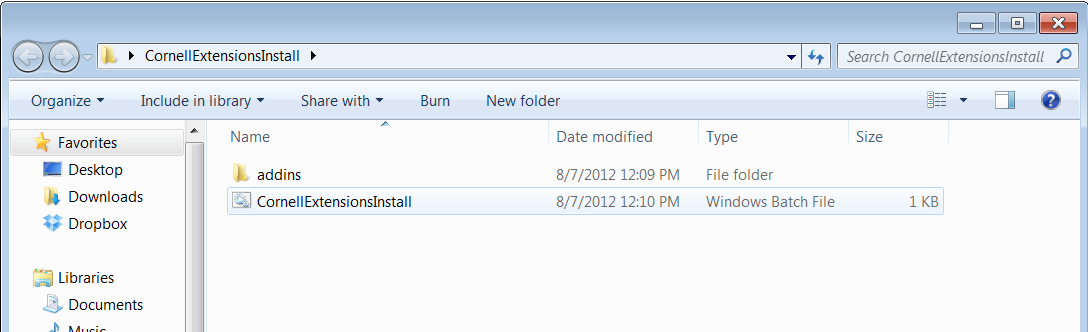
This will pop up a window with a lot of scrolling text in it. When that window closes, Python is successfully installed.
Installing on Macintosh
The version of Python that we are using for this class is only compatible with Snow Leopard (10.6), Lion (10.7), and Mountain Lion (10.8). If you are still using an older version of OS X (such as Leopard), you will not be able to use this version of Python. In that case you will either need to upgrade your OS or work in the ACCEL lab.
Installation for the Macintosh actually requires three steps instead of just two. That is because OS X ships with Python by default. We do not want to use the Apple version of Python, but we do not want to delete it either (deleting System software is always a bad idea). So we need to change some settings to make sure that you will always use the new version of Python instead of accidentally using the Apple Python.
Before you do anything at all, however, we recommend that you quickly familiarize yourself with the Terminal program. You do not need to master the commands yet. Just learn where the program is in your Applications folder (and put it in your Dock), and how to start it.
Install ActiveState Python
Go to the ActiveState web page and download the free Community Edition of Python 2.7.2. This should be the big blue button on the right. Make sure you have Python 2.7.2 and not Python 3.2.2. Python 3 is "bleeding-edge" software and too new to safely use in this course (particularly because it is not backwards compatible with Python 2.7).
When you download this file, you will get a web page asking you to fill in some information. Ignore this web page. You do not need to fill in the information; your download has started already.
The file that you download is a DMG. Double click on it and it will turn into a virtual disk drive containing a package installer. Double click on the package installer and follow directions.
Install the Cornell Extensions
Download the file CornellExtensionsMacintosh.zip. Unzip the file into a folder somewhere on your computer. Like the ActiveState Python, this is a package installer. Double click on it and follow the directions.
Updating your Application Path
The application path is how the Terminal finds the correct version of Python to use. Launch the Terminal and enter the command
which pythonThis command is asking the Terminal "which version of Python are you using?" If you get either the message
/Library/Frameworks/Python.framework/Versions/2.7/bin/pythonor the message
/usr/local/bin/pythonthat is good (the exact one you see appears to depend on the version of OS X that you are using). You are done, and you can skip this step. Python is completely installed.
However, it is much more likely that you will get the answer
/usr/bin/pythonThat is the Apple verison of Python. We need to change that. Download the file bash-install.sh and put it in your home directory. That is the directory you see when you open the Finder, the one that contains both Desktop and Downloads.
Once you have done that, start the Terminal again. Type
bash bash-install.shOne of two things will happen. In the best case you will get the message
    No .bashrc found.  Installing...
    Installation completed
However, it is possible that you will get the message
    Searching for .bashrc...
    You already have a .bashrc.  Should I modify it (y/n)?
If that happens, answer "y" and the installation will continue.
Whichever one is the case, quit the Terminal program and relaunch it for the setting changes to take place. Now type
which pythonYou should get If you get either the message
/Library/Frameworks/Python.framework/Versions/2.7/bin/pythonor the message
/usr/local/bin/pythonIf this still does not work, contact TA Ilias Bilionis <ib227@cornell.edu>
Installing on Linux
At the moment, we do not support an install for Linux. While Active State has a version of Python for Linux, we have not bundled the Cornell extensions to work in Linux. The issue is with Kivy, the graphic application package that we are using. It needs to be recompiled to work with Active State Python.
If there is enough interest, we will look into this possibility. If you want Python on Linux, contact TA Ilias Bilionis <ib227@cornell.edu>.
Installing Komodo Edit
While you can use any text editor to work on Python, we are using Komodo Edit in this class. The primary advantage to this editor is that it is the same across all platforms. That allows you to collaborate with partners who might be working on other operating systems.
To install Komodo Edit, simply download the installer from Active State's website (click on the blue "Download Komodo Edit" button after you follow that link). Do not download Komodo IDE, as that is the paid version. Again, you will be redirected to a website asking for some personal information; ignore that and wait for the download to finish. The file that you download will either be a MSI installer for Windows or a DMG for Macintosh. Double click on it and follow directions.
Configuring Preferences
One of the most controversial aspects of Python is that it treats spaces and tabs very differently. If you accidentally put a tab in your program, it will cause your program will crash. And you will have a hard time finding it because both tabs and spaces look exactly the same.
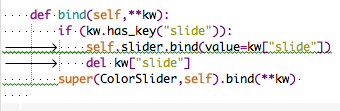
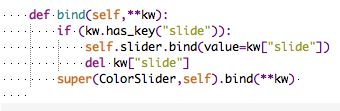
To solve this problem, you need to change your preferences to help you distinguish between the two. Open Komodo Edit and then select the Preferences menu option (under Edit on Windows; under Komodo on Macintosh). Choose the Editor category and check the box Show whitespace characters, as shown below.

This will allow you to see both tabs and spaces, and to tell the difference between both. Spaces will look like light dots which are centered vertically on each line. Tabs will look like black arrows. These are illustrated in the examples below.
 |
 |
|
| Python with Tabs (Bad) | Spaces Only (Good) |
Adding a "Run" Button (Updated 9/4/12)
Note: We have discovered how to add a "run-button" that will save your module before running it, thus making things a lot less confusing. If you installed the run button before our update (9/4/12), delete it from the tool box and follow these new instructions.

Komodo Edit is an editor, not a programming IDE. That means it can be used to write Python programs, but it will not run them. However, it is possible to modify Komodo so that it can run Python programs; that is the purpose of the current step.
Make sure the Toolbox is visible. This should be a panel to the right hand side with three or more options (the first is a folder that says "Samples (7.1.x)"). If it is not visible, choose the menu option
View > Tabs & Sidebars > Toolbox
Now select the menu in Toolbox that looks like a gear. Choose the option "New Macro", which should be the first in the list of options starting with New.
You will get a box pop up that defines the macro. Change the name "New Macro" to the command "Run Python Module". It is also a good idea to change the icon. We personally like to use an arrow. If you click on "Change Icon", you will get a lot of options to chose from. Our icon is called the "redo" icon in the provided icon set.
Above the textbox, select the Javascript button. Then cut and paste the following directly into the box below it:
if (komodo.view) { komodo.view.setFocus() };
komodo.doCommand('cmd_save');
ko.run.output.kill(-1);
setTimeout(function(){
   ko.run.runEncodedCommand(window, '%(python) \"%F\" {\'cwd\': u\'%D\'}');
}, 100);
When done, the window should look as follows.

Do not press OK yet, but do click the Apply button if you see one; if there is an Apply button and you do not select it, the text in the box will be lost and you will have to do this over again.
Before you click OK, move to the Key Binding tab. This is where you set the "hot key" for your command. Put your cursor in the "New Key Sequence" field. What you do next depends on your operating system.
- On Windows, hold down the control and shift key and type "R".
- On a Macintosh, hold down the command and shift key and type "R".
When you do this, It will fill in the field with a bunch of words describing the key stroke sequence you typed. If you are on a Macintosh, it will look like this.

When done, press either "Change" or, if "Change" is greyed out, "Add". Now you can finally press "OK".
This will add a new item to your Toolbox. You can now run Python from Komodo. To try it out, download the Python module hello.py; it does not matter where you put it. Load this file into Komodo and make sure it is the active tab.

This Python module has a print statement. To see the result of the print statement, we need the Command Output sidebar active. If it is not visible, choose the menu option
View > Tabs & Sidebars > Command Output
To run this script, double-click the "Run Python Module" button in the toolbar. Alternatively, you can type the key command, control+shift+R or command+shift+R, depending on which operating system you are running. Once you do this, you should get the message "Hello World" in the Command Output window.
We will show off this feature in more detail much later in class.
Using Python
You should now be ready to go. We will spend the first lab section showing you how to use Python. However, if you want to get started right away, here is what you need to know.
First of all, you need to familiarize yourself with the appropriate command shell for your operating system. Even though we just added a Run button to Komodo, we will just be working with the command shell for the first week or so of the course. Once you know how to work the command shell; simply type
pythonThis will put you in the "Python Interactive Shell".
The Python Interactive Shell looks exactly like the command shell except that it takes Python commands (and does not respond to operating system commands to list files or change the working directory). While the command shells are different for all operating systems, the Python Interactive Shell should look and behave the same way for everyone. One Windows, it will look something like this.
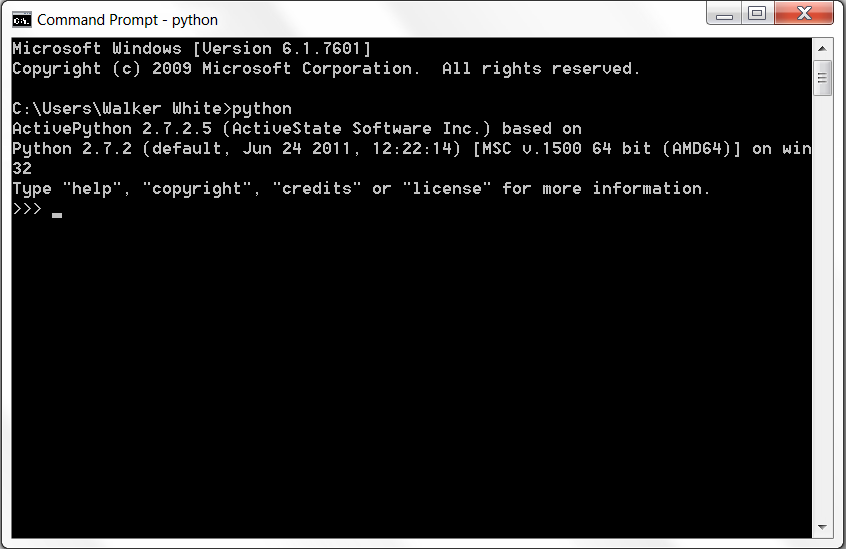
The > > > symbols are the prompt. To get the shell to do something,
just type a Python command (which could be a mathematical expression like
"1+1") and hit Return. To exit the Python Interactive Shell, type
quit() and hit Return.
It is possible to run Python modules from the command shell as well. Download the file hello.py and put it in your home directory (see the command shell tutorial). Start a command shell and type
python hello.pySee what happens?
This is all that you need to know for now. You will get a lot of practice with this in the labs and assignments to come.